Written by Steve Patterson. In this Photoshop tutorial, were going to look at how to tint and enhance colors in a photo using Photoshops Photo Filter. If Photoshops Photo Filter isnt one of the most widely used features in the program, it certainly deserves to be. Not only is it easy to use, its the only feature in Photoshop that lets you choose colors simply by selecting color names from a list! It also has several valuable uses, one of which weve already looked at in a previous tutorial Neutralizing Color Casts With The Photo Filter and this time, were going to learn how to use it to tint and enhance colors in an image.
At its most basic level, the Photo Filter can be used to warm up or cool down the overall colors in a photo, but since were going to be using the adjustment layer version which comes with a built-in layer mask, we can combine multiple Photo Filters to tint and enhance specific areas of an image individually, which is what well be doing in this tutorial.
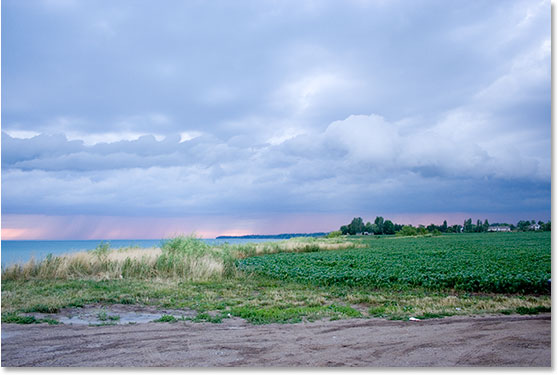
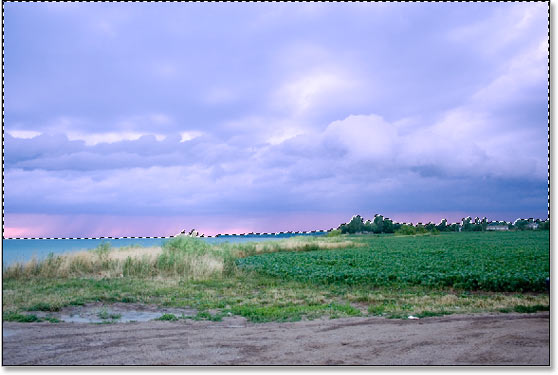
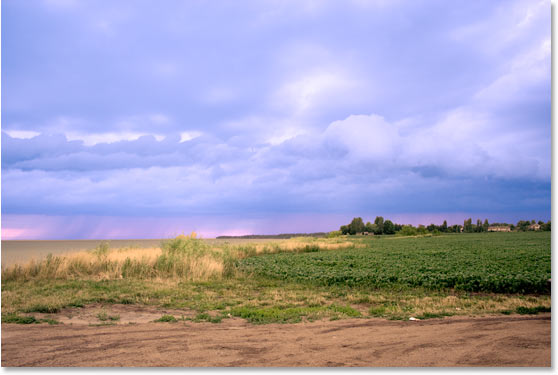
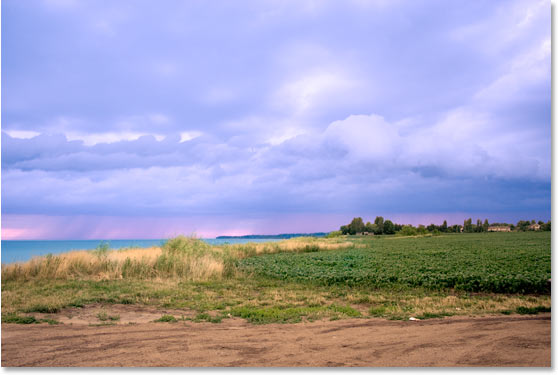
Heres the image Ill be working with. I took this photo during sunset on a recent trip to the lake, and the colors that evening were spectacular. The sky was full of pinks and purples and the ground was almost glowing in a warm orange. Unfortunately, my digital camera didnt quite capture things the way I saw them, and the colors in the photo ended up looking a little dull:
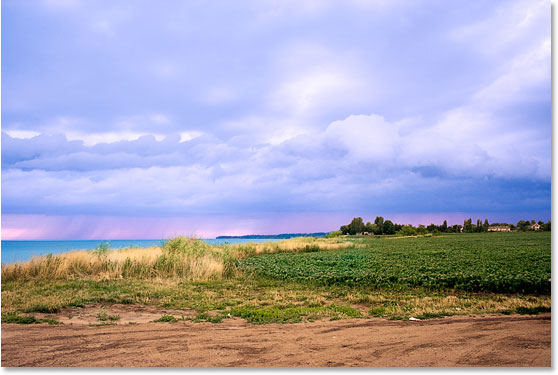
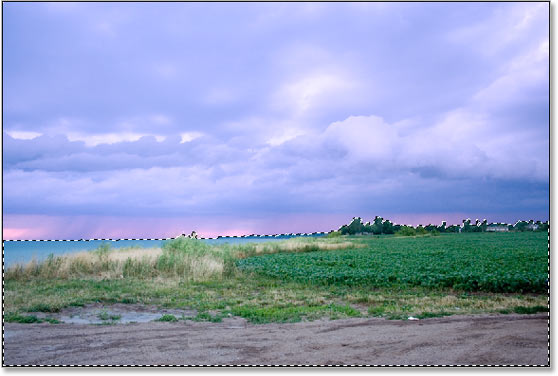
Thanks to Photoshops Photo Filter though, I can easily bring back the colors the way I remember them, and even take them further if I want:
The colors look much brighter and more vivid now, which makes the image itself more visually appealing, and it was all done with just a couple of simple Photo Filter adjustment layers. Lets get started!
Step 1: Select The First Area You Want To Work On
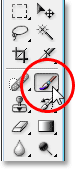
As I mentioned, Im going to be using a couple of Photo Filter adjustment layers to enhance the colors in specific areas of the image separately, and the first area I want to work on is the sky, so before I add my first Photo Filter, I need to select the sky. You can use whichever selection tool youre most comfortable with (Lasso Tool, Pen Too, etc.). Im going to use the Lasso Tool for this, so Ill select it from the Tools palette:
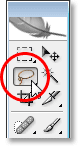
Selecting the Lasso Tool from Photoshops Tools palette.
I could also press L on my keyboard to access it with the shortcut. Then with my Lasso Tool selected, Im going to draw a selection around the sky:
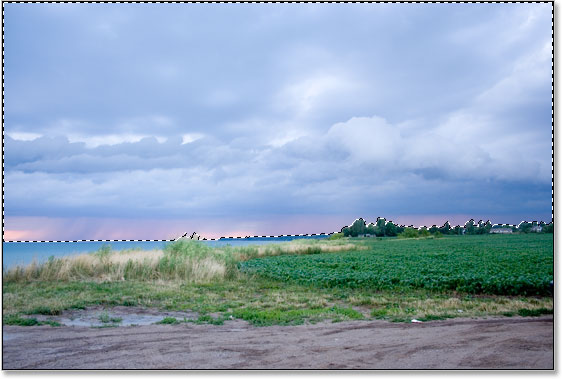
Using the Lasso Tool to draw a selection around the sky, which is the first part of the image I want to work on.
You can see the selection outline in the image above.
Step 2: Add A Photo Filter Adjustment Layer
Now that I have my sky selected, I can add my first Photo Filter. To do that, Ill click on the New Adjustment Layer icon at the bottom of the Layers palette:
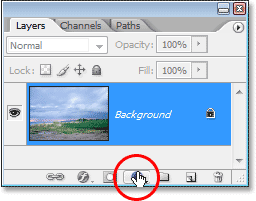
Click on the New Adjustment Layer icon at the bottom of the Layers palette.
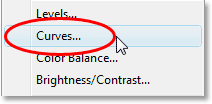
Then Ill select Photo Filter from the list of adjustment layers:
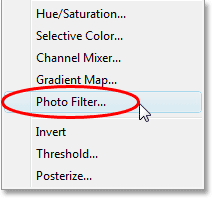
Select Photo Filter from the list.
This brings up Photoshops Photo Filter dialog box, and since we selected part of the image before adding the Photo Filter, only the area we selected will be affected by it.
Step 3: Choose The Color You Want To Tint The Selected Area With
The Photo Filter is based on the idea of photographers adding colored filters to the camera lens to tint the photo, and we can achieve the exact same effect in Photoshop but with a lot more flexibility, since we can change the filter color to anything we want.
The Photo Filter gives us two ways to choose a color. At the top of its dialog box are two options, Filter and Color. They both do exactly the same thing, which is allow us to choose a color to tint our image with. The only difference between them is that the Filter option allows us to select from a list of preset colors, including some that are based on common warming and cooling lens filters (they have the words Warming and Cooling in the color names), while the Color option simply brings up Photoshops Color Picker and allows us to choose exactly which color we want. Im going to stick with the preset colors since theyll work just fine for my image here, and I remember from when I took this photo that the sky had a lot more pink and purple in it than what the image is currently showing. Unfortunately, the Photo Filter doesnt have a preset pink or purple color for me to select, but it does have magenta which will work nicely, so Im going to click on the down-pointing arrow for the "Filter" option and select Magenta from the list (of course, you can choose whichever color you like for your image):
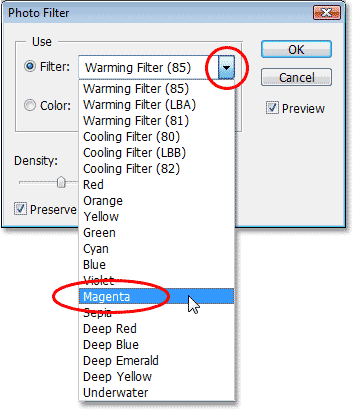
Select the color you want to tint your image with from the Filter preset list of colors, or choose a color from the Color Picker by clicking on the Color color swatch.
Now that I have my color selected, I want to increase the intensity of the color a little, and I can do that with the Density option. Dragging the Density slider to the right adds more of the color to the image for a stronger amount of tinting, while dragging it to the left reduces the amount of color for a more subtle tinting effect. You can see a preview of whats happening in your image as you drag the slider. Im going to increase the intensity of my color a little by dragging the Density slider to around 30%:
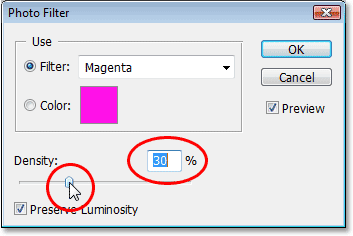
Increase or decrease the amount of color added to the image by dragging the Density slider to the right or left.
Make sure the Preserve Luminosity option in the bottom left corner is checked so youre not darkening the image. When youre happy with the tinting youve applied, click OK in the top right corner of the dialog box to exit out of it. Heres my image after tinting my sky with magenta. Notice that only the sky is tinted. Everything below it remains untouched:

The sky now appears much more pink and purple after tinting it with magenta.
Now the sky looks a lot more colorful. I may have taken things a bit further than what it actually looked like that evening, but I like the overall effect and theres no law in Photoshop that says you always have to strive for realism. The ground definitely looks less colorful than I remember it though, but I dont want it to be pink or purple. It needs to be warmed up with some orange, which means were going to need a second Photo Filter set to a different color.
Since I want only the ground to be affected by my second Photo Filter, Im going to have to select it, but since Ive already selected the sky, selecting the ground is going to be easy, as well see next.
Im done with enhancing the colors in the sky and now I want to do the same thing with the ground but using a different color, so for that, Ill use a second Photo Filter adjustment layer.
Just as I did with the sky though, before I go adding the new adjustment layer, I need to first select the ground. Since Ive already selected the top portion of the image (the sky) and now I want to select everything below it, all I need to do is load my original sky selection and then invert it. To do that, Im going to hold down my Ctrl (Win) / Command (Mac) key on my keyboard and click on the Photo Filters layer mask thumbnail in the Layers palette:
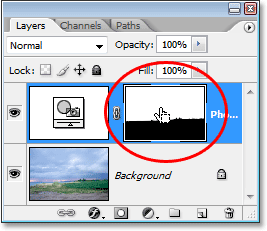
Ctrl-click (Win) / Command-click (Mac) directly on the layer mask thumbnail in the Layers palette.
If you look closely at the layer mask thumbnail, youll notice that the top portion of it is white while the bottom portion is black. The white area on top is the selection I made around the sky before I added the adjustment layer, and because its white, that means the Photo Filter is affecting that area, which we saw quite obviously in the image. The area on the bottom filled with black means that the adjustment layer is not affecting that area, which is why the ground was not tinted with the magenta color.
By "Ctrl-clicking" (Win) / "Command-clicking" (Mac) directly on the layer masks thumbnail, Ive loaded my original selection back into the image:
The original selection around the sky has been loaded back in to the document.
Currently, the sky is selected, but I want everything below it to be selected instead. All I need to do is invert the selection, and I can do that easily with the keyboard shortcut Shift+Ctrl+I (Win) / Shift+Command+I (Mac). This causes everything that was selected to become deselected, and everything that was not selected previously is now selected. In other words, Ive basically flipped the selection so that now the ground is selected and the sky is not:
The ground is now selected and the sky has become deselected.
The only problem here is that not only have I selected the ground, Ive also selected the small area of water over on the left which I dont want to be affected by either of my Photo Filters. I can easily fix that though after I warm up the colors on the ground so I wont worry about it for now.
Step 5: Add The Second Photo Filter Adjustment Layer
With my selection in place, I can add my second Photo Filter adjustment layer, and Ill do that the same way I did before, by clicking on the New Adjustment Layer icon at the bottom of the Layers palette:
Adding a second Photo Filter by clicking once again on the New Adjustment Layer icon.
Again, Ill select Photo Filter from the list that appears:
Selecting Photo Filter from the list.
Photoshop adds my second Photo Filter adjustment layer above the first one in the Layers palette and pops up the Photo Filter dialog box just as before.
Step 6: Select The Color You Want To Use
I want the ground in the photo to appear a lot warmer, which means Ill want to add a warm color like orange to it. Fortunately, warming and cooling images is exactly what Photoshops Photo Filter was originally designed for, and rather than choosing Orange from a list of colors or from the Color Picker, I can simply use the default filter, which is Warming Filter (85):
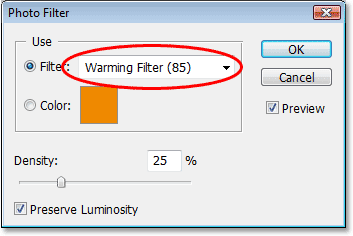
Using the Photo Filters default Warming Filter (85).
Theres two other warming filters included Warming Filter (LBA) and Warming Filter (81) but after experimenting with all three, the first one seems to give me the best results with this image. The "Density" value, which as we saw a moment ago determines how much of the color is mixed in with the image, is set to 25% by default and thats not nearly enough to warm up my image, so Im going to click on its slider and drag it to the right, keeping an eye on my image as I drag so I can see a live preview of what Im doing, and Im going to increase the Density value all the way to around 85% to match the same color intensity as the sky above it:
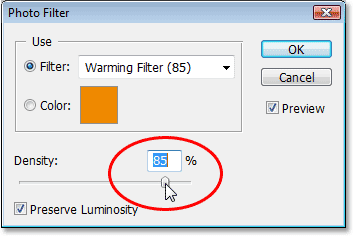
Increasing the warming effect in the image by increasing the Density value.
Im going to click OK to exit out of the dialog box, and heres my image after warming up the ground:
The ground now appears much warmer and the color intensity matches that of the sky above it.
As I mentioned earlier, the only problem now is that Ive warmed up the area of water on the left which I didnt want to do, so Ill fix that next.
To remove the warming color over the water, Im going to simply paint it away using the Brush Tool.
All I need to do is paint with black over any areas where I want to hide the effects of the Photo Filter. Even though it will look like Im painting directly on the image itself, Ill really be painting on the layer mask and anywhere you paint with black on a layer mask hides the layer from view (or in this case, hides the effects of the adjustment). First, I need my Brush Tool, so Ill grab it from the Tools palette:
Selecting the Brush Tool from the Tools palette.
I could also press B to select it with the keyboard shortcut.
I need to paint with black, so I need to set black as my Foreground color, since the Brush paints with whichever color you have set as the Foreground color. Currently the Foreground color is set to white and the Background color is set to black. To swap them, Ill press X on my keyboard and now black is my Foreground color. I can see this in the Foreground and Background color swatches near the bottom of the Tools palette (Foreground is the top left, Background is the bottom right):
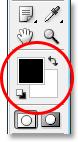
The Foreground and Background color swatches in Photoshops Tools palette.
Now Im ready to paint away the warming color from the water. To change the size of my brush as Im painting, I can use the left and right bracket keys on my keyboard. The left bracket key makes the brush smaller and the right one makes it larger. To make my brush edge harder or softer, I can hold down the Shift key as I press the left and right bracket keys. Shift+left bracket makes the brush edges softer, and Shift+right bracket makes them harder. Im going to paint over the water and as I do, the original blue color returns:
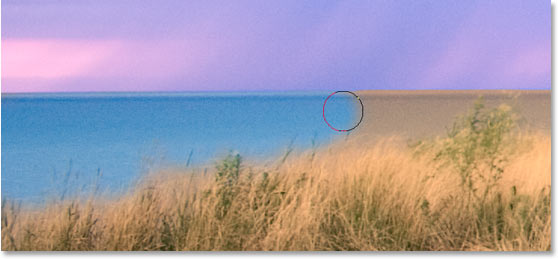
Painting with black over the water to hide the effects of the Photo Filter and bring back the original blue color.
Ill continue painting until Ive brought all of the original water color back into the image, and heres the result:
The water is now back to its original blue color after painting over it with black.
At this point, were done with our tinting and enhancing colors, but theres one more thing Id like to do with this image. The contrast could use a little boost, so as a bonus step, lets quickly increase the contrast in the image using a Curves adjustment layer.
Bonus Step: Boosting The Contrast With A Curves Adjustment Layer
In this little bonus step (which is completely optional of course), Im going to finish off my image by boosting the contrast using a Curves adjustment layer and whats commonly referred to as an S curve, named for no other reason than its a curve in the shape of the letter S (sort of, anyway). Dont worry if you dont understand anything about Curves. All you need to know is how to click and drag with your mouse and youll be able to use this technique to give all your images a nice contrast boost. First, make sure you have the top layer selected in the Layers palette, since we want to add this Curves adjustment layer above all our other layers. Then click on the New Adjustment Layer icon at the bottom of the Layers palette and select Curves from the list:
Click on the New Adjustment Layer icon once again and select Curves from the list.
Photoshop adds the adjustment layer and pops up the Curves dialog box. By default, youll see a large 4×4 grid in the dialog box, and if thats what youre seeing, hold down your Alt (Win) / Option (Mac) key and click anywhere inside the grid, which will change it to a 10×10 grid:
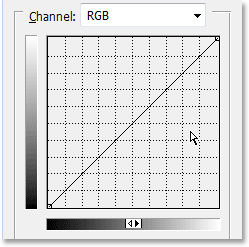
Hold down Alt (Win) / Option (Mac) and click inside the 4×4 default grid to change it to a 10×10 grid.
See that diagonal line running from the bottom left corner to the top right corner? Were going to reshape it into more of an S which is going to boost the contrast in the image. To do that, click your mouse at or near the grid intersection point in the top right corner. Youll see a small black dot appear on the diagonal line where you clicked. Then either drag the dot slightly upward with your mouse or if you prefer, you can nudge it up by pressing the Up arrow key on your keyboard a few times. As you drag or nudge it higher, youll see your image becoming brighter. Dont raise it too high though or youll lose detail in the bright areas of your image. Im going to press my Up arrow key 4 times to nudge it up just slightly:
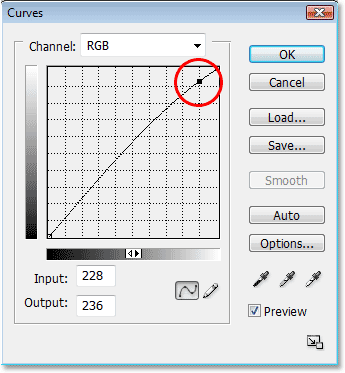
Click on or near the grid intersection point in the top right corner and drag it up slightly with your mouse or nudge it up with the Up arrow key on your keyboard to make the image brighter.
Now lets do the exact opposite in the bottom left corner of the Curves grid. Click your mouse at or near the grid intersection point in the bottom left corner and either drag it down slightly with your mouse or nudge it down using the Down arrow key on your keyboard. However you choose to lower it, try to lower it by the same amount that you raised the point in the top right corner. As you lower the point, youll see the diagonal line taking the form of an S and youll see the dark areas in the image becoming darker. Im going to use my Down arrow key 4 times to lower the point by the same amount I raised the other point:
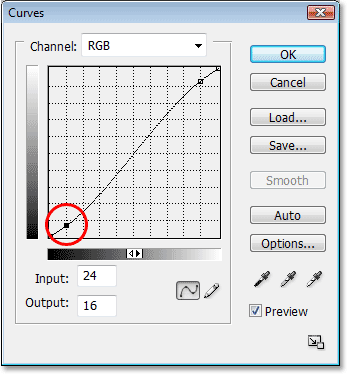
Click on or near the grid intersection point in the bottom left corner and drag it down slightly with your mouse or nudge it down with the Down arrow key on your keyboard to make the dark areas in the image darker.
When youre done, click OK to exit out of the Curves dialog box. Weve now made the bright areas in the image brighter and the dark areas darker thanks to our S curve and boosted the overall contrast in the image. Without knowing anything more about how Curves works, you can now use that same technique to improve the look of all your images!
And with that, were done! Heres my original image once again for comparison:
The original image.
And here, after finishing things off with a slight contrast boost, is the final enhanced color result:
The final result.
And there we have it! Thats how to enhance colors in an image with the Photo Filter adjustment in Photoshop! Check out our Photo Retouching section for more great image retouching and editing tutorials, or see below for tutorials you may be interested in!
Download our tutorials as print-ready PDFs! Learning Photoshop has never been easier!
You May Also Like...
Travelling is my life
ConversionConversion EmoticonEmoticon