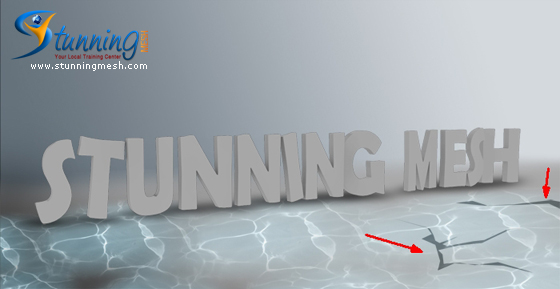
In this Photoshop Tutorial, we will be making a 3D text under water. We will be making water effect also in this tutorial. 3D text to use and some effect will be given on it. Some blending option, filters also to use in this tutorial, so it will be very useful for those who are in Web Design Training, Web design Learning, Graphic Design Training, Graphic Design Learning, 3D Web Design etc.

1. Lets start with a new file in Adobe Photoshop, having the following properties:

2. Create a new layer and fill with Gradient tool ![]() by using #65727c and #d3d8dd (from left to right) colors as:
by using #65727c and #d3d8dd (from left to right) colors as:

3. Create another layer and create selection with Polygonal Lasso tool ![]() and Erase the top edge of the layer by using Eraser tool
and Erase the top edge of the layer by using Eraser tool ![]() and use Paint Bucket tool
and use Paint Bucket tool ![]() to fill the selection with #a8a8a8 color as:
to fill the selection with #a8a8a8 color as:

4. Now after taking new layer paint the following areas with Black color by using Brush tool ![]() :
:

5. Now Im going to use this Water Caustic image:

6. Paste this image on your file, erase the top area by Eraser tool ![]() and change the blending option of the layer from Normal to Screen from layer panel
and change the blending option of the layer from Normal to Screen from layer panel ![]() :
:

7. Now Im going to use the following PNG image which is having Stunningmesh in 3D, (if you want to learn how you can make your text as 3D, then you should also visit our Photoshop tutorial letting you know how you can make your text in 3D by clicking here):

8. Now take new layer behind this text layer, pick Brush Tool ![]() with Dark gray color, make the following shadows:
with Dark gray color, make the following shadows:

9. Now Im going to add some cracks on the surface, take new layer, pick Polygonal Lasso tool ![]() and by using #a8a8a8 color, make the crack as shown below:
and by using #a8a8a8 color, make the crack as shown below:

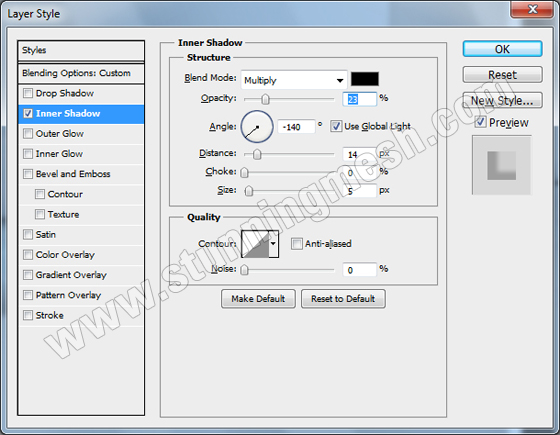
10. Goto Layer >> Layer Style >> Inner Shadow and give the following settings:

11. Now select the text layer and apply the following Layer Styles:


after hitting ok, you will get this result:

11. Create new layer above this text layer, pick Move Tool ![]() and hold Ctrl key and click on the thumbnail of previous Text layer, so it will bring marquee around the text, now pick Brush Tool
and hold Ctrl key and click on the thumbnail of previous Text layer, so it will bring marquee around the text, now pick Brush Tool ![]() and pick #adced9 color, paint the edges of the selection and then change the blending mode from Normal to Lighter Color from layer panel, you should have something like this:
and pick #adced9 color, paint the edges of the selection and then change the blending mode from Normal to Lighter Color from layer panel, you should have something like this:

12. New create another new layer, pick Brush tool ![]() and make the following white spots then change this layer mode from Normal to Screen and add the following Layer Style (with #066022 color):
and make the following white spots then change this layer mode from Normal to Screen and add the following Layer Style (with #066022 color):

So you will get something like this:

13. Now Im going to put the following image to give Aquatic effect:

Change the mode from Normal to Overlay so you should have something like this:

14. Now click on Create a new fill and adjustment layer button ![]() from Layer Panel and select Levels and give the following settings:
from Layer Panel and select Levels and give the following settings:

Now add Color Balance by using the following settings:

So you should have the following final Underwater 3D Text effect in Photoshop, hopefully it will be a valuable assets while you are in Graphic Design learning or Graphic Design Training field, hope you have enjoyed this tutorial:

ConversionConversion EmoticonEmoticon