
This easy step-by step tutorial will teach you how to create a light beam effect on the picture. This tutorial requires a variety of different filters.
Create a new Photoshop document with 500×500 px and fill the background layer black.

Then using Google Pictures find and copy onto the canvas some appropriate picture like mine. Also feel free to use your own pictures. Reduce it a little bit to get the picture like below:
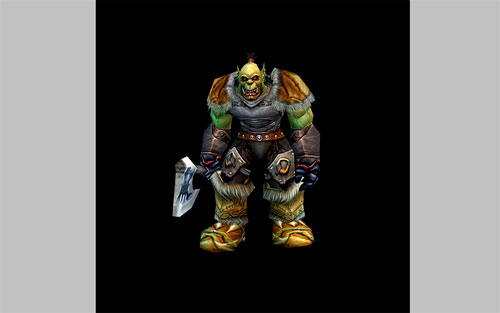
Duplicate this layer with Ctrl+J and apply Filter > Blur > Radial Blur to the original lower layer:
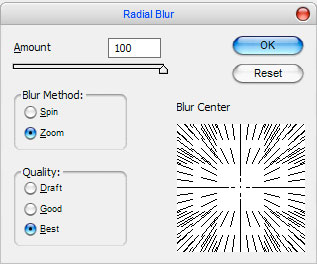
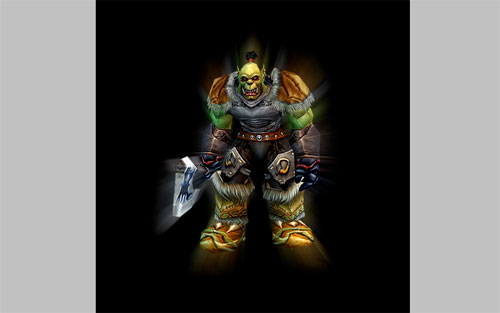
See the result now:
Now, select the Horizontal Type Tool and type your text on the stage use the color of #ebb100:

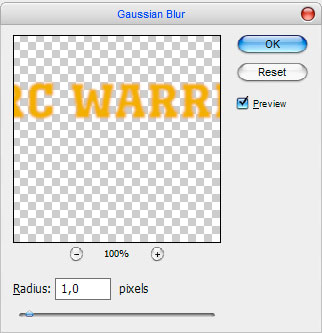
Rasterize this text layer with Layer > Rasterize > Type. After that press Ctrl+J to duplicate layer. Go to the previous layer and apply Filter > Blur> Gaussian Blur. Use the following setting and click ok.
Now we have something like this:

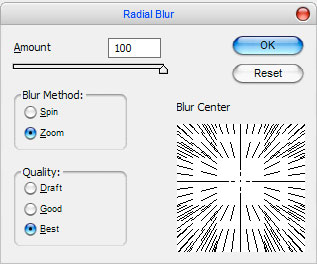
Select Filter > Blur > Radial Blur with next presets:
Now your picture should look as mine:

Press Ctrl+F two more times to apply the same filter twice more.

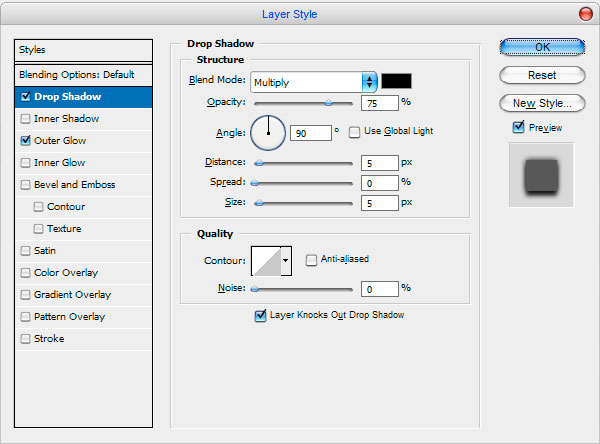
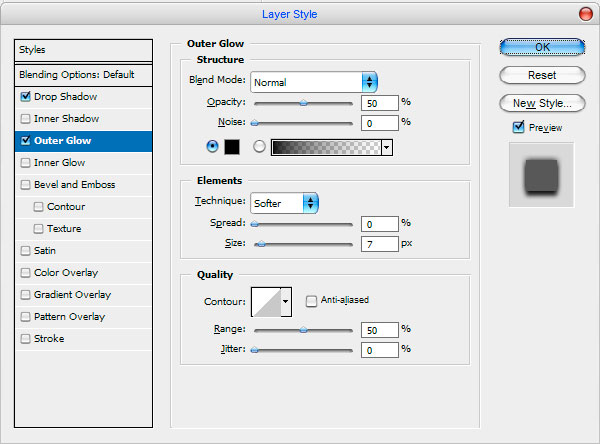
Now, go to the lower layer and apply following layer styles for this layer:
⢠Drop Shadow
⢠Outer Glow
Now you can see the result:

Ok, now time to add glare to the text. Use Select > Load Selection to make text selection, after that create a new layer and move it on the top in the Layers Palette. Then fill the selected area with white to transparent gradient.

Now, use the Rectangular Marquee Tool to make a new selection and press Delete to clear selected area.

Deselect chosen area with Ctrl+D and set opacity up 65%:

I think it will be better to make some shining around the text. Merge all of text layers in one, then create a new one layer under the text layer. Use the Elliptical Marquee Tool to create selection on it and fill it with black color.

Remove the selection with Ctrl+D, after that apply Filter > Blur > Gaussian Blur with similar settings to these:

We received picture like so:

Well, weâre done for this tutorial! Hope it was interesting and useful for you.

ConversionConversion EmoticonEmoticon