Written by Steve Patterson.
In this Photo Retouching tutorial, well learn how to make teeth whiter and brighter using a Hue/Saturation adjustment layer, a brush and a layer mask.
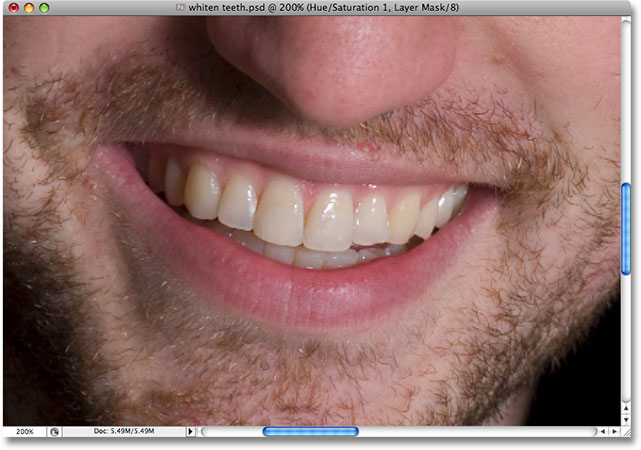
Heres the image Ill be using for this tutorial. The womans teeth look nice and white already, but the mans teeth appear a bit dull and yellow and could use a little whitening:
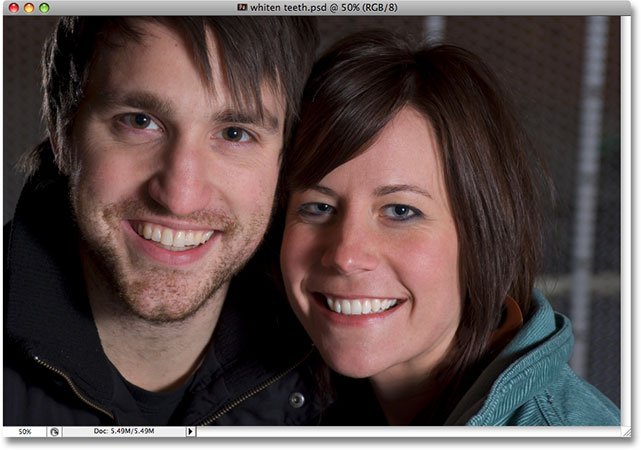
The original image.
Heres how the teeth will look when were done:

The final result.
Lets get started!
Step 1: Select The Area Around The Teeth With The Lasso Tool
First, grab the Lasso tool from the Tools palette in Photoshop, or press the letter L on your keyboard to quickly select it:
Select the Lasso tool from the Tools palette, or press L on your keyboard.
With the Lasso tool selected, Im going to draw a selection around the guys teeth. I dont need to be precise with my selection here because this selection is only temporary. All I need is to have his teeth inside the selected area:
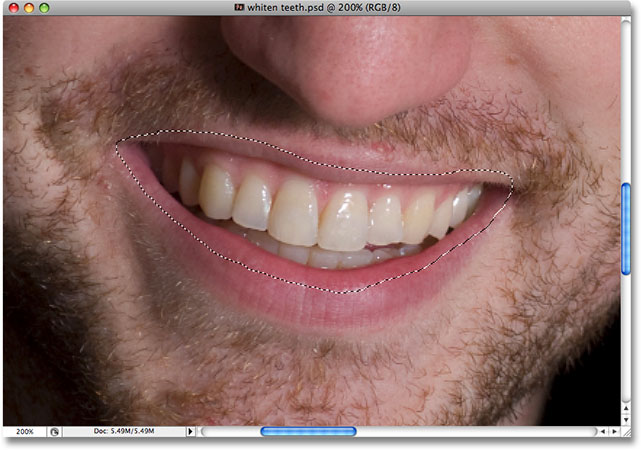
Selecting the area around his teeth. No need to be precise here because this selection is temporary.
Step 2: Choose A Hue/Saturation Adjustment Layer
With the area around his teeth selected, Im going to go to the bottom of the Layers palette and click on the New Adjustment Layer icon:
Click the New Adjustment Layer icon at the bottom of the Layers palette.
Then Ill select a Hue/Saturation adjustment layer from the list:
Choose Hue/Saturation from the list.
This brings up the Hue/Saturation dialog box, and were going to use it to remove the yellow from his teeth and brighten them at the same time.
Step 3: Select Yellows From The Hue/Saturation Edit List
The reason his teeth are not white is because, obviously, theres too much yellow in them, so we need to remove the yellow. To do that, with the Hue/Saturation dialog box open, click the down-pointing arrow to the right of the word Master at the top of the dialog box and select Yellows from the list. This will allow us to make changes only to the yellow in the image:
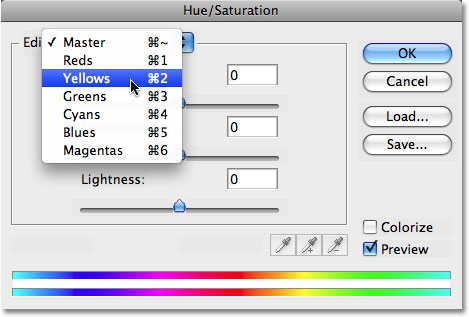
Select Yellows from the Edit list in the Hue/Saturation dialog box.
With our yellows selected, drag the Saturation slider in the middle of the dialog box all the way to the left, which desaturates (removes) the yellow from the teeth, leaving the teeth whiter:
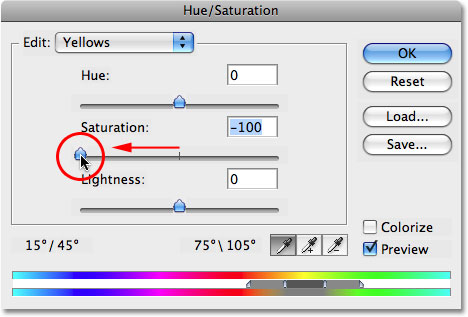
Drag the Saturation slider to the left to remove the yellow color from the teeth.
His teeth now appear whiter thanks to the yellow being removed. If only it were so easy in real life:
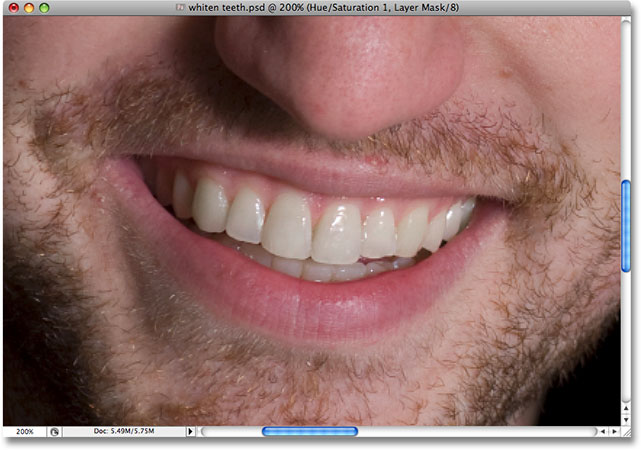
His teeth now appear whiter after removing the yellow with the Hue/Saturation adjustment layer.
Step 4: Drag The Lightness Slider To The Right To Brighten The Teeth
His teeth now look whiter, but they could use some brightening as well, and we can do that using the same Hue/Saturation adjustment layer. First, go back up to the Edit list at the top of the dialog box, click on the down-pointing arrow once again, and this time, select Master from the list. The "Master" option allows us to make changes to every color in the image at once:
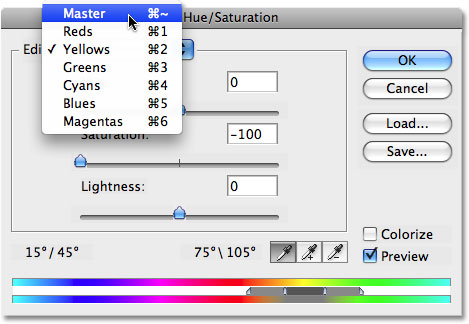
Set the Edit option back to Master at the top of the Hue/Saturation dialog box.
With Master selected, drag the Lightness slider, which is directly below the Saturation option, towards the right. This will brighten the teeth. The further you drag the slider, the brighter the teeth become. Keep an eye on your image in the document window as you drag the slider so you dont end up dragging it too far:
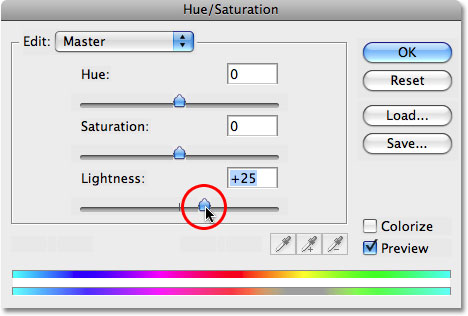
Drag the Lightness slider to the right to brighten the teeth.
Click OK when youre done to exit out of the dialog box.
We can see in the image now that not only have I brightened his teeth, Ive also brightened the area around them, since that was the area I initially selected with my Lasso tool:
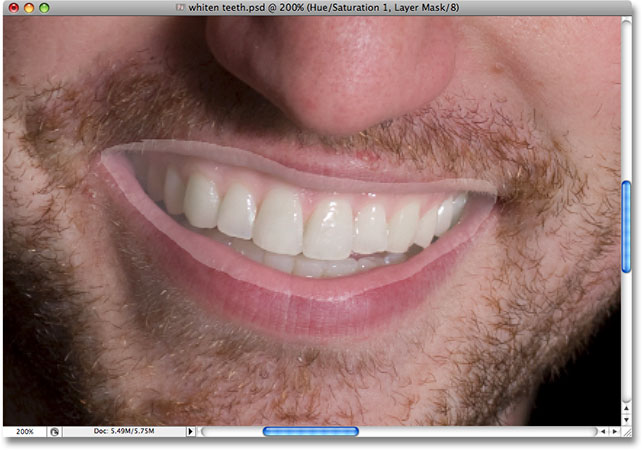
His teeth are now brighter, but so is the area around them.
No worries though. Were going to fix that next.
Step 5: Fill The Hue/Saturation Layer Mask With Black
One of the great things about using adjustment layers in Photoshop is that each one comes with its own layer mask. If we look in the Layers palette, we can see that we have two layers. The original image is on the Background layer, and directly above it is our Hue/Saturation adjustment layer. The black rectangle with the small area of white in it on the right of the adjustment layer is the layer mask thumbnail, which is showing us a preview of our mask. That small area of white is the area weve selected around the mans teeth.
Make sure the layer mask is selected. The way you can tell if a mask is selected or not is by looking for a white highlight border around the mask preview thumbnail in the Layers palette. If you see a white highlight border around the thumbnail, it means the mask is currently selected. If you dont see the border, click on the thumbnail to select it:
Make sure the layer mask for the Hue/Saturation adjustment layer is selected.
Were going to remove that initial selection around his teeth by filling the layer mask with black. This will temporarily hide all the work we did from view. With the layer mask selected, go up to the Edit menu at the top of the screen and select Fill, which brings up the Fill dialog box. For Contents, click on the down-pointing arrow and choose Black from the list:
Make sure Black is selected for the Fill contents.
With black selected, click OK to exit out of the dialog box. Photoshop fills the layer mask with black:

The layer mask is now filled with black.
With the layer mask filled with black, it looks like weve undone all the work we did on his teeth. Theyre back to being yellow and dull:
His teeth are now back to their original yellow.
Dont worry, all the work we did is still there, we just cant see it at the moment. Were going to fix that though by using a brush to paint the whitening and brightening back in, and well do that next.
Step 6: Select The Brush Tool
Select Photoshops Brush tool from the Tools palette, or press B on your keyboard to quickly select it:
Select the Brush tool.
Step 7: Set White As Your Foreground Color
Make sure you have white selected as your foreground color, since were going to be painting on the layer mask with white in order to reveal the effects of the Hue/Saturation adjustment layer over the guys teeth. To quickly set it to white, first make sure you have the Hue/Saturation layer mask selected in the layers palette, and then press the letter D on your keyboard, which will set your foreground color to white and your background color to black:
Select the layer mask, then press D to set white as your foreground color.
Step 8: Paint With White Over The Teeth To Restore The Whitening And Brightening
With our brush selected, the layer mask selected in the Layers palette, and white as our foreground color, all we need to do now is paint over the teeth with our brush to bring back the whitening and brightening. Youll probably need to change the size of your brush as youre painting. To change the brush size, press the right bracket key on your keyboard to make the brush larger and the left bracket key to make it smaller. Youll find the bracket keys to the right of the letter P" on your keyboard. If you want to adjust the edge hardness of the brush, hold down your Shift key and press the right or left bracket keys. Shift+right bracket makes the brush edges harder, and Shift+left bracket makes the edges softer.
Simply paint over the teeth with the brush to reveal the Hue/Saturation adjustment layer over those areas, making the teeth whiter and brighter. You may find it easier to zoom in on the teeth, as Im doing here:
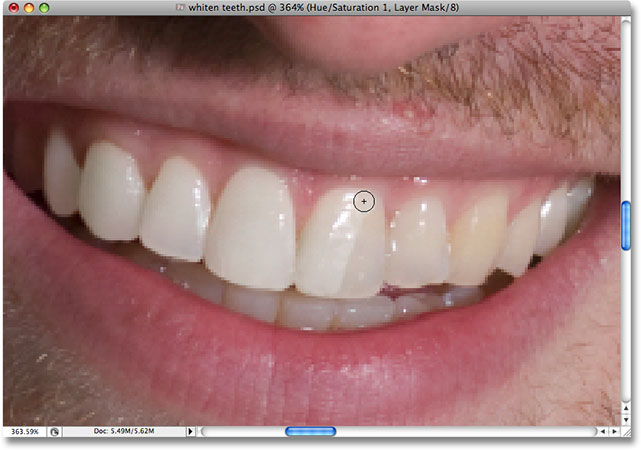
Painting over the teeth to reveal the whitening and brightening.
If you accidentally paint over an area you didnt mean to, just press the letter X on your keyboard to swap your Foreground and Background colors, which will set your Foreground color to black. Paint over the mistake to hide the effects of the adjustment layer, then press X again to switch back to white and continue painting.
For some areas, you may also find it easier to paint with a lower opacity brush. Youll find the Opacity option in the Options Bar at the top of the screen. A low opacity of around 20% is sometimes helpful to avoid over brightening teeth in the darker corners of the mouth:

Lower the opacity of the brush if necessary to apply less whitening to darker corners.
Continue painting over the teeth until youve whitened and brightened them all. Ill zoom back out of my photo, and we can see that the mans teeth are now just as white as the womans teeth:

Both peoples teeth are now white and bright thanks to Photoshop.
Step 9: Lower The Opacity Of The Adjustment Layer If Needed
Keep in mind that no matter what the toothpaste companies want us to believe, our teeth are not supposed to be pure white. If you find that your whitening effect is a bit too strong, making the teeth look unnaturally white, you can easily fine-tune the effect by lowering the opacity of the Hue/Saturation adjustment layer. Youll find the Opacity option near the top of the Layers palette. Im going to lower my opacity down to about 75%:
Reduce the whitening effect by lowering the opacity of the adjustment layer.
Here is my final teeth whitening result:
The final result.
And there we have it! Thats how to whiten and brighten teeth in Photoshop! Check out our Photo Retouching section for more great image retouching and editing tutorials, or see below for tutorials you may be interested in!
Download our tutorials as print-ready PDFs! Learning Photoshop has never been easier!
You May Also Like...
How To Whiten Teeth In Photoshop
Written by Steve Patterson. In this Photo Retouching tutorial, well learn how to make teeth whiter and brighter using a Hue/Saturation adjustment layer, a brush
How to Whiten and Brighten Teeth in Photoshop
You don't need special toothpaste if you've got Photoshop! The dodge tool makes quick work of whitening and brightening your smile.
How to Whiten Teeth in Photoshop
Phlearn PRO Photoshop Tutorials View Our Bestselling Bundles learn how to whiten an
How to Whiten Teeth in Photoshop Elements | eHow
How to Whiten Teeth in Photoshop Elements. For a quick makeover without committing to messy supplies or expensive procedures, look to your computer. With a couple of
How To Whiten Teeth And Eyes - Retouching Portraits ...
Download any Adobe product for a free 30 day trial. Photoshop Retouching Cookbook "Whitening Teeth & Eyes" (Pages 54, 55 from the Retouching Portraits section of
How to Whiten Teeth on Adobe Photoshop: 10 Steps (with ...
Edit Article How to Whiten Teeth on Adobe Photoshop. Everyone gets coffee stains or wine stains on their teeth once in a while. Now instead of spending hundreds of
How to Whiten Teeth in Photoshop | 10Steps.SG
How to Whiten Teeth in Photoshop . Retouching a portrait in a way that makes the model looking the best way possible AND maintaining still a natural look, can be a
How to Whiten Teeth in Photoshop
I will show you how to whiten teeth so that they look natural in photoshop. For more tutorials please visit www.photoshop-phreak.110mb.com Here you'll also
Photo Retouching: how to whiten teeth in Photoshop ...
As our Raw Tuesday series guide to photo retouching continues we show you how to whiten teeth in Photoshop, as well as straighten teeth, in just three easy steps!
2 Easy Ways to Whiten Teeth in Photoshop CS6 - Guiding Tech
Want to make the teeth in that photo a little more white? Here are 2 ways to do that using Photoshop.
Travelling is my life
ConversionConversion EmoticonEmoticon