
- Wonder Woman Pin Up Tutorial
In this Photoshop tutorial I will show how I used Photoshop and a Wacom Tablet to create a digital illustration of a voluptuous Wonder Woman pin up. The tutorial reveals one of my digital painting techniques with a step by step walk through including images for each stage and layer settings. Enjoy!
Introduction:
Wonder Woman is an iconic figure in the comic book world. She is an amazon princess called Diana after a Greek goddess (Artemis). One of the most recognized characters in the pantheon (pardon the pun) of the DC Comics universe. Wonder Woman first appeared in the early 1940s and since then has been a favorite of millions of fans on comics, tv series (Linda Carter anyone?) and cartoons. I created this pieces as an homage to the character. I chose to paint her in a pin-up pose because I am also a big fan of the pin up genre and I loved the chance to portray Wonder Woman in a way that is seldom done.
Step 1 : Sketch

Photoshop Tutorial Wonder Woman Step 1 : Sketch
This is where your knowledge of anatomy and the human form come into play. The female body is especially hard to draw realistically, so for this sketch I shot some reference photos of a model. There is no shame in using reference, especially in the illustration field (where it is the norm). With the photos aside, I proceeded to draw the pose from scratch, paying attention to proportions, anatomy (you can see a hint of bone structure and muscles in my sketch). A good way to get good at drawing the female body is to draw from life and from photos as often as you can. Learn how each part correlates to the rest and what the proportions are in relation to arms, body, head, legs, etc. With practice it is possible to become very proficient.
Photoshop Technique: I created a new image. I left the background layer white. Added a new empty layer on top and renamed it sketch. I sketched the drawing on the sketch layer with a small brush with low opacity. To paint this sketch, I used Photoshop 7 and a Wacom Intuos tablet. My favorite tablet is the Wacom Intuos 3 6×8. See my tutorial on choosing the right graphic tablet.
Tip: While sketching, flip your drawing horizontally once in a while. It will help you find problem areas. Flipping your drawing might help you see where proportions are incorrect. Use Edit > Transform > Flip Horizontal.
Step 2: Line Art

Photoshop Tutorial Wonder Woman Step 2 : Line Art
The goal of this step is to obtain a pretty good line art drawing. You cant move to the next stage unless the line art is done properly. It will save you time and headaches later. I referenced Wonder Womans costume from several images I found on the web, but kinda changed it a bit to make it fit my vision for it. In other words, I made sure that our heroine would appear sexier and ehmm.. well stacked as to say ![]()
Photoshop Technique: I added a new empty layer above the sketch layer and named it line art. I set the opacity of the sketch layer to 15% to make it barely visible. I then drew the finalized line art on the line art layer with a small brush. Once the line art drawing was finished I turned off the sketch layer.
Tip: At this stage is very useful to zoom in closer, at least 200%.
Step 3: Flats
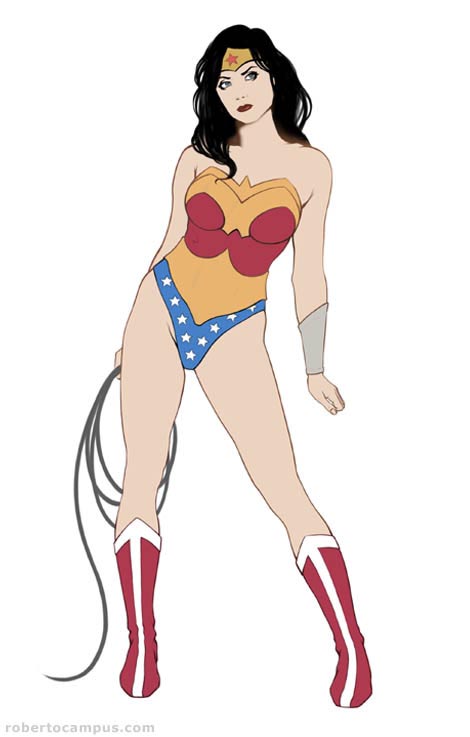
Flatting is a technique borrowed from the comic book industry. Each area is filled with the base color (skin, clothes, hair, etc.) to serve as a basis for the following coloring steps. Flats are essential when coloring comics especially and I like to use the same technique to paint digital illustrations. You will see later how having flats gives you great control over each part of the painting. Flats allow you to apply adjustments selectively to each part without touching the rest.
Photoshop Technique: I added a new layer under the line art layer and called it skin. I created a selection that covered the figure completely and filled it with a base skin color. Above this layer, I created another empty layer and called it metal. I proceeded to outline a selection of all the metal accessories on the body of Wonder Woman and filled it with a yellowish gold color. This will allow me to paint inside the metal parts only. I stacked this layer above the skin layer (hold the ALT key and click on the line between layers to do this). I did the same thing for the clothes layer. See the layer screen capture to see the layers at this point.
Tip: Instead of using the selection tool to define the flats area you can use the pen tool (press P on the keyboard). Lately, I have been using this method more and more often. Its a bit slower but you end up with perfect shapes that very precisely follow the line art outlines.
Step 4: Chiaroscuro (light and dark)
This is where the fun beings and the true power of this techniques shines! Photoshop 7 (or 6?) introduced adjustment layers and fill layers. To paint the shadows in, I use another trick borrowed from my comic coloring arsenal. Instead of actually painting directly on the flats, I paint in the mask of a fill layer set on multiply. This is extremely versatile because you can add, modify, smooth and paint as much as you want on this layer. Areas where the layer opacity is visible darkens whatever is on the layers below (in this case: skin, clothes and metal elements). It is easier to understand this technique if you refer to the layer setup screen shot. It is at this stage that my Wonder Womans voluptuous female body started to become more tri-dimensional.
Photoshop Technique: I created a new Fill layer (called dark) above the flats layers, but below the line art layer. I also stacked this layer inside the base flats layer skin so that this layer contents would show only inside the area of the flat layer below. I set the dark layer mode to Multiply. Using a medium opacity smooth brush I painted in the shadows. I switched between the brush tool and the smudge tool continuously until I got the result I was looking for.
Tip: While you paint in a fill layer or an adjustment layer you are only actually working on the layer mask. Using white and black you define the layer opacity. White pixels are visible, black pixels are transparent. While you paint on this layer using the brush tool, you can use the X key shortcut on the keyboard to switch between black and white so you can add or remove opacity as needed. Also use the smudge tool often (R key shortcut) to blend in your brush strokes. This is a technique borrowed from my traditional oil painting background.
Step 5: Finalizing the chiaroscuro (darker shadows)
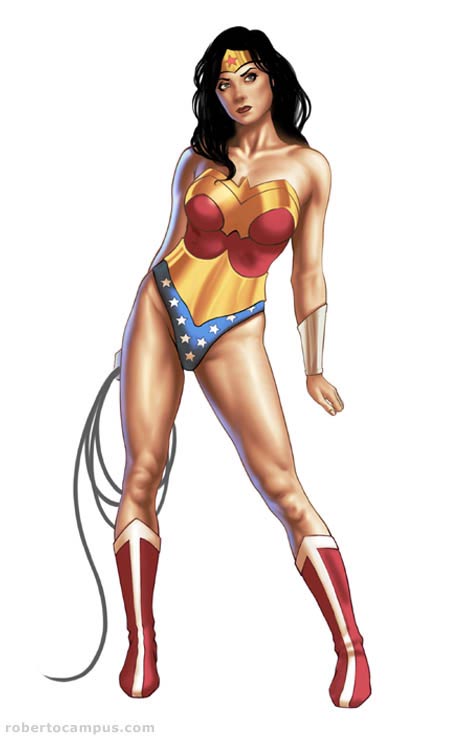
At this point its all about volume and shapes. My sexy Wonder Womans body needed darker areas to further refine her shapely curves ![]() Some areas needed highlights also.
Some areas needed highlights also.
Photoshop Technique: I created another Fill layer (called darker) above the original dark layer. I also stacked this layer inside the base skin flats layer. Again, the darker blending mode is set to Multiply. Here I painted additional shadows where needed. Using another layer for darker shadows gives me extra control. At this stage I also added 2 adjustment layers to enhance the figures contrast and saturation. First, I created a new Curves adjustment layer above the shadows layers and changed the curve profile so to add more red tones to the highlights and more blue in the darker areas. This simple step usually helps achieve a natural flesh tone look. I also added a Color Balance adjustment layer and did some additional tweaking. Finally, I added some incidental light highlights on the left side of the figure. To do this I added a new empty layer below the line art layer and painted a light blue halo near the edge using a smooth brush.
Tip: Adding incidental light usually helps enhance the tri-dimensionality of a figure considerably.
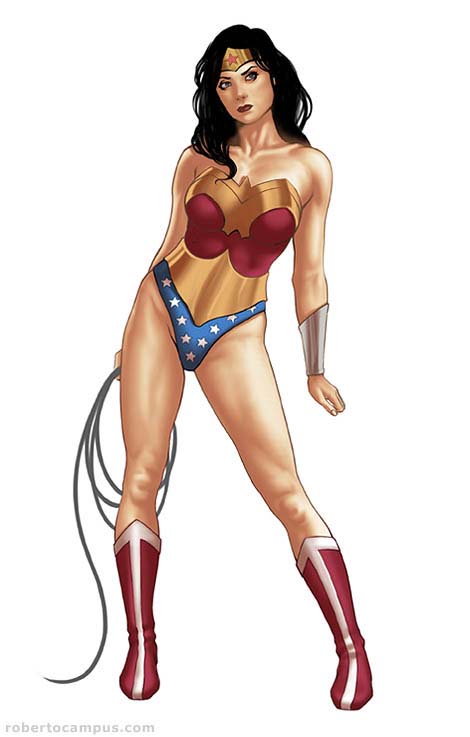
Step 6: Details
The final step is where the details and final adjustments are made. This is where I finalized her face, the metal elements and the whip.
Photoshop Technique: First, I linked all the layers (from the skin layer to the line art layer) and merged them together into a single layer. I duplicated this layer and then zoomed in to paint details using a medium opacity pressure sensitive brush with smooth edges. While painting, once again, I switched to the smudge tool to blend in brush strokes. To enhance the highlights I used the Dodge tool in small areas where a bright spot was needed. Use the dodge tool sparingly though.
Tip: It is sometimes useful to keep copies of earlier stages of a layer you are painting on, just in case you feel like the painting took a wrong turn and you want to go back to a previous stage.
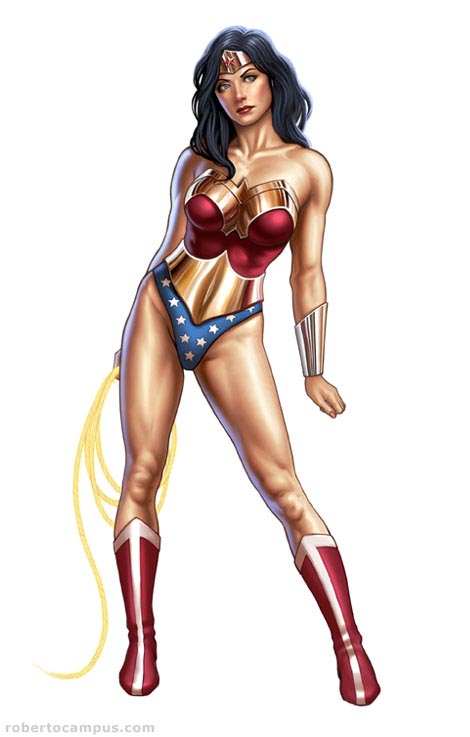
Final Wonder Woman Pin Up:
Check out the final version of this image in my gallery where you can see her with a background.
If you liked this tutorial you might enjoy this link: Wonder Woman stuff
Photoshop Tutorial: Wonder Woman Pin Up Digital Painting ...
In this Photoshop tutorial I will show how I used Photoshop and a Wacom Tablet to create a digital illustration of a voluptuous Wonder Woman pin up.
Photoshop Tutorial: Wonder Woman Pin Up Digital Painting ...
In this Photoshop tutorial I will show how I used Photoshop and a Wacom Tablet to create a digital illustration of a voluptuous Wonder Woman pin up.
Photoshop Tutorial: Wonder Woman Pin Up Digital Painting ...
This looks like a great Photoshop coloring tutorial. While I know our subject matter is Transformers and the subject here is Wonder Woman, I think a lot of the
Photoshop Tutorial: Wonder Woman Pin Up Digital Painting ...
In this tutorial I will show how I used Photoshop and a Wacom Tablet to create a digital illustration of a voluptuous Wonder Woman pin up. The tutorial reveals one of
Photoshop Digital Art Photoshop Tutorial: Wonder Woman Pin ...
To populate text input or textbox control when user selects combobox using jQuery. Easy solution with jQuery $
Photoshop Tutorial: Bioshock Videogame Digital Painting
Wonder Woman Pin Up Tutorial In this Photoshop Fantasy art, photoshop and wacom tutorials, digital illustration tips from professional illustrator Roberto
photoshop Wonder Woman Pin Up Digital Painting
Top Free Photoshop tutorials. Pages. Home; photoshop Wonder Woman Pin Up Digital Painting
Wonder Woman Pin Up Digital Painting - Photoshop Tutorial ...
In this Photoshop tutorial we will show how we used Photoshop and a Wacom Tablet to create a digital illustration of a voluptuous Wonder Woman pin up.
Bundlr - Photoshop Tutorial: Wonder Woman Pin Up Digital ...
Wonder Woman Pin Up Tutorial In this Photoshop tutorial The tutorial reveals one of my digital painting Tutorial: Wonder Woman Pin Up Digital
Photoshop Tutorial: Wonder Woman Pin Up Digital Painting ...
Discuss Photoshop Tutorial: Wonder Woman Pin Up Digital Painting in the 2D Graphic Articles forum on Tutorialized. Photoshop Tutorial: Wonder Woman Pin Up Digital
Travelling is my life
ConversionConversion EmoticonEmoticon