There seems to be a lot of debate about the best sharpening method in Photoshop. Some say its unsharp mask, while others swear by smart sharpen, and a few have developed complex multi-step workflows for sharpening their photos.
Ive tried a few of these techniques, but the one I like best is High-Pass sharpening. Its my favorite method for two reasons:
- It barely adds any noise to your photo
- Its a short and quick process
So, heres how you do it:
1.) Youll need to have a flat image for this, so if you have multiple layers, merge them together by selecting Flatten Image from the Layer menu.
2.) Create a duplicate layer of your flat image by selecting Duplicate Layer from the Layer menu:

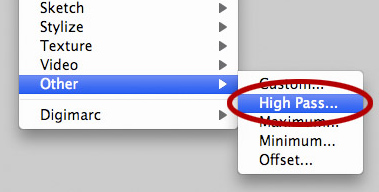
3.) Go to the Filter menu, and go all the way to the bottom until you get to the submenu labeled Other, and then click on High Pass

4.) You should now see a window that looks like this:

5.) The goal here is to select a pixel radius large enough so it outlines the edges of your photograph and shows a little bit of color (make sure the preview box is checked!). Usually values between 4 and 10 work very well. Here are a few examples of radius values that are too small, too big, and perfect:


6.) Click OK to apply the filter
7.) In the Layers window, click on the blending mode listbox, and select Overlay

8.) Your photo should now look like its too sharp. But, dont worry, the next step is to fix that! Right next to the blending mode listbox, theres an Opacity slider. Click on that and lower the opacity until your photo looks sharp, but not too sharp. I usually set it between 30-45%.
You should now have a super sharp photo! Heres an example before/after:

Photo by Steve Berardi

Photo by Steve Berardi
Click here to open a side-by-side comparison. Its a lot easier to see the difference if you do an undo/redo in Photoshop.
ConversionConversion EmoticonEmoticon