Photoshop can help us create many wonderful effects. I'm sure you have noticed the torn paper look in my site's main interface, as well as on my navigation board above. In this tutorial, you will not only learn how to make this effect, but you will also get some practice with these: - Making a texture (Wheathatch paper and Cotton Scroll paper)
- Using a Layer Mask (and an Elemask)
- Making a Shadow in a difficult situation.
1. Make your paper. If you're tearing something that's already made, like a photo, then skip this part. If I'm making this effect from scratch, though, I like to use a very paperlike texture. There are a couple of different papers that look good for this. One is Cotton Scroll paper, like I used for my interface. Another is Wheathatch paper. | This tutorial was written with screenshots from Photoshop 7 or with Elements 2. This entire tutorial can be done with either program. It also will work just fine with newer PS or with PS 5.* or 6. There are some parts where the screenshots have minor differences from those with Elements, but where there are procedural accomodations, I've put these into Notes for you. (This tutorial has the distinction of being my most-frequently stolen tutorial! If you do happen to see my work on someone else's site, do give me a shout!) | Cotton Scroll Papera. Make a new layer by clicking the Create a New Layer icon at the bottom of the Layers palette. Fill this with whatever color you want. (Choose the foreground color you want and then Alt-Backspace to fill.) | | b. Filter -> Noise -> Add Noise. Make it Monochromatic and, generally, just a small amount of noise is best, say 10%. |  | c. Filter -> Blur -> Gaussian Blur. Just a few pixels is enough to give you this nice Cotton Scroll paper. | 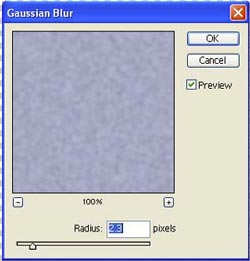 |
|
| Wheathatch Papera. Make a new layer by clicking the Create a New Layer icon at the bottom of the Layers palette. Fill this with whatever color you want. (Choose the foreground color you want and then Alt-Backspace to fill.) | b. Filter -> Noise -> Add Noise. The amount of noise you use will determine how heavily textured your wheathatch is. | 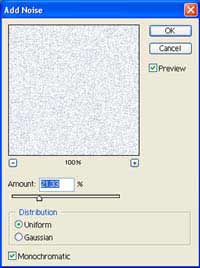 | c. Filter -> Brush Strokes -> Crosshatch. Tada! Wheathatch! | 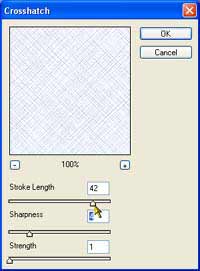 |
|
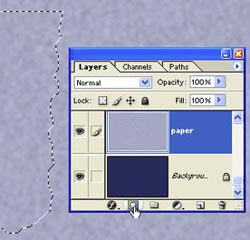
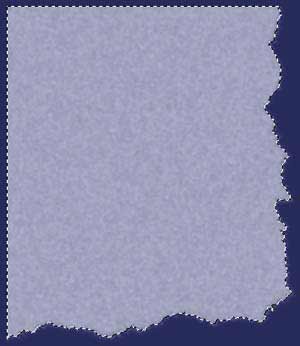
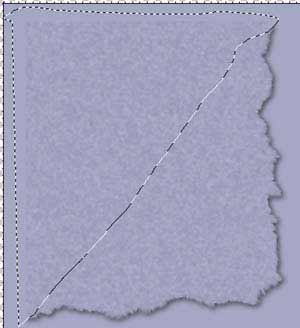
| 2. Make the selection. a. Make a selection for the main rectangle of your paper. Use the Rectangular Marquee. b. Now "tear off" the edges you want removed. To do this, type L to choose the lasso tool and then hold the Alt key to make the part you are about to select subtracted from this original selection. c. Draw a ragged selection line. When your lasso gets to about where mine is -> , you can let go of your mouse and it will snap the selection closed. | 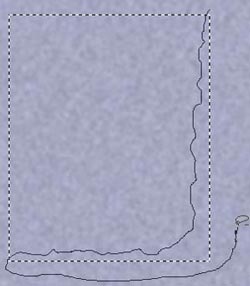 | 3. Make the mask. With this selection going, click the Add Layer Mask icon at the bottom of the layers palette. Note to Elements users: You don't have this Add Layer Mask button, but you CAN add a mask. Yours is the Elemask and you make it as we did in THIS tutorial. What you do here is the following: - Click the Background layer.
- Click the Create a New Adjustment Layer icon at the bottom of the Layers palette.
- Choose Hue/Saturation and click OK without changing anything.
- Alt-click between this Adjustment layer and the paper layer above it in the Layers palette. Now you have your Elemask. And HERE is what your Layers palette looks like.
|
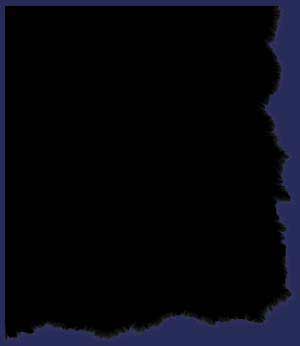
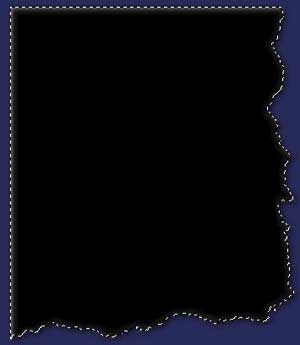
|  | Click the mask in the Layers palette. This little icon next to the eye tells you that you are working on the Layer mask and not the layer itself. You are, in fact, not touching the paper layer's pixels at all! |  | 4. Smudge to tear. Choose the Smudge tool (fingerpaint option OFF!), with 50% Strength, and a one-pixel brush. Zigzag this brush along the edge between the paper and the background. Don't concentrate too much on any one area and DO be erratic. If you want to, tear an actual piece of paper and look at it magnified, or at least very closely, at the way the fibres lie. Nothing regular there! | 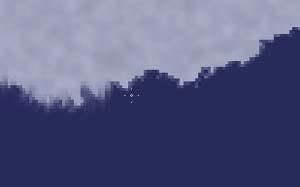 | Beautiful torn paper effect! To make it even more realistic, though, you should add some shadow. Even if it is right ON the desktop, a sheet of paper will still cast some shadow. It will look most realistic if it is just a bit of a shadow and if it is only on two sides of the paper, depending upon the location of the light source. In PS versions before 7, and in Elements, we have a problem because of the Layer mask. In PS, you can apply the Layer Mask, if you are sure you're done tweaking. Then you can just make a Drop Shadow. In Elements, or if you don't want to lose the flexibility of your mask, go to this tip below for your solution. If you're using PS 7 or newer, you can continue here: | 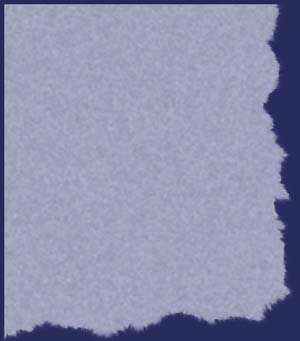 | 7. Make a Drop Shadow. Click the paper layer to make it active. Then click the Layer Styles icon  in the Layers palette. Choose Drop Shadow, adjust your parameters, and there you are! in the Layers palette. Choose Drop Shadow, adjust your parameters, and there you are! |  | | | Note to PS 6, PS 5, Elements users:Because of the layer masking, we can't just do a "drop shadow" layer style on this paper, without actually cutting the paper, which we are not going to do. Instead, we will put the shadow ABOVE the paper and background layers. Remember that this is just an illusion we are creating. Your viewer shouldn't be able to tell that this shadow is on top of the paper and not under it! One way to do this is to apply the Layer Mask. To do this, drag the mask to the Trash at the bottom of the Layers palette. When it asks what you want to do with the mask, say Apply. This is the same as deleting the edges. Then you can use a Drop Shadow Layer style. | But what if you're not sure you want to delete that part just yet? Then you'll want another way to make this shadow: Make the shadow: - Ctrl-click the Layer Mask, in order to load this selection.
- Click the paper layer and then click the Create a New Layer icon at the bottom of the Layers palette.
|  | - Choose black for the foreground color and Alt-Backspace to fill the selection with black. Ctrl-D to Deselect.
|  | - Filter -> Blur -> Gaussian Blur. It won't need a whole lot, maybe 2 pixels or less.
- Type V for the moVe tool and pull the shadow down and to the right just a wee bit, as i have done here. ->
|  | - Shift-Ctrl-D to Reselect the cut area. (Or Select -> Reselect, in case you can't remember this icky shortcut!)
- With the shadow layer chosen in the Layers palette, click the Delete key on the keyboard. This takes away the shadow that is on top of the paper.
|  | - You may still have some shadow around the top edge that you don't want. If this is the case, type L for the Lasso, encircle the part that you want to get rid of.. and click the Delete key.
|  |
|
| And here you are! |  Here is the torn paper effect with wheathatch paper. :) | I hope you enjoyed this tutorial! 
| | Student work: |
| Ask tutorial questions in the Message Board: 
| | All material in this site is ©2001-2005 by myJanee.com Graphic Creations. No part of it may be used without my written permission. If you have questions or comments about this site or its construction, contact Janee at myJanee.com Graphic Creations, 7193 W Gifford Rd, Bloomington, Indiana, USA 47403 or by email. |
| Creating Torn Paper in Photoshop -- a Photoshop tutorial ...
Photoshop can help us create many wonderful effects. I'm sure you have noticed the torn paper look in my site's main interface, as well as on my navigation board above.
Create a Realistic Torn Paper Effect in Photoshop
Torn paper is one of the key become exposed when torn, to make the torn paper effect realistic create useful tutorial for realistic paper effects I
How to Make a Torn Paper Edge in Photoshop
In this tutorial, I'll show you a very simple technique for creating a torn paper edge in
Torn Paper Photoshop Elements - Paint Shop Pro Tutorials
Adobe Photoshop and Adobe Photoshop Elements Tutorials Note For a visual guide, tear a piece of A4 paper, and study it; additionally, for a photorealistic tear
Create a torn paper in Photoshop | iconShots
How to create a torn paper in Photoshop. Tutorial Details. Program: Adobe Photoshop; Difficulty: Intermediate; Tags: note photoshop torn paper tutorial. Share:
Creating a Torn Paper Effect in Photoshop
The Adobe Photoshop torn paper effect can be achieved in just a In this step by step Photoshop tutorial, Creating a Torn Paper Effect in Photoshop.
Ripped Paper Photoshop Tutorial - Yardarm Motel
RIPPED PAPER PHOTOSHOP TUTORIAL blog design is creating-a-realistic-torn-photo-effect-photoshop-tutorial Tutorials-photoshop -essential-photoshop-techniques
Worn, Torn Photo Edges Effect In Photoshop
In this Photoshop photo effects tutorial, space when were finished creating the torn edges around the edges and only the back layer of the paper
Creating torn edges in Photoshop and Photoshop Elements ...
May 24, 2013 in Tutorial // Creating Torn Edges in Photoshop and Photoshop Elements; May 22, Paper generally tears with a soft, fibrous edge.
Torn Paper Photoshop CS CS2 CS3 CS4 CS5 CS6 Extended
This tutorial demonstrates three different ways of creating torn paper using Photoshops filters. To work along,

ConversionConversion EmoticonEmoticon