This is the technique that will wrap your art around objects and (seemingly) magically make it hug every contour.
Step 1
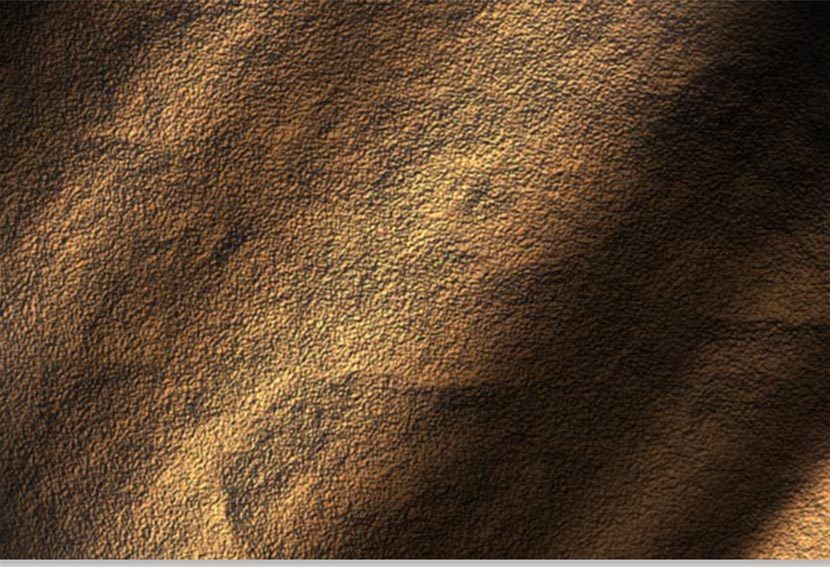
Begin with a texture, you must be in RGB mode. I have another tutorial under textures that shows you how to create this rock surface. You can also just download it if you wish.
Download rock texture here
Step 2
Click on the Channels palette and click on each channel until you find the one with the most contrast (dark to light). In this case it is the Red channel.

Step 3
We need to make a new document out of the channel.
Either right click/Control+click on the channel area of the channels palette, or click on the top right arrow to open the drop down menu. Choose duplicate channel.
Under destination>document, choose new.
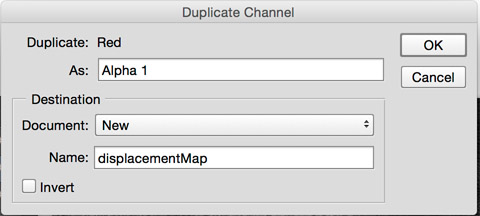
Click ok
Step 4
You will now have a new document. This will become our displacement map. Apply a 0.7 Gaussian blur (Filter>blur>Gaussian blur) to lower the sharp detail a bit. This will make for a smoother image in the end.

Step 5
Save the document as a .psd, I called it displacementMap.psd, any name will work, just remember it and the location. I put mine on the desktop.
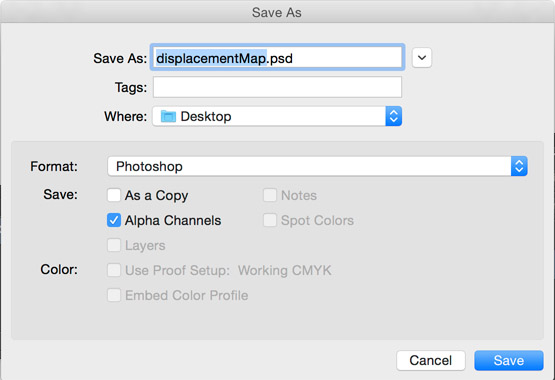
We have now created our displacement map for use later on.
Step 6
On our original document, click on the RGB to restore the default channel display.

Step 7
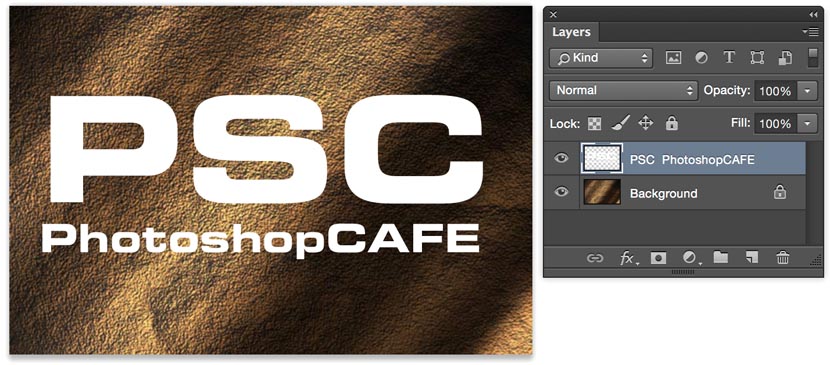
Open the layers panel and add your artwork or text on a new layer. This is the content that you want to warp. Make sure you have everything you want to warp on one layer. If you have text, rasterize it now. (Right click on the layer palette next to the name and choose rasterize layer from the pop up menu.
Step 8
Now lets apply the displacement map
Filter>Distort>Displace
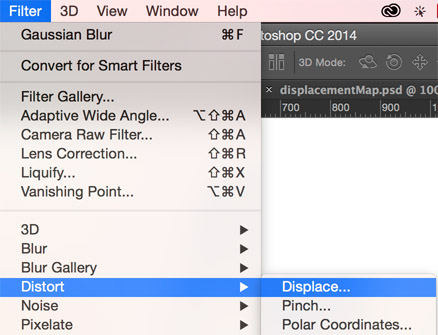
Step 9
Use the settings shown here when the Displace palette opens.
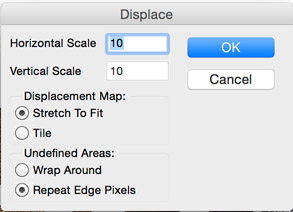
Click ok
Step 10
You will now see a browser asking you to choose a displacement map. Navigate to the desktop and load the image we created at the beginning of this tutorial.
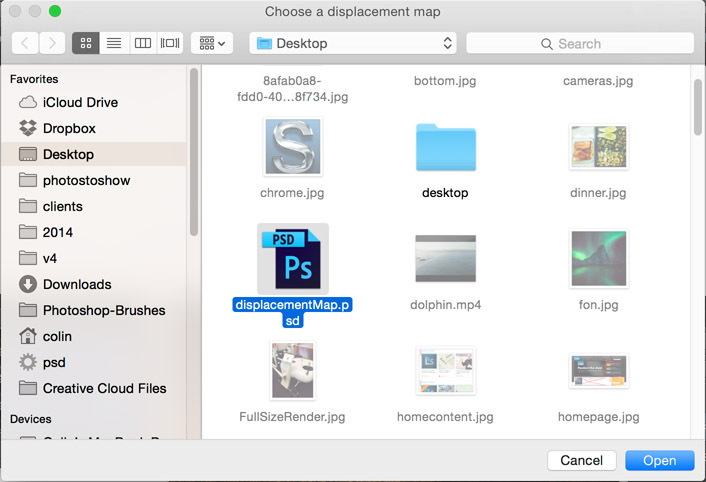
Click open
Step 11
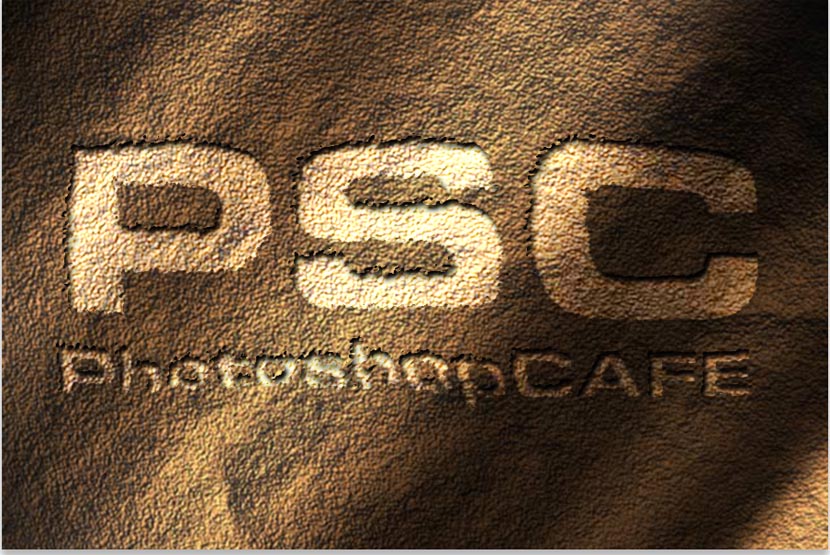
You will now see your artwork distort to hug the texture of the rock.
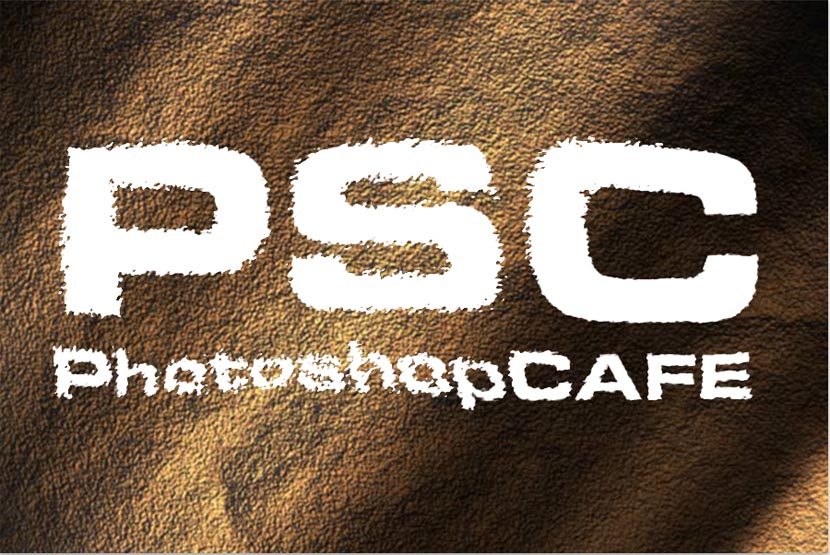
Lets jazz it up a bit.
Step 12
Choose Overlay mode to add some realistic blending.
Duplicate the distorted layer to add a bit more strength to the effect. I dropped the opacity of the top layer to 30 to tone it down a bit.
Here is the result on the blending mode.
See how the color blends in with the texture.

Step 13
Here is exactly the same image but with a variation. I added an inner shadow layer style to the top layer
I hope you had fun with this tutorial and learned a lot.
CS6 Superguide
All the CS6 information and more is available as a PDF magazine called the CS6 Superguide. If youre on our list, you will receive it free by email as soon as its available. If not, sign up now and get the CS6 Superguide for free.
Wrapping objects with Displacement Maps Photoshop Tutorial ...
Displacement maps see like such strange and difficult animals until you learn to tame them. In this long overdue tutorial, I will teach you what you need to know
Photoshop Tutorial Displacement Map
images available at http://www.ocritq.co.uk/displacement-map-images How to create a Displacement Map? This tutorial will co.uk/displacement-map-images
Tag Archives: Displacement maps - Learn Photoshop ...
Wrapping objects with Displacement Maps Photoshop Tutorial. Displacement maps see like such strange and difficult animals until you learn to tame them.
Wrap a Texture or Pattern Around an Object using Displacement Map Tutorial - Photoshop CS5 Training
http://photoshopcs5training.blogspot. --------------- This cool effect can be used to wrap an existing texture or pattern around an object such as a
Wrapping Objects with Displacement Map Filter in Photoshop ...
In this long overdue tutorial, I will teach you what you need to know about displacement maps in plain English, so that you can take advantage of the stunning effects
Photoshop Tutorial Displacement Map - YouTube
kinds of design onto many different surfaces.Wrapping objects with Displacement Maps Photoshop Tutorial. Displacement maps seem like such strange and
Photoshop Tutorials (..wrap..)
Photoshop Tutorials category wrap ordered by Wrapped Gift Box Text Effect,3D Ribbon Wrapped Text Effect,Wrapping objects with Displacement Maps in Photoshop
Wrapping Objects with Displacement Map Filter in Photoshop ...
Click to enlarge. In this long overdue tutorial, I will teach you what you need to know about displacement maps in plain English, so that you can take
Learn Photoshop, photography and photoshop tutorials
Wrapping objects with Displacement Maps Photoshop Tutorial. Displacement maps see like such strange and difficult animals until you learn to tame them.
Photoshop Tutorial Displacement Map
Photoshop Tutorial Displacement Map. Resize; maps for placing many kinds of design onto many different surfaces.Wrapping objects with Displacement Maps Photoshop
Travelling is my life
ConversionConversion EmoticonEmoticon