One of the most useful Photoshop filters for me is the Emboss filter especially for creating textures. The emboss effect also known as bump, bevel effect simply adds depth to your image accordingly to your image contrast. In this tutorials I will show you how you can use the emboss in Photoshop to obtain great textures and backgrounds. Nothing complicated, it is a tutorial especially for the Photoshop beginners that hopefully will learn new tips and tricks.
In today's tutorial I want to show you some simple ways in which you can use the Emboss Filter to obtain interesting and most of all unexpected results. The first thing that you need to know is where to find this Photoshop filter; the emboss filter is in the Filters, Stylize menu.
The emboss effect or bevel effect for text and shapes is obtained mostly using the layer styles like Inner Shadow, Inner Glow and last but not least the Bevel and Emboss effect. So the Emboss Filter is not really used for this kind of emboss text effect. I will show you how a text looks in both cases.
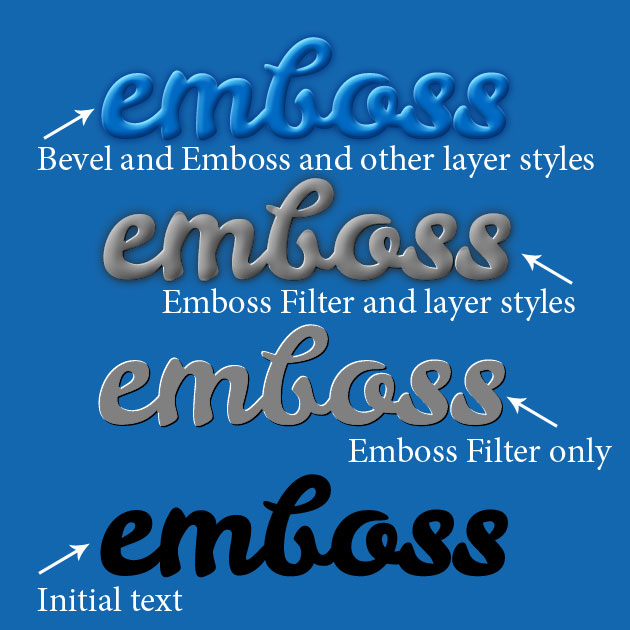
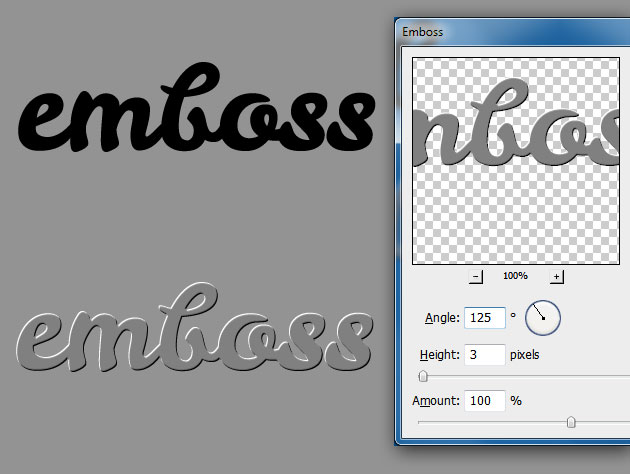
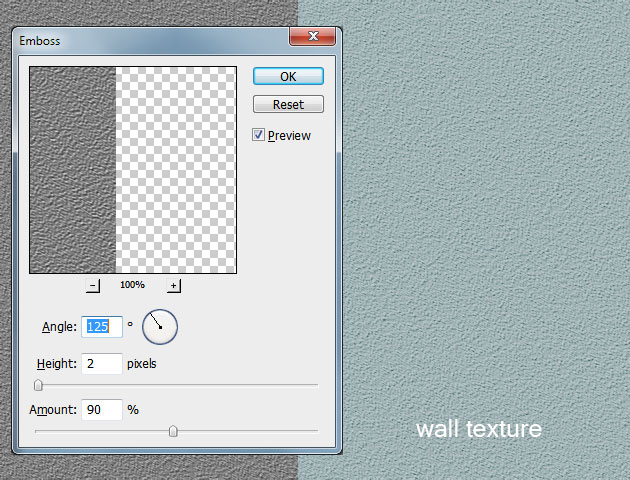
So to obtain bevel text in Photoshop using the emboss filter, simply write a black text, rasterize the text and apply the emboss filter. You can see that the emboss filter has some items that you need to set. First we have the angle that determines from where the light comes. In our case the angle is 125 that means that the light is coming from the top left. The height determines the bevel depth or height. And the last but not least we have the amount that determines the light/dark balance.
If you want a more soft emboss result, add a gray Inner Glow and rasterize the effect before you add the emboss filter. But you have to remember that the emboss filter is not for text effects.
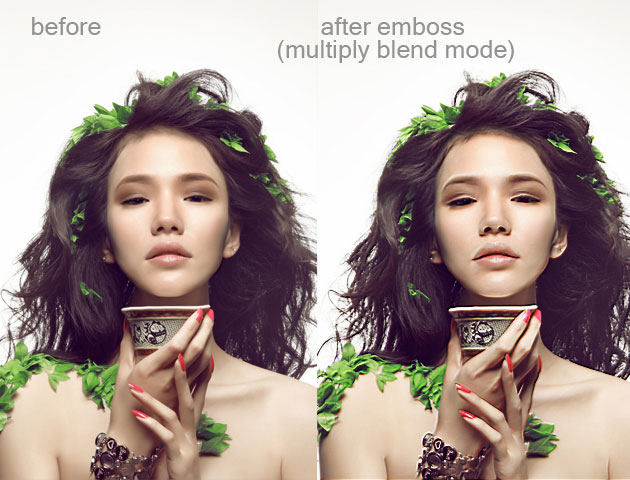
Another thing that you can do with this filter is to use it on a photo. You will obtain a copy of the original image with the details embossed. I have used this girl stock for the preview.

You can not do many things with this image. One idea is to desaturate it and use it to make a customized metal coin but there are better methods to do that. Another thing is to use it to sharpen the photo. Place it over the initial image and change the blend mode to Multiply. You will obtain a more sharpen image with better contrast. It can be used in combination with the High Pass filter.
Now let's talk about the best method in which you can use the emboss filter. I am talking about using emboss to create different textures from scratch in Photoshop. You can play and combine different effects to make hundreds of textures using the emboss filter. I will mention in the following lines, the most commonly textures created using this effect.
First we will make a wall texture using the Noise Filter and the Emboss Filter. Create a new canvas, fill it with #d0d8da color and apply the noise filter like shown in the image:
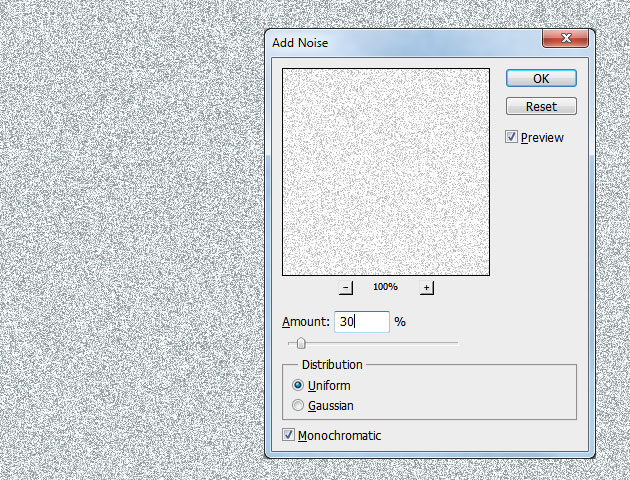
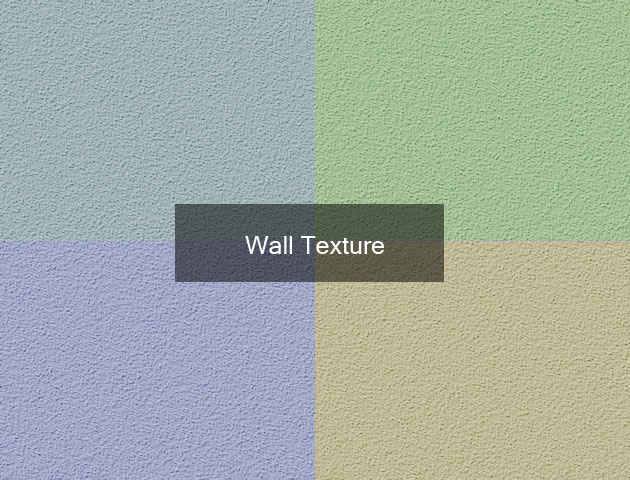
Apply the Emboss Filter and set the blend mode to Color Burn 100% opacity.
You can add a Hue/Saturation adjustment with colorize checked to add different tone colors. This texture can be used as wall texture or even as rough paper texture.
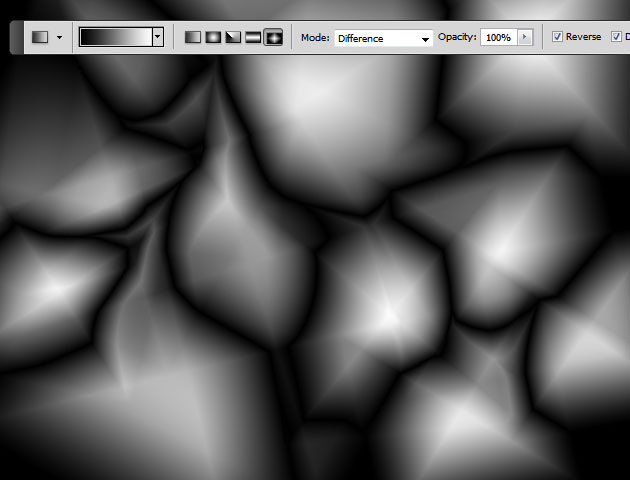
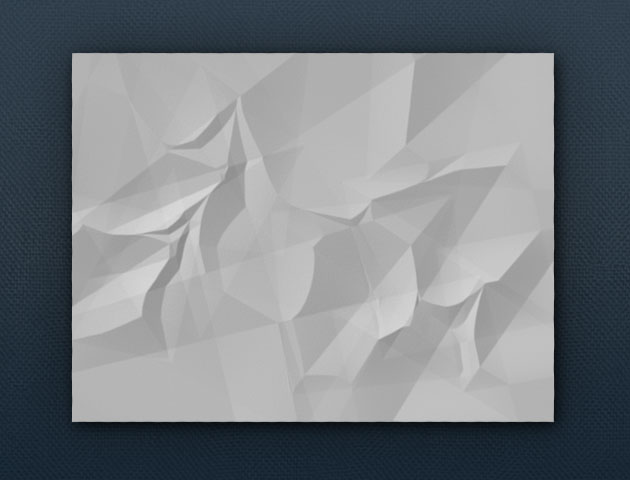
Another use of this filter is to create a crumpled paper, folded paper or ruffled papere. Let's start with a new empty layer. Pick the Gradient Tool and use it a couple of times to obtain this crumpled paper effect. Use a simple black and white gradient, set the Mode to Difference and the gradient type Diamond Gradient.
Go to the Filter, Stylize menu and choose Emboss. Set the angle around 135, height 2 and amount 250. You can play with these settings to adjust the result!
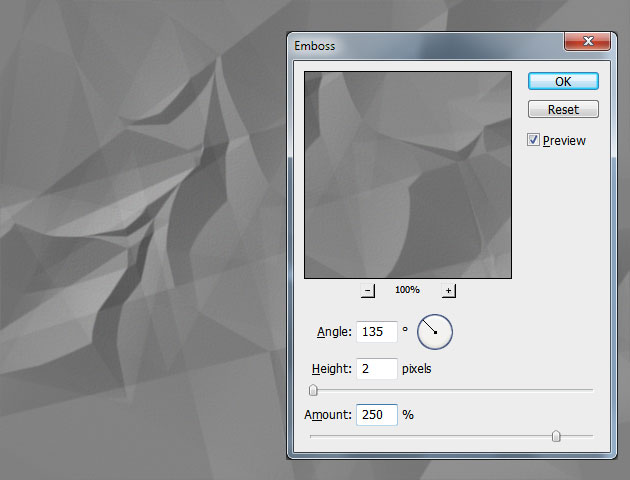
Adjust the Brightness/Contrast balance and you can also add a Hue/saturation like in the previous steps, for adding color. The effect presented above can be used to create fabric folds for example with some minor adjustments.
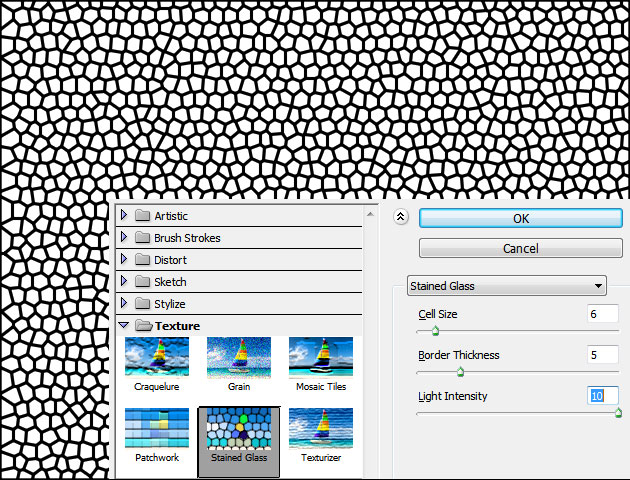
Let's start again with a layer filled with white color. Make sure you have a black foreground and an white background. Go to the Filter, Texture menu and choose Stained Glass with the following settings.
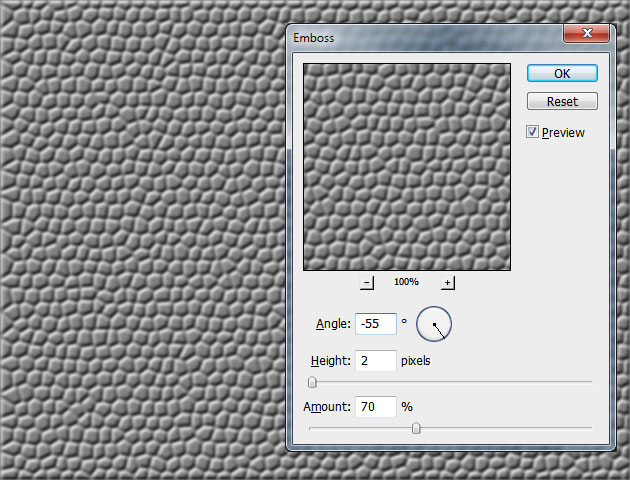
Add a Gaussian Blur of around 1.5px radius and apply the Emboss Filter like shown in the image.
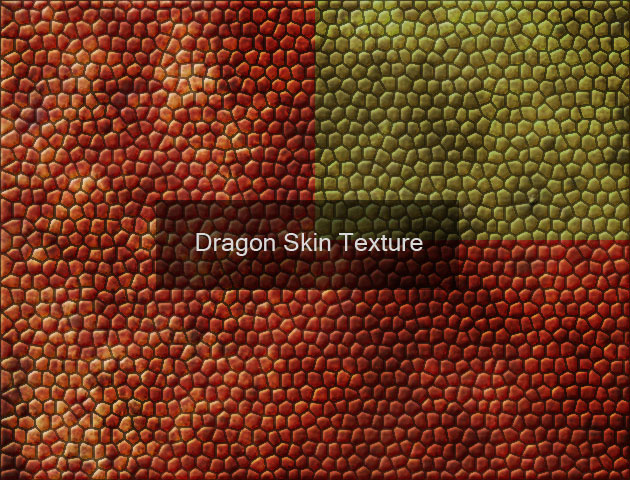
All you have to do to obtain a reptile skin or dragon skin is to apply a texture over the emboss layer with an Overlay or Hard Light blend mode. You can combine different textures for great results; the rusty texture works really great to color the skin.
This were just a few of the many ways in which you can use Photoshop emboss filter to create beautiful and unexpected effects. I will just mention some of the other effects that can be obtained: rock texture, glass texture, water texture and so on. Here you can find a list with other Texture Photoshop Tutorials where the emboss filter is used.
Emboss Photoshop Tutorial - Photoshop tutorial | PSDDude
One of the most useful Photoshop filters for me is the Emboss filter especially for creating textures. The emboss effect also known as bump, bevel effect simply adds
Photoshop Basics Emboss Photoshop Tutorial Tutorial
psddude Tutorials Basics 18058 Views August 21st, 2012. Here you can find a list with other Texture Photoshop Tutorialswhere the emboss filteris used.
Letterpress and Emboss Photoshop Style Collection | PSDDude
I was searching the other day for a decent looking emboss style to use in one of my projects. And I found this amazing set of 80 emboss Photoshop styles that are
Photohop Tutorial Link: 3D Road Map Creation
currently viewing photoshop tutorials from Photoshop Lady psddude Tutorials Open the layer style window of the Map Layerand add a Bevel and Embossand a
Photoshop Text Effects Create a Transparent Text in ...
psddude Tutorials Text Effects 20678 Views create your own glass text effectyou can try this easy to follow photoshop text tutorial. and Bevel and Emboss.
Quick Tutorial - Creating a Letterpress and Embossed Text ...
This tutorial will guide you through creating the letterpress and embossed text effect in Photoshop. The tutorial will Here is the PSD Thanks dude. Nice
Letterpress emboss text effect photoshop tutorial
In this tutorial you will learn how to do the ever trendy letter press effect.
Tutorial Photoshop CS5 - Emboss
Tutorial Adobe Photoshop CS5 english - how to make an emboss effect on a photo and how to blur the background of Tutorial Adobe Photoshop CS5 english
Create a Metal Coin in Photoshop - Photoshop tutorial PSDDude
Create a Metal Coin in Photoshop - Photoshop tutorial etc. Add also emboss Thank you for reading Create a Metal Coin in Photoshop - Photoshop tutorial PSDDude.
Ps Letterpress emboss text effect - Photoshop Tutorials ...
1 comment on Ps Letterpress emboss text effect. Psd Dude; Smashing Buzz; Tutorial King is a collection of high quality Photoshop tutorial.
Travelling is my life
ConversionConversion EmoticonEmoticon