Written by Steve Patterson. In this Photoshop tutorial, well learn the essentials of using clipping masks to hide unwanted parts of a layer from view in a document. Clipping masks are a lot like Photoshops layer masks in that both allow us to show and hide different parts of a layer, but clipping masks work differently.
Unlike layer masks, where we first need to add a mask to the layer and then paint or fill areas on the mask with black (to hide the area), white (to show the area) or gray (to partially hide the area), clipping masks simply use the contents and transparency of a layer to determine which parts of the layer above it remain visible. That may actually sound more confusing than layer masks when you first hear it, but as well see, clipping masks are very easy to use. In fact, they can be faster and easier to use than layer masks! Theres so many possible uses for clipping masks in Photoshop that it would be impossible to cover them all in a single tutorial, so what were going to do here is cover the basics and essentials of how clipping masks work so you can take what youve learned and focus on the fun part coming up with your own creative ways to use them!
Ill be using Photoshop CS6 in this tutorial but everything well cover here applies to any recent version of Photoshop.
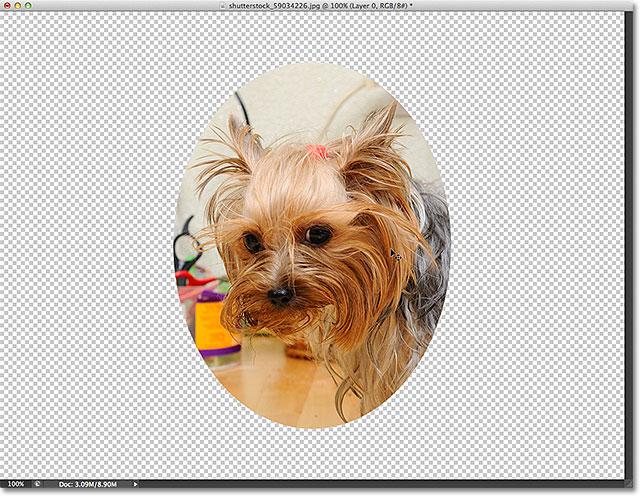
To really understand how clipping masks work, we first need to make sure we understand the difference between areas with actual content and areas of transparency on a layer. To do that, well use my little friend here whos also trying to understand, in his own way, what this clipping stuff is all about (dog grooming photo from Shutterstock):
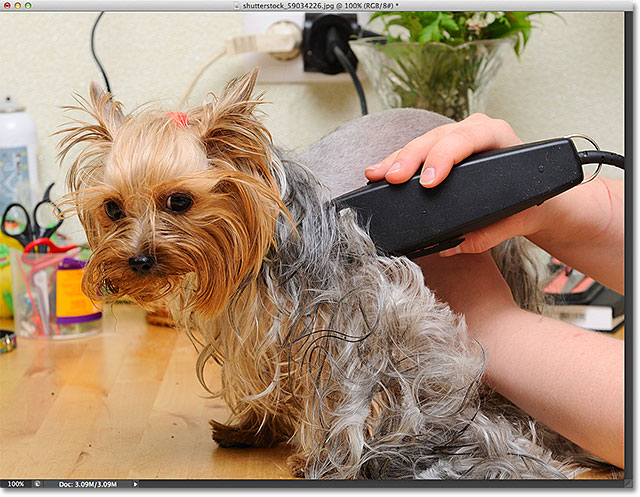
Clipping masks dog clippers see what I did there? Yeah, the dog doesnt look too impressed with me either.
If we look in my Layers panel, we see the photo sitting by itself on the Background layer:
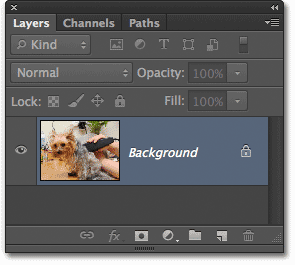
The Layers panel showing the image on the Background layer.
To show how clipping masks work, Im going to add a new blank layer below the image. Now, Photoshop doesnt actually allow us add layers below a Background layer, but to get around that problem, all we need to do is rename the Background layer to anything other than Background, and the easiest way to do that is to simply hold down the Alt (Win) / Option (Mac) key on the keyboard and double-click on the layers name in the Layers panel. Photoshop will instantly rename the layer Layer 0 which may not be very descriptive but its good enough for our purposes:
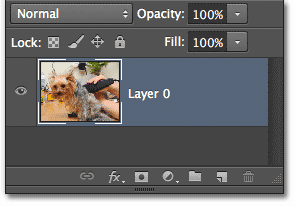
The Background layer has been renamed Layer 0.
Now that the Background layer is just a normal layer, we can add a new layer below it. To do that, Ill press and hold the Ctrl (Win) / Command (Mac) key on my keyboard and Ill click the New Layer icon at the bottom of the Layers panel:
Holding Ctrl (Win) / Command (Mac) and clicking the New Layer icon.
Normally Photoshop adds new layers above the currently active layer, but holding down the Ctrl (Win) / Command (Mac) key while clicking the New Layer icon is a handy little trick that tells Photoshop to add the new layer below the active layer instead. In this case, Photoshop adds a new layer named Layer 1 below the image on Layer 0:
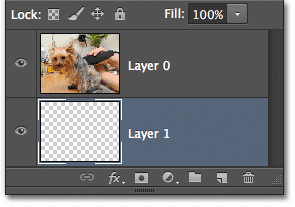
Photoshop adds the new layer below the original image layer.
Lets take a closer look at our new layer. Im going to hide the original image layer for the moment by clicking on its visibility icon (the eyeball icon) on the far left of the layer in the Layers panel:
Click the visibility icon to turn layers on or off in the document.
With the image layer turned off, were now seeing just the newly added layer in the document. By default, new layers are blank, meaning theres nothing on them. They have no content at all. They may be full of promise, sure, but nothing else, at least not at the moment. When a layer has no content, its transparent. We see right through it. Photoshop displays transparency on a layer as a repeating grid pattern, as we see here. When we see nothing else on a layer except for this grid pattern, we know its completely blank:
The document window showing the newly added blank layer.
As I mentioned at the beginning of the tutorial, the way clipping masks work is that they use the contents and transparency of a layer to determine which areas of the layer above it remain visible. How does that work? Well, any areas on the layer below where there are actual contents (whether those contents are pixels, shapes or type basically anything other than transparency) become the visible areas of the layer above, while areas of transparency on the layer below become the hidden areas on the layer above.
As we just saw, our new layer has no content at all. Its just a blank, transparent layer. Lets see what happens if we try to use it as a clipping mask for the image layer above it. To do that, Ill first turn the image layer back on in the document by again clicking its visibility icon:
Turning the image layer back on in the document.
The image reappears in the document window as before:
The image is once again visible in the document.
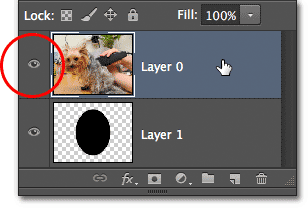
Next, I need to make sure I have the correct layer selected in the Layers panel. When creating a clipping mask, we want to select the layer thats going to be clipped by the layer below it, so in my case here, Ill click on my image layer (Layer 0) to make it active (the currently active layer is highlighted in blue). Layer 1 below it will then become the clipping mask for the image layer:
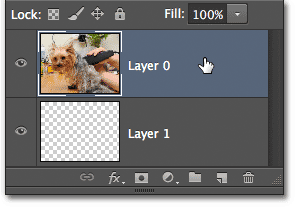
Selecting the image layer.
To create a clipping mask, we simply go up to the Layer menu in the Menu Bar along the top of the screen and choose Create Clipping Mask:
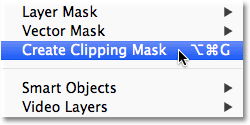
Go to Layer > Create Clipping Mask.
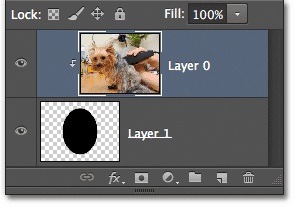
If we look again in our Layers panel, we see that the image layer (Layer 0) is now indented to the right, with a small arrow to the left of the preview thumbnail pointing down at Layer 1 below it. This is how Photoshop lets us know that the layer is now clipped to the layer below it. Weve successfully turned Layer 1 below into a clipping mask for Layer 0 above it:
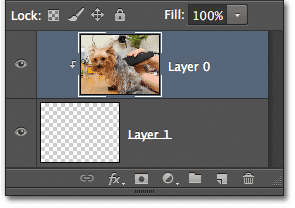
The Layers panel showing the top layer clipped to the bottom layer.
The problem is, all weve really done is created one of the most uninteresting clipping masks imaginable because Layer 1 currently has no content. Since its completely transparent, and Photoshop is using the transparent areas to figure out which areas of the layer above should be hidden, all weve ended up with in the document window is, well, nothing. The entire image on Layer 0 has been hidden from view:
With no content on the clipping mask layer, the image layer above is completely hidden.
That wasnt very exciting, so lets release our clipping mask. To do that, we go back up to the Layer menu at the top of the screen and choose Release Clipping Mask:
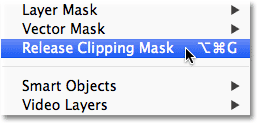
Go to Layer > Release Clipping Mask.
We can see that the image layer is no longer clipped to the layer below it because its no longer indented to the right in the Layers panel:

All signs of the clipping mask are gone from the Layers panel.
And were back to seeing the photo once again in the document window:
With the clipping mask released, the image returns.
Lets add some content to the blank layer. Ill hide the image layer again temporarily by clicking its visibility icon, just so we can see what were doing, then Ill select the blank layer by clicking on it in the Layers panel:
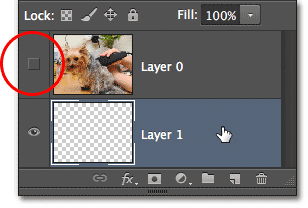
Turning off the top layer and selecting the bottom layer.
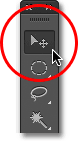
With the blank layer selected, Ill grab my Elliptical Marquee Tool from the Tools panel by clicking and holding on the Rectangular Marquee Tool until a fly-out menu appears showing me the other tools nested in that spot, and then choosing the Elliptical Marquee Tool from the menu:
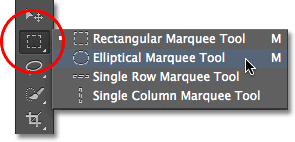
Selecting the Elliptical Marquee Tool.
Then, with the Elliptical Marquee Tool in hand, Ill click and drag out an elliptical selection outline in the center of the document. Theres no particular reason why Im using this specific selection tool. The point here is simply to add some content to the layer:

Drawing a selection with the Elliptical Marquee Tool.
To create actual content, I need to fill the selection with something, so Ill go up to the Edit menu at the top of the screen and choose the Fill command:
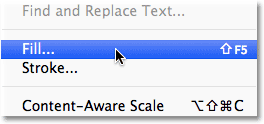
Going to Edit > Fill.
This opens the Fill dialog box. Ill set the Use option at the top of the dialog box to Black, and Ill make sure the Mode option near the bottom is set to Normal and the Opacity option is set to 100%. Again, Im simply adding content to the layer. Theres no reason why Im specifically choosing black as my fill color, other than black will be easy to see in the screenshots:
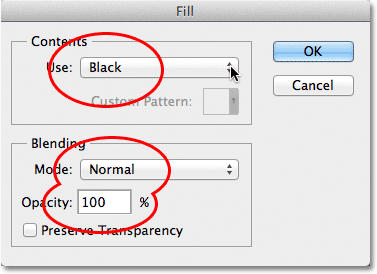
The Fill dialog box.
Ill click OK to close out of the Fill dialog box, and Photoshop instantly fills my elliptical selection with black. I now have an area with actual content on the layer, although the area surrounding the content remains transparent:
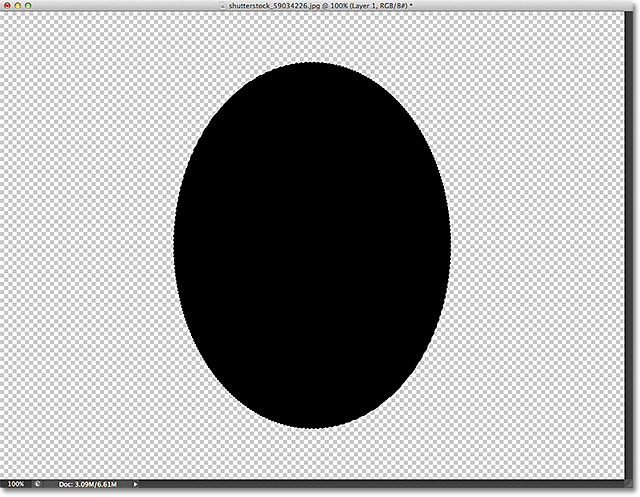
The selection has been filled with black.
The selection outline itself is still visible, so since I dont need it anymore, Ill remove it by going up to the Select menu at the top of the screen and choosing Deselect:
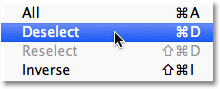
Removing the selection outline by going to Select > Deselect.
Now that weve added some content to the bottom layer, lets take a quick look again in the Layers panel. We can see the black-filled elliptical area in the preview thumbnail for Layer 1. Whats important to notice here is that if you compare this preview thumbnail with the preview thumbnail for the image layer above it, youll see that some of the photo on the image layer is sitting directly above the new content area, while the rest of the photo sits above the remaining transparent areas:
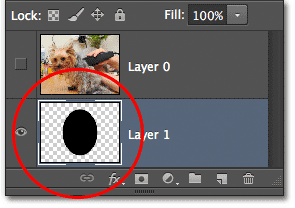
The preview thumbnail shows the filled content area on Layer 1 below the photo.
Lets see what happens this time when I go to create the clipping mask. As before, Ill turn the top layer back on by clicking its visibility icon, then Ill click on the layer itself to select it and make it active:
Selecting and turning on Layer 0.
Ill add the clipping mask by once again going up to the Layer menu at the top of the screen and choosing Create Clipping Mask:
Once again going to Layer > Create Clipping Mask.
The Layers panel once again shows us that the top layer is now clipped to the layer below by indenting Layer 0 to the right. So far, nothing looks all that different from before:
The Layers panel again showing the clipping mask.
But when we look in the document window, we see something very much different than what we saw last time. While much of the photo is once again hidden because its sitting above transparent areas on the layer below, the area of the photo thats sitting directly above the elliptical content area now remains completely visible:
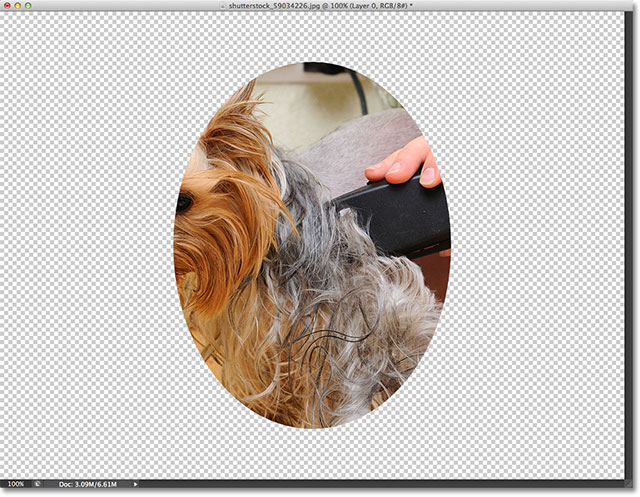
The part of the photo above the content area stays visible in the document.
Of course, the result might look better if the subject of my photo was centered inside the shape. Thankfully, one of the great features of clipping masks is that its easy to move photos inside them. All I need to do is grab my Move Tool from the Tools panel:
Selecting the Move Tool.
Then with the Move Tool in hand and the image layer selected in the Layers panel, I can simply click and drag the photo into position inside the clipping mask:
Click and drag images with the Move Tool to reposition them inside clipping masks.
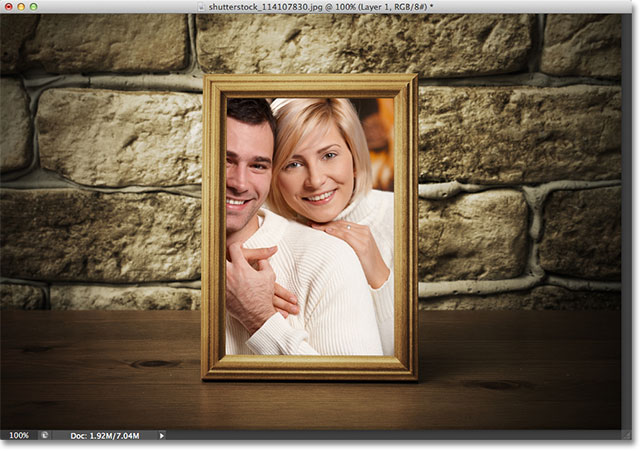
Lets look at a common situation where a clipping mask would be used. Heres another document, this one containing two photos. The image on the bottom Background layer is of a photo frame (old photo frame from Shutterstock):

A photo of an old wooden frame.
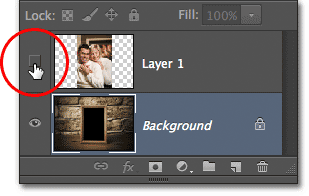
And if I turn on the layer above it by clicking its visibility icon:
Clicking the visibility icon for Layer 1.
We see the photo I want to place inside the frame (young couple photo from Shutterstock):
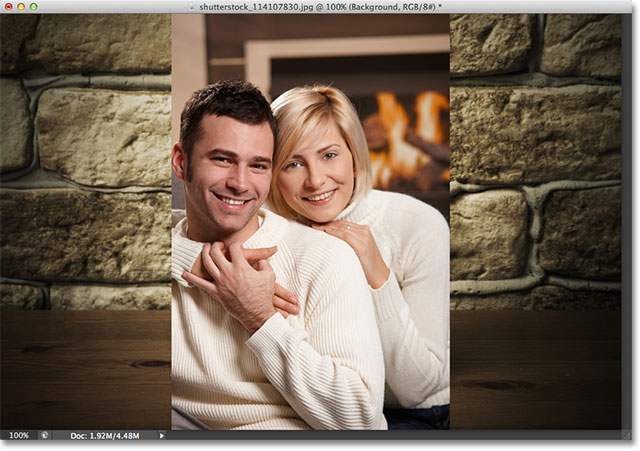
The photo that will be going inside the frame.
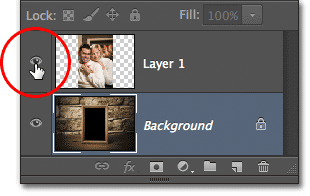
Im going to turn the top layer back off for the moment by clicking again on its visibility icon:
Turning the top layer back off.
To place the photo of the couple inside the frame using a clipping mask, I first need to select the area inside the frame. In this case, since the area inside the frame is solid black, I can easily select it with the Magic Wand Tool which Ill grab from the Tools panel. To get to it, Ill need to click and hold on the Quick Selection Tool until the fly-out menu appears and then select the Magic Wand Tool from the menu:
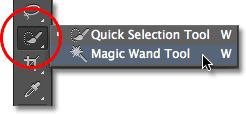
The Magic Wand Tool is nested in with the Quick Selection Tool.
With the photo frame layer active in the Layers panel, Ill click inside the frame with the Magic Wand Tool to instantly select all of that black area:

Clicking on the area inside the frame with the Magic Wand Tool to select it.
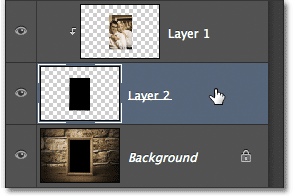
Next, I need to copy the selected area to its own layer. To do that, Ill go up to the Layer menu at the top of the screen, then Ill choose New, and then Layer via Copy (or I could simply press Ctrl+J (Win) / Command+J (Mac) on my keyboard for the much faster shortcut):
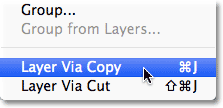
Going to Layer > New > Layer via Copy.
Nothing will seem to have happened in the document window, but if we look in the Layers panel, we see that the area inside the frame has been copied to its own layer above the original image. Notice in the layers preview thumbnail that only the area inside the frame has been copied, which means its the only part of the layer with actual content on it. The rest of the layer surrounding it is transparent:
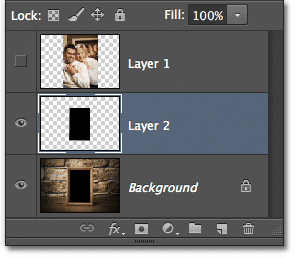
The area inside the frame has been copied to a new layer.
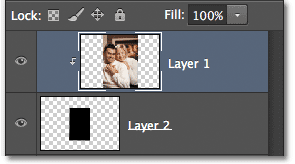
Ill turn the top layer back on by clicking its visibility icon, then Ill click on the layer itself to select it and make it active so we can add our clipping mask. As we learned earlier, we always want to select the layer thats going to be clipped to the layer below it:

Selecting and turning on Layer 1.
Lets go ahead and create our clipping mask. This time, instead of choosing the Create Clipping Mask command from under the Layer menu, well use a much faster and more common way, and thats by creating it directly from within the Layers panel.
All we need to do is press and hold the Alt (Win) / Option (Mac) key on the keyboard and hover our mouse cursor directly over the horizontal dividing line between the two layers we want to use with our clipping mask. When you see your mouse cursor change into the clipping mask icon, just click with your mouse:
Click between the two layers when your mouse cursor changes to the clipping mask icon.
The layer above will instantly be clipped to the layer below, with the Layers panel showing the top layer indented to the right:
Layer 1 is now clipped to Layer 2 below it.
And in the document window, we see that the photo on Layer 1 now appears only inside the area of the frame we selected and copied to its own layer. The rest of the photo has been hidden from view because it sits over top of transparency on the clipping mask layer below it:
The photo is now clipped inside the frame thanks to the clipping mask.
We saw earlier that we can use Photoshops Move Tool to move and reposition images around inside their clipping mask. We can also use the Free Transform command not only to move images inside clipping masks but also to resize them as needed. In my case here, I need to make the photo smaller so it fits more naturally inside the frame, so after making sure I have the photos layer selected in the Layers panel, Ill quickly go up to the Edit menu at the top of the screen and choose Free Transform:
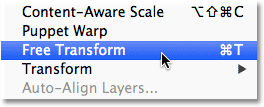
Going to Edit > Free Transform.
This brings up the Free Transform box and handles around the photo. Youll notice when resizing images inside clipping masks that even though you can only see the area that fits inside the clipping mask shape, the Free Transform box and handles will appear around the actual dimensions of the image which includes the area currently hidden from view. Simply click and drag any of the corner handles to resize the image as needed. Hold down your Shift key as you drag the handles to constrain the aspect ratio of the image so you dont accidentally distort the overall shape of it. When youre done, press Enter (Win) / Return (Mac) to accept the transformation and exit out of the Free Transform command:
Resizing the photo inside the clipping mask shape with Free Transform.
Theres just one more finishing touch needed to make things look more realistic, and thats to add a bit of a shadow around the inner edges of the frame, which brings us to yet another thing we can do with clipping masks add layer styles to them!
I need to add the shadow directly to the clipping mask layer itself, so Ill click on Layer 2 in the Layers panel to select it:
Making the clipping mask layer the active layer.
With the clipping mask layer selected, Ill click on the Layer Styles icon at the bottom of the Layers panel:
Clicking the Layer Styles icon.
Then Ill choose Inner Glow from the list of layer styles that appears:
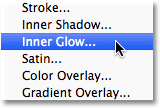
Choosing an Inner Glow layer style.
This opens Photoshops Layer Style dialog box set to the Inner Glow options in the middle column. I first need to change the color of the glow (since I actually want a shadow effect, not a glow effect), so Ill click on the color swatch:
Clicking the color swatch.
This will open the Color Picker. Ill choose black form the Color Picker, then Ill click OK to close out of it:
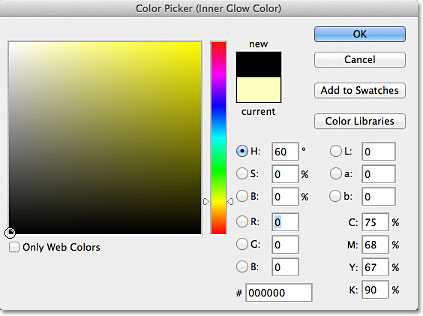
Choosing black from the Color Picker.
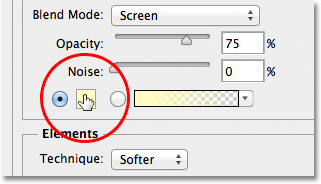
Back in the Layer Style dialog box, Ill change the Blend Mode of the Inner Glow from Screen to Multiply, then Ill lower the Opacity down to 25% and Ill increase the Size of the glow (shadow) to 10px:
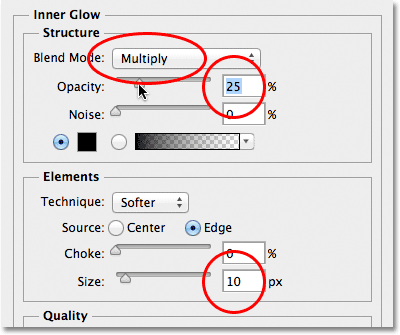
The rest of the Inner Glow settings.
Ill click OK to close out of the Layer Style dialog box, and with that, were done! If we take one final look in the Layers panel, we can see the newly added Inner Glow style thats been added to the clipping mask layer (Layer 2):
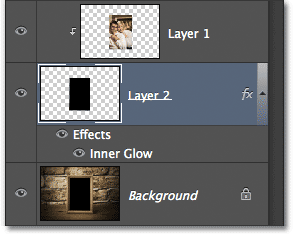
Any layer styles weve added appear below the layer in the Layers panel.
And here, thanks to the ease and flexibility of clipping masks, is my final result:

The final result.
And there we have it! Thats the basics and essentials of working with clipping masks in Photoshop! For another example of how clipping masks can be used, see our Place An Image In Text tutorial. Or check out our Photoshop Basics section for more tutorials on essential Photoshop skills and topics!
Download our tutorials as print-ready PDFs! Learning Photoshop has never been easier!
You May Also Like...
Photoshop Clipping Masks Tutorial
Written by Steve Patterson. In this Photoshop tutorial, well learn the essentials of using clipping masks to hide unwanted parts of a layer from view in a document.
Photoshop Tutorial: Clipping Mask 101
Clipping Mask 101 photoshop tutorial - There is one funky feature of Photoshop that many people seem either terrified of, indifferent to, or possibly in ignorance of.
» Clipping Mask Tutorial
A very little known/underused feature of Photoshop is the Clipping Mask. Clipping Masks are used to mask out something so that you can only see a portion of a
Clipping Mask Tutorial - Photoshop Signature Tutorials ...
This tutorial is split into two parts. The first part will teach you how to successfully create a clipping mask. The second part focuses on how to create t
The basics of clipping masks in Photoshop Elements ...
Tutorial explaining the basics of how to create and use clipping masks in Photoshop Elements.
Place An Image In Text With Photoshop Clipping Masks
Learn how to use type as a clipping mask in Photoshop to easily place an image inside your text!
Photoshop Elements Tutorial: 5 Uses for Clipping Masks
Clipping masks in Photoshop Elements were used in a tutorial I did a few weeks back about an advanced layer masking feature. Today, were going to dig deeper into
What is a Clipping Mask Then? - Tuts+ Design ...
Are you new to Photoshop? Have you been trying to teach yourself the basics of Photoshop but have found the amount of educational material available on the net a bit
More On Clipping Masks Photoshop Elements User
While the possibilities for Clipping Masks are endless, the steps are few. And, it's easy to get started with this technique via our written steps and video tutorial.
Creating and Using Photoshop 's Clipping Masks
In this tutorial, we show you how to get the best out of Photoshop's indispensable Clipping Masks. Introduction. Often, when creating images in Photoshop, you'll want
Travelling is my life
ConversionConversion EmoticonEmoticon