I just saw the new movie from the James Bond series - "Casino Royale". It was really excellent. Most of all I liked the effect with running and fighting vector figures at the beginning of the movie. Today's tutorial will be devoted to creation of such an effect in Photoshop.
First, I use a photo of Bond for making a silhouette. I looked through some posters and chose this one.
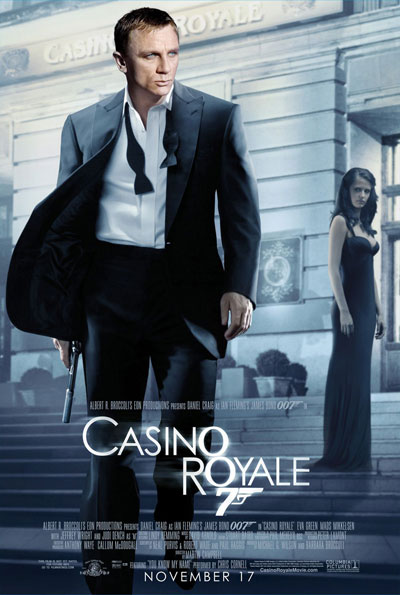
Click to enlarge
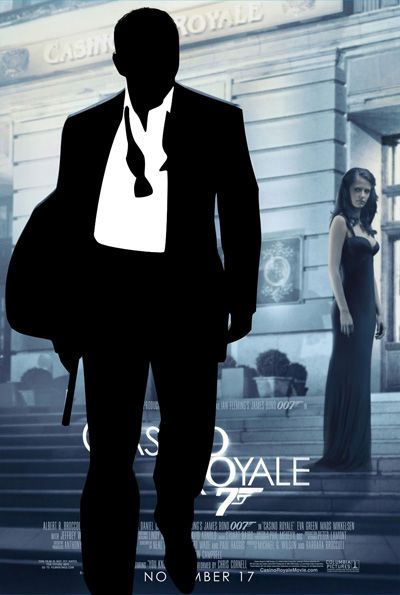
Here we can use 2 basic colors. His suit, gun and body will be black, and his shirt will be white.
Select the Pen Tool with Paths option and make a contour of Bond's body. Then, if necessary, correct path with the Convert Point tool. If you are not very good at using Path tool, I recommend reading this tutorial.
![]()

Create a new layer click on any part of the path with the right mouse button, select Fill and paint it black.
Hide the layer with the black silhouette. Using the same tools create the Path for the shirt contour (you may include his tie.)
Create a new layer and paint it white. Hide this layer.
Now repeat this procedure for the last part - his tie over the shirt.

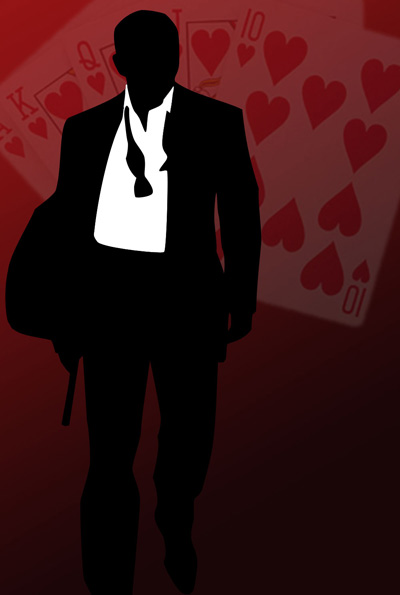
Paint it black. Unhide the hidden layers, you should have something like this:
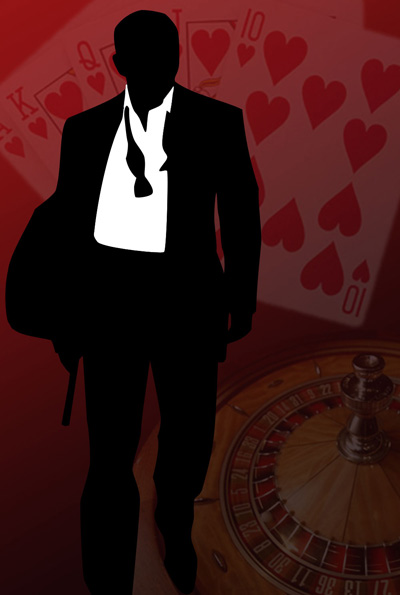
Well, it doesn't look good yet. Now it's time for filling the background with a gradient. Transitioning from dark-red to black with a red tint looks the best. I chose the following colors for it: #1A0607 and #931314 (use them for the background and the foreground colors). Select the background layer (with the original poster), choose Linear Gradient tool and make a diagonal gradient fill (darker part should be in the lower right corner).

Click to enlarge
The vector silhouette effect is ready, we can stop here. But I decided to go further and add some more effects.
Playing cards, roulette wheel and chips are the indispensable attributes of any casino. That's why I have added them to my picture. After a brief search I found the following pictures:
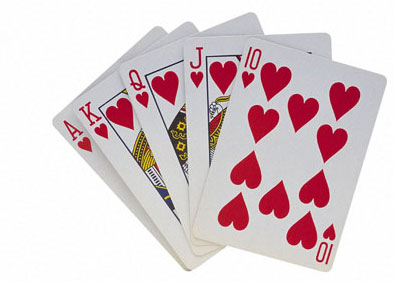
Use the Extract tool for cutting playing cards out of the background and paste them to the image of Bond's silhouette.
Place this layer between the background and the layer with Bond's silhouette. Set Opacity at 15%. Then with the help of the Free Transform tool resize the playing cards and place them somewhere in the upper part of the image.
Follow the same procedure with the roulette wheel. Set the Opacity at 20% and place the roulette wheel in the lower part of the image.
Almost done. Adding the "Casino Royale" inscription is the last step. While looking for other posters I found a great golden-lettered logo on a black background.
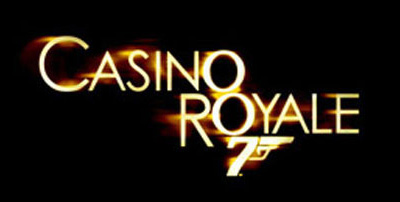
Paste this inscription onto your image and place it in the upper right corner. Set Lighten for Blending Mode in order to remove the black. That's it!

Click to enlarge
Travelling is my life
ConversionConversion EmoticonEmoticon