Star Wars Titles Photoshop Tutorial
from David Occhino Design
Level: Intermediate
Time: 60-90 minutes
This is a free Adobe Photoshop tutorial from David Occhino Design.
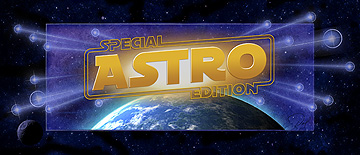
If you have intermediate Photoshop and Illustrator skills, the Star Wars movie titles are not difficult to re-create. This step-by-step guide will demonstrate a few simple tricks that simulate the look of the famous Star Wars movie titles, with background artwork in the style pioneered by movie poster artist Drew Struzan. ![]()
![]()
STAR WARS TITLES PHOTOSHOP TUTORIAL Prerequisite Photoshop skills:
|
![]()
Step 1: Set up the Photoshop file
A) Install the Astro SE font software. B) Create a Photoshop file with the dimensions you need. C) Using the Paint Bucket tool D) Name and save the file and exit Photoshop. |

![]()
Step 2: Type the text in Illustrator
A) Open Adobe Illustrator and set up a new file. An 8.5" x 11" file will work fine. B) Using the Type tool and the Astro SE Solid font at 125 pt., type the word(s) for the inner portion of the logo in black (000000). C) Use the Type tool create a second text layer. Using the Astro SE Solid font at 40 pt., type the word(s) that will form part of the top frame. While not required, the first and last letters of the "framing words" should end where the letter stroke falls on the baseline. In this example, the "S" and "L" in "Special" adhere to this guideline. D) Use the Type tool create a third text layer. Using the Astro SE Solid font at 40 pt., type the word(s) that will form part of the bottom frame. E) As desired, change the font to Astro SE Solid Alternate for selected letters. In this example, the letter "A" in "Astro" and letters "E" and "N" were changed. Note the uppercase and lowercase feature letters of different styles; experiment with this until you get lettering that looks balanced and interesting. In this example the text is actually typed like this: "SpecIAL ASTRO EDITIon." F) Select all three type layers (Fig. 2) and convert the text to paths (Object: Expand...). |

![]()
Step 3: Create the frame
A) Using the Rounded Rectangle tool B) Using the Direct Selection tool C) Adjust the size or thickness of individual letters as needed. In this example, the width of the "O" in "ASTRO" was reduced slightly. |
![]()
Step 4: Join the frame and letters
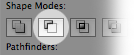
A) Select the frame and convert the shape to paths (Object: Expand...). B) Snap two guides to the left and right side of the top word. Then draw a gray rectangle on top of the frame that snaps exactly to each of the guides (see Fig 4a, left frame). C) Select both the gray rectangle and the frame (see Fig. 4a, center frame). D) With the Pathfinder window open (Window: Pathfinder), click on the "Minus Front" option:
The rectangle will be subtracted from the frame (Fig. 4a, right frame).
E) Repeat steps 4B-D for the bottom word. F) Once the frame has been sliced, select all the frame and frame lettering paths (not the letters inside the frame, however). With the Pathfinder window open (Window: Pathfinder), click on the "Unite" option:
|


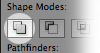 This unifies the frame lettering paths.
![]()
Step 5: Create the oblique logo
A) Select only the frame paths and set the fill to none (transparent). B) Apply a 1.38 stroke in black (000000) only to the frame paths. C) Select all the logo artwork paths. Using the Shear tool Your artwork should look similar to Fig. 5. D) Select only the frame paths and change the fill color to white ( ffffff). Copy only the frame paths to RAM so that they can be pasted in Photoshop. Keep Illustrator open as you will be returning to it later.
|
![]()
Step 6: Add the lettering to Photoshop
You be adding to new layers to Photoshop that you'll use for the creation of the final artwork. A) Paste the Illustrator data that you just copied into a new layer in Photoshop as a "Smart Object". If it doesn't paste, go back to Illustrator, select the artwork, return to Photoshop and paste. You now have the logo in Photoshop. Rename this layer "Lettering Outline."
B) Return to Illustrator and select only the center logo lettering. Change the fill color to white (ffffff). Copy this solid text, go back to Photoshop and paste the solid lettering into a new layer and rename the layer "Lettering Fill." Adjust the position of this new layer so that the logo elements are aligned properly. Be sure that the "Lettering Fill" layer is under the outline later (see Fig. 6a). A) Rasterize both of the Lettering layers (Layer: Rasterize: Smart Object) and lock the transparent pixels of both layers:
C) Quit Illustrator: you won't need it for the remainder of this project (unless you decide to tweak the lettering further, and in that case, be sure to delete all the vector art layers in Photoshop and repeat steps 6D-7A). Your artwork should look similar to Fig. 6. |

![]()
Step 7: Create the fill gradient
A) Rasterize both of the Lettering layers (Layer: Rasterize: Smart Object) and lock the transparent pixels of both layers:
B) To prepare for the gradient fill, set the foreground and background colors: C) With the "Lettering Fill" layer active, select all the pixels (Select: All). Then, using the Gradient Fill tool D) Repeat the process is Step 7C for the "Lettering Outline" layer.
|
![]()
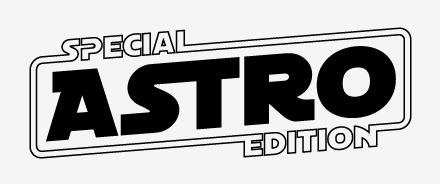
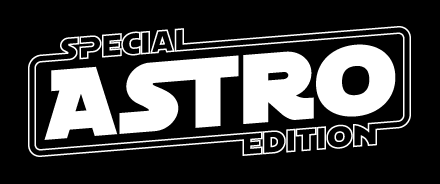
Step 8: Add layer effects
A) Add a layer effect (Bevel and Emboss) to the "Lettering Fill" layer:
B) Add a layer effect (Drop Shadow) to the "Lettering Fill" layer:
C) Repeat the process in Step 8B for the "Lettering Outline" layer. For most purposes, your artwork will be completed after the painting of the highlights and shadows. However, if you want to pull out all the stops on this project, you can continue your design journey with the following optional steps. |

![]()
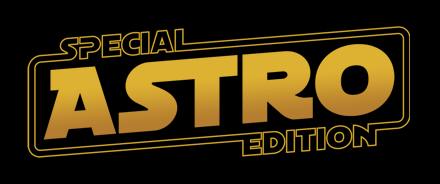
Step 9: Optional enhancements
While the classic black background is suitable, you might choose a different approach. In our example, a custom painting was created in the style pioneered by movie poster artist Drew Struzan. In addition, a glowing gold center was placed just behind the text. Custom Background If you would like to use the custom painting by artist David Occhino, click here for a low-res version which you can use for non-business or commercial purposes. To use the artwork for a business project or commercial project, contact us. Save your work and enjoy your new creation. |

![]()
Did this tutorial help you? What other tips would you like to see on our site? Drop us a line and let us know.
©2015 David Occhino Design. All Rights Reserved.
Star Wars Titles Photoshop Tutorial from David Occhino Design
Use this free Star Wars Titles Photoshop tutorial to create the Star Wars movie lettering with basckground artwork drawn in the style pioneered by artist Drew Struzan.
David Occhino Design - Graphic Design Tutorials
These graphic design tutorials by David Occhino Design provide tips Star Wars Photoshop Tutorial by David Back to the Future Titles Photoshop Tutorial.
David Occhino Design Blog - Design News and Reviews
A free Adobe Photoshop tutorial is now available on the David Occhino Design website, the "Star Wars Titles Photoshop Tutorial."
David Occhino Design Blog - Design News and Reviews: Star ...
This is the official blog of David Occhino Design. We specialize in the creation of high-quality visual designs for almost any medium including motion
davidocchino.net - David Occhino Design - Premium creative ...
Star Wars Photoshop Tutorial Posted Free Indiana Jones Titles Tutorial Offered hired David Occhino Design to create the logo for Amber Entertainment.
Star Wars Logo Photoshop | Owners Manual Download PDF
Star wars Titles photoshop Tutorial From David Occhino Design star wars logo photoshop use this free star wars titles photoshop tutorial to create the star wars movie
David Occhino Design Blog - Design News and Reviews ...
David Occhino Design Blog - Design News and Reviews Web page information. Title. David Occhino Design Blog - Design News and Reviews.
Star Wars Text Effect Photoshop | Owners Manual Download PDF
Savage star wars Conversion 6 0 Savage Heroes. star wars text effect photoshop titles tutorial from david occhino design use this free tutorial to create the movie
David Occhino Design - Premium creative solutions for ...
David Occhino Design specializes in premium graphic design and visual communication solutions.. Title. David Occhino Design Star Wars Photoshop Tutorial Posted.
www.Davidocchino.com - David Occhino Design
davidocchino.com David Occhino Design Custom Type Design - by David .. davidocchino.com Star Wars Titles Photoshop Tutorial from David Occhino Design ;
Travelling is my life
ConversionConversion EmoticonEmoticon