Clipping Mask Tutorial
This tutorial is split into two parts. The first part will teach you how to successfully create a clipping mask. The second part focuses on how to create the following signature.
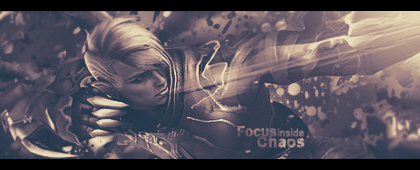
This sig may look rather daunting and difficult, but is actually a rather simple sig which was done almost entirely through Clipping Masks. But more about this signature later on, first lets have a look at the wonderful world of clipping masks!
Download the .psd
As a Premium member you can download the .psd file of the signature
It is fully labeled, this way you can exactly see what I did when creating the signature, even steps that I didnt explain in the tutorial.
Never again you will get stuck because you dont understand something in the tutorial, just take a look inside the .psd file and boost your signature making skills with new techniques and ideas!

Click here to learn more about Premium membership
What a clipping mask really does is kinda hard to explain, thats why I will just show you step by step on how to create one!
So for practice, open up a new canvas at any dimensions, I will be using 420 pixels x 200 pixels. Create a new layer (Ctrl+N) and fill it with white using the paint bucket, this will be our background. Create a new layer and on it type some random text in black, you should have have something like this:

The text layer is the base layer which will act as the mask that will make everything on the masked layer visible.
Next create a new layer above the base layer, find a good stock image (I used a picture of Doutzen Kroes) and paste it in.

Now we will create our clipping mask with these 2 layers. A clipping mask will make everything on the top layer visible, if there is something on that same location on the base layer. To do this right click on the stock layer and choose clipping mask:
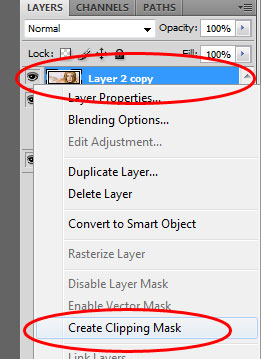

And here is how it should look with the clipping mask enabled. As you can see the base layer is used as a mask on the stock layer.

This technique is really easy and you can use it for a lot of cool effects! Just play around with it yourself to find out what other things you could do with it.
In this example we used a text layer for our base, common other base layers are:
- Splatter Brushes
- C4D Renders
- Marquee tooling such as the Rectangular Marquee
- Pen tooling
Now that we know how to create a clipping mask, lets use it to create the following signature.

Resources you will need:
- A render with some nice action in it, I used the following one: render
- Some splatter brushes: splatter brushes
Creating the background
Create a new photoshop document (I used 420px by 170px) and insert your render into the document. Now duplicate (right click on the layer> duplicate) the render layer a few times and move them around so they fill the entire canvas like this.
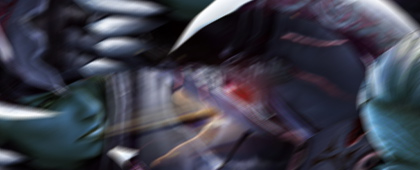
Select all of the duplicate layers using your mouse and holding the ctrl key, now merge (right click > merge layers) them into one layer. Now you can use some effects on this layer using Filter > Filter Gallery. Just do some random filters which you like, here is my result:
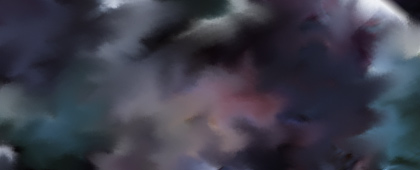
Now add your render one more time, this time resize it. (Edit > Transform > Scale) Remember to hold shift when you do this to keep your render in proportion! Try to place your render in the center of the canvas with the best part of the render in focus (in my case the head + bow).
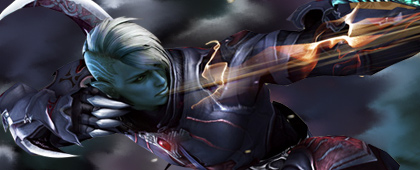 Now that we have finished the background, its time to create the effects using clipping masks!
Clipping mask effects
For our clipping mask we will need 2 layers, as you learned in the first part.
A base layer: the layer that will determine what part will be visible.
The mask layer: this layer will be put on top of the base layer, and the one visible.
To create our mask layer create a new layer and go to Image > Apply Image. For now, hide this layer using the little eye in front of the layer.
Now lets create our base layer. Create a new layer, select the Brush Tool (Shortcut key: B) and load your downloaded splatter brushes.

With these brushes we are going to make the base that we will use for our clipping mask.
Select one of the splatter brushes you like and brush a bit on the canvas. Remember to brush onto a NEW and empty layer (ctrl+N). As you can see, only brush on the canvas around your render

See that white brushing? This is the base for our clipping mask.
To finish this clipping mask, select the layer mask (the one we just made and hid from view) and create a clipping mask with it like this:
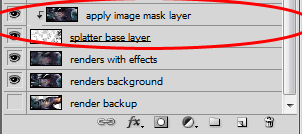
Once you have created the clipping mask, select the apply image layer mask and move it a bit to the left or right using the move tool, else nothing will happen!
To sum the above steps up:
and here is the result (nothing that special yet):
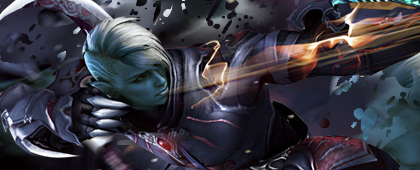
Now create another clipping mask like you just did:

And our chaotic signature is almost done! Now we will just need to do some final enhancements to make the signature look good.
Final Adjustments
The base of our sig is now done, all we need to do know are the basic steps I use in all of my sigs to improve it:
- Create a light source
- Create a border
- Add some text
- Adjust the colors
- Sharpen / blur
- Burn / Dodge
Every signature needs a good light source, as you can see by looking at the highlights and shades on the render, light is coming from the top right. I created a light source in that area using a 400px soft white brush, I brushed once in the top right corner

Now I added some borders on the top and bottom. Create a new layer and using the Rectangular Marquee Tool make a selection at the top, now select the Paint Bucket and Fill this selection with a black color. Your first border is done. Now simply duplicate this layer and move it to the bottom.

I dont really like the colors in this signature, thats why I first added a Black & White Adjustment layer (Layer > New adjustment layer > Black & White)
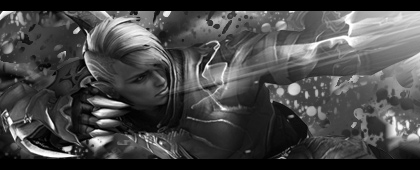
I added some color to the signature (although I really like the black and white version!) using a gradient map (Layer > New adjustment Layer > Gradient Map). The gradient is part of the default photoshop gradients, just search for it or find one you like yourself.
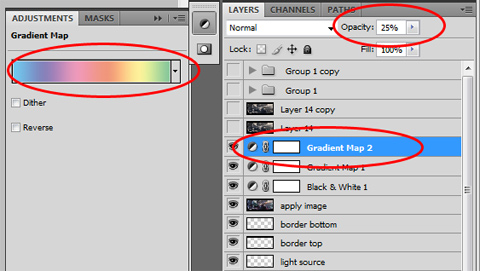
And here is the result after this step:
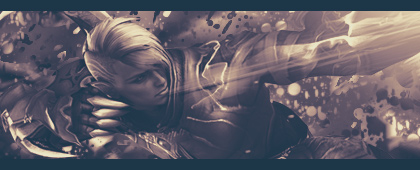
The signature looks a bit to chaotic, we want people to focus on the render, not the background. This can be done by making the background darker, and the render lighter. (This will make the render stand out more) If you want to learn the next few steps in more details please read the following tutorial here.
To do first create a new layer and go to image > apply image. On this layer play around with the Burn Tool (this makes areas on your signature darker) and the dodge tool (this will make areas on your sig lighter)
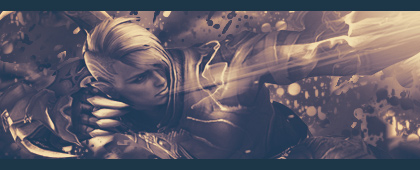
As you can see the background is darker, making the render stand out more. Now finally sharpen the signature one time (Filter >Sharpen > Sharpen) this will almost always make your signature look a lot better!

Now all we need to do is add some text, some general tips:
- Dont place your text in the corner, place it next to the area where you want people to look at (in my case the face)
- Use an easy to read font, dont go all crazy with downloaded fonts, verdana or arial always look amazing!
- Try to give the text the same colors as used in the rest of the signature.
For the text I just typed the words Focus inside chaos and I used the same clipping mask technique as in the first part of the tutorial on the text. As you can see my text is really easy, but looks really complex and hard to do (I did it in like 20 seconds)
And here we have our final sig:

In this tutorial you have learned how to use clipping masks using splatter brushes and text as your base layer. You also learned how to create a simple background and what kind of adjustment layers you can use to enhance your signatures.
Clipping Mask Tutorial - Photoshop Signature Tutorials ...
Clipping Mask Tutorial. Posted on December 26th, 2009. Written by JaspervD. This tutorial is split into two parts. The first part will teach you how to successfully
Photoshop Signature Tutorials | Sigtutorials.com
The largest collection of high quality photoshop signature tutorials on the web. Forums; Premium Login; Clipping Mask Tutorial. This tutorial is split into two parts.
Photoshop Clipping Masks Tutorial
In this Photoshop tutorial, Theres so many possible uses for clipping masks in Photoshop Lets see what happens if we try to use it as a clipping mask
65 Amazing Signature Photoshop TutorialsPhotoshop Website ...
1.Absolute beginner tutorial. 2.Clipping Mask Tutorial. 3.Metal Gear Solid Signature Tutorial 4.Advanced Signature Tutorial 5.Basic Filter and Blending tutorial
Place An Image In Text With Photoshop Clipping Masks
When we use a clipping mask with a layer and as we learned in the Clipping Masks Essentials tutorial, section for more tutorials on Photoshops
» Clipping Mask Tutorial
A very little known/underused feature of Photoshop is the Clipping Mask. Clipping tutorial I mentioned that a Clipping Mask clipping mask, photoshop tutorials.
Easy clipping mask signature - Photoshop tutorial
Photoshop Tutorials Photoshop tutorials; 3D Effects; Abstract; Animation; Easy clipping mask signature tutorial description. Added on: 26.06.2008: Total clicks: 217:
The basics of clipping masks in Photoshop Elements ...
Clipping Masks 101. A clipping mask is NOT a mask Tutorials for Photoshop and it was a great time to experiment with the clipping mask tutorial
Photoshop Tutorial: Clipping Mask 101
Clipping Mask 101 photoshop tutorial Notice that they are all clipping layers, and that the bottom « all photoshop tutorials.
Photoshop Tutorial: Clipping Mask
Rate / Comment / Subscribe "SubCordem Beats" Is the author for The Beat In The Intro hiphop-beatz.us And The Guy Who Made My Intro http://www.youtube.com
ConversionConversion EmoticonEmoticon