Written by Steve Patterson.
In this Photoshop Effects tutorial, well learn how layer blend modes make it easy to add a popular lens flare effect to a photo without making any permanent changes to our image. Well start by adding the lens flare normally to position it exactly where we want it, then well undo the effect, add a new layer, re-apply the lens flare instantly using a handy keyboard shortcut, and finally, well blend the lens flare into the image using one of Photoshops most common and widely used blend modes.
Heres the image Ill be working with:
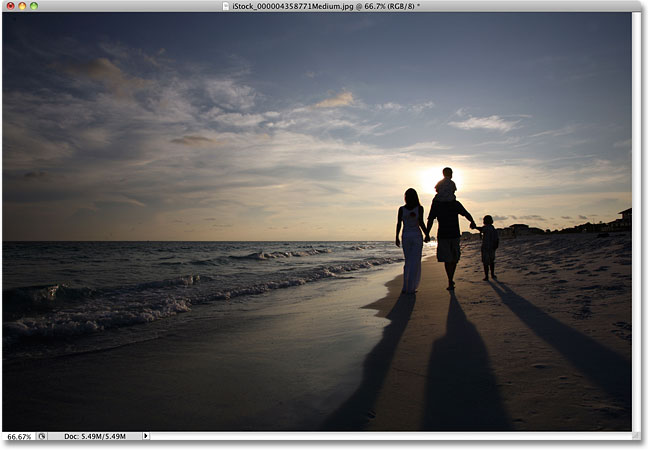
The original image.
Heres how it will look after weve added the lens flare effect. The important thing to note is that lens flare itself is completely separate from the image, so if I change my mind later and decide I dont like it, I can easy remove it and revert back to the original photo:
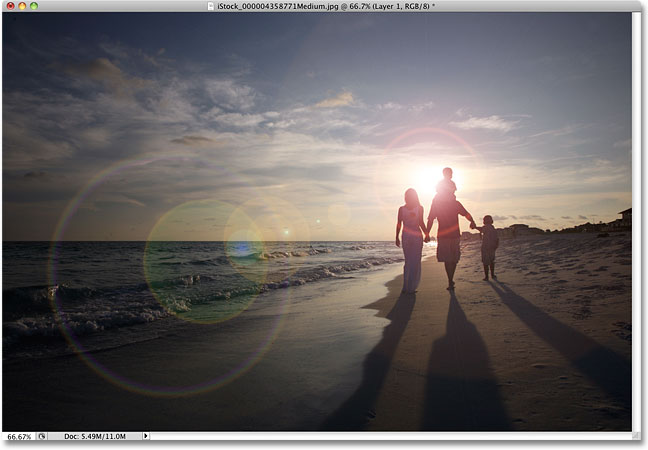
The final lens flare effect.
Lets get started!
Step 1: Apply The Lens Blur Filter
With our image open in Photoshop, the first thing we need to do is add a lens flare the way we normally would if we were applying it directly to the image. Even though were going to be undoing the effect, this gives us a chance to position the lens flare exactly where we want it. To add a lens flare, go up to the Filter menu at the top of the screen, choose Render, and then choose Lens Flare:
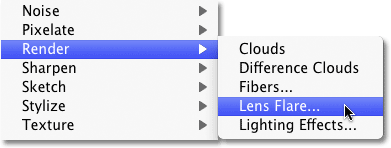
Go to Filter > Render > Lens Flare.
This opens the Lens Flare dialog box. Photoshops Lens Flare filter adds a simulated lens flare effect to the image, and we can choose from one of four different types of lenses (50-300 mm Zoom, 35mm Prime, 105mm Prime, and Movie Prime) in the Lens Type section at the bottom of the dialog box. Each one will give us a different type of flare. Select each one to view the effect in the preview area in the top half of the dialog box. Im going to stick with the default 50-300mm Zoom lens. You can also adjust the brightness of the lens flare by dragging the Brightness slider left or right, but again, Ill stick with the default 100%.
To position the lens flare where you want it, simply click inside the preview area. The spot you click on becomes the center of the flare. Im going to click directly on the setting sun just above the people walking on the beach:
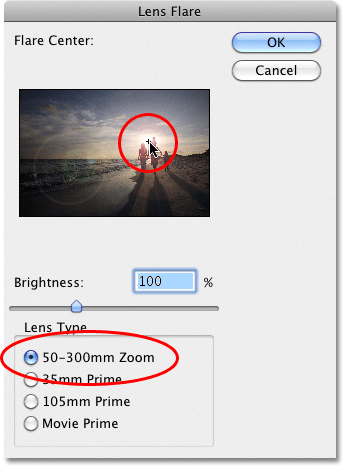
Click inside the preview area to set the position of the lens flare.
When youre happy with the type and position of your lens flare, click OK to exit out of the dialog box. Photoshop will then apply the effect to your image in the document window. Heres what my lens flare looks like:
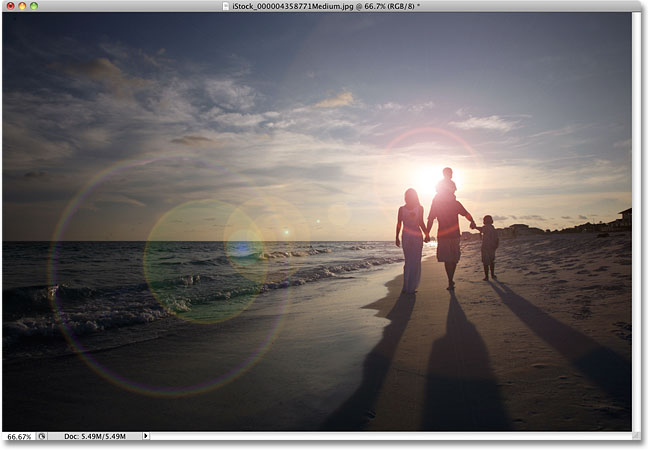
The initial lens flare effect.
The only problem is, weve just applied the lens flare directly to the image itself. If I was to save the image at this point and close out of it, the original photo (without the lens flare) would be gone forever, and thats not the way you want to work in Photoshop, especially when we can create the exact same effect non-destructively using blend modes!
Step 2: Undo The Lens Flare
Now that we know exactly where we want the lens flare to appear in the image, lets undo the effect by going up to the Edit menu at the top of the screen and choosing Undo Lens Flare. Or, a faster way to undo the effect is to press Ctrl+Z (Win) / Command+Z (Mac) on your keyboard, which will undo the last step:
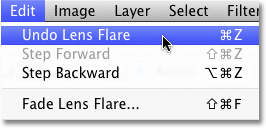
Go to Edit > Undo Lens Flare, or press Ctrl+Z (Win) / Command+Z (Mac).
Step 3: Add A New Blank Layer
Click on the New Layer icon at the bottom of the Layers palette. Photoshop will add a new layer named Layer 1 above the Background layer (which is the layer our image is sitting on):
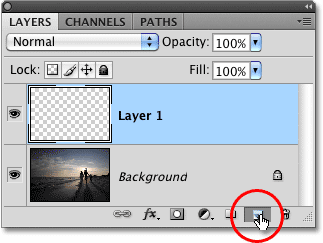
Add a new layer above the Background layer.
Step 4: Fill The New Layer With Black
Photoshop wont allow us to apply the Lens Flare filter to a blank layer, so lets fill the layer with a color. Well use black, which will make it easy to blend the lens flare into the image later. Go back up to the Edit menu and this time, choose Fill:
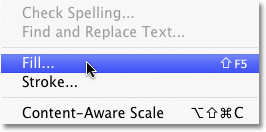
Go to Edit > Fill.
When the Fill dialog box appears, set the Use option in the Contents section at the top of the dialog box to Black:
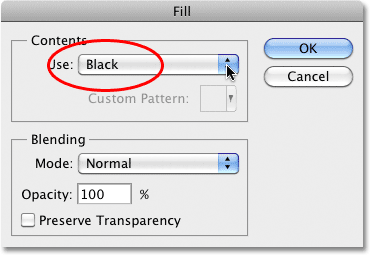
Set Black as the color you want to fill the layer with.
Click OK to exit out of the dialog box. Photoshop fills the new layer with black, which fills the document window with black, temporarily hiding the original photo from view.
Step 5: Re-Apply The Lens Flare Filter
Now that the layer is no longer blank, we can re-apply our Lens Flare filter. Photoshop still remembers all of the settings we used for the filter the last time we applied it, including the flares position, so all we need to do is re-apply it. Since the Lens Flare filter was the last filter we used, we can quickly re-apply it simply by going up to the Filter menu and choosing Lens Flare at the very top of the list. Or, for an even faster way to re-apply the last filter you used, simply press Ctrl+F (Win) / Command+F (Mac) on your keyboard:
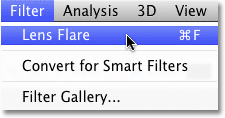
The previously used filter always appears at the top of the filter menu so we can re-apply it easily using the same settings.
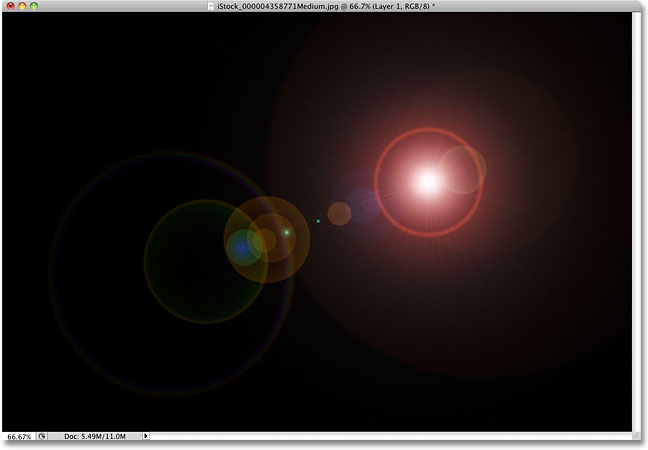
The same lens flare appears in the same position in the document window, this time on Layer 1 rather than on the image itself:
Space. The final frontier. These are the oh, uh, sorry about that.
Step 6: Change The Layer Blend Mode To Screen
All we need to do now is hide all of the solid black on the layer and blend the lens flare into the image below it, and we can do that easily by changing the blend mode for Layer 1 from Normal to Screen. Youll find the blend mode option in the top left corner of the Layers palette:
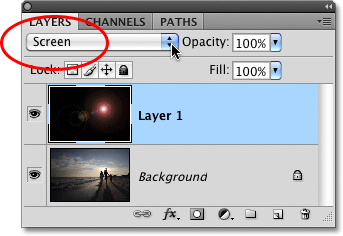
Change the blend mode for Layer 1 to Screen.
With the blend mode set to Screen, all of the solid black on Layer 1 disappears, leaving only the lens flare itself and giving us the exact same effect we had initially, only this time, its on a separate layer:

The same lens flare effect has been applied without harming the original photo.
Since the lens flare is now on a separate layer above the image, we can turn it on and off just by clicking the layer visibility icon (the eyeball) on the far left of Layer 1. Click it once to turn the lens flare off. Click it again to turn it back on:
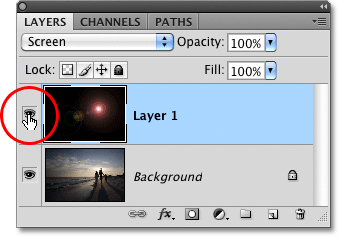
Click the layer visibility icon to show or hide the lens flare in the document window.
Step 7: Lower The Opacity Of The Lens Flare (Optional)
Another benefit to having the lens flare on its own layer is that we can reduce its intensity if needed by lowering the opacity of Layer 1. Youll find the Opacity option directly across from the blend mode option at the top of the Layers palette. The lower you set the opacity, the more subtle the lens flare will appear in the document:
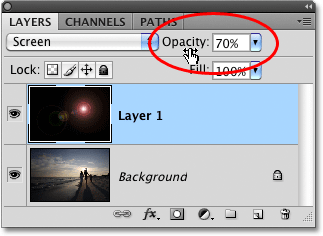
Lowering the opacity of Layer 1 reduces the intensity of the lens flare.
Here, Ive lowered the opacity to 50%, giving me a much more subtle flare effect:
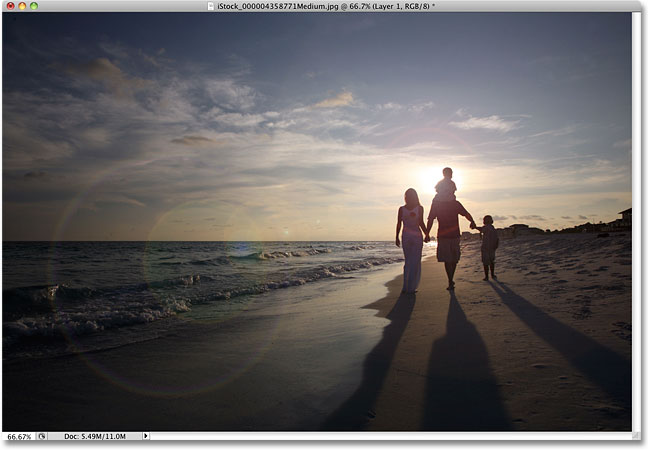
A more subtle flare effect.
Make sure you save the image as a Photoshop .PSD file when youre done to keep the layers intact in case you ever need to go back to the original image without the flare effect.
And there we have it! Thats how to add a lens flare effect to an image non-destructively with Photoshop!
Download our tutorials as print-ready PDFs! Learning Photoshop has never been easier!
You May Also Like...
Non-Destructive Lens Flare Effect In Photoshop
This opens the Lens Flare dialog box. Photoshops Lens Flare filter adds a simulated lens flare effect to the image, and we can choose from one of four different
Tutorial Time: Non-Destructive Lens Flare Effect In Photoshop
Very clever idea! I would just like to add one quick tip: just before you apply Lens Flare filter to a layer filled with black, convert it to Smart Object.
Photoshop Lensflare Effect non destructive #5 Minutes Photoshop
In this tutorial I show you two ways of adding a Lens Flare Effect non destructively. Lens Flares are so common in Photography that if they are not in an
Photoshop Tutorial Non Destructive Lens Flare
In this quick Photoshop Tutorial you will learn how to create a non destructive lens flare.
Non-Destructive Lens Flare in Photoshop | The Darkroom
Customize the Lens Flare effect You can change position, 3 thoughts on Non-Destructive Lens Flare in Photoshop alafista February 17, 2009 at 10:51 am.
Photoshop: non destructive Lens Flare Effects #5 Minutes ...
Photoshop: non destructive Lens Flare Effects #5 Minutes Photoshop. Like. Share this:
Non Destructive Lens Flare In Photoshop
In this quick episode you will learn how to create a non destructive lens flare. Fun Double Exposure Effect In Photoshop. 23 Jul, 2014. Abstract Lighting Effect
Photoshop Tutorial Non Destructive Lens Flare
http://photoshop123.com In this quick Photoshop Tutorial you will learn how to create a non destructive lens flare. quick Photoshop Tutorial you will
Photoshop Tutorials | Photoshop Essentials
Non-Destructive Lens Flare Effect In Photoshop Learn how easy it is to create interesting photo border effects using Photoshops brushes,
Photoshop Tutorial Non Destructive Lens Flare - Dwidi Video
Photoshop Tutorial Non Destructive Lens Flare Do Photoshop Tutorial Non Destructive Lens Flare Do you want to learn how to create Non Destructive Lens Flare
ConversionConversion EmoticonEmoticon