In Photoshop, layers are used to work on individual parts of an image while not affecting other parts. You might say that layers are like transparency papers stacked on top of one another which can be repositioned and separately drawn on without disturbing each other.
Explaining Layers
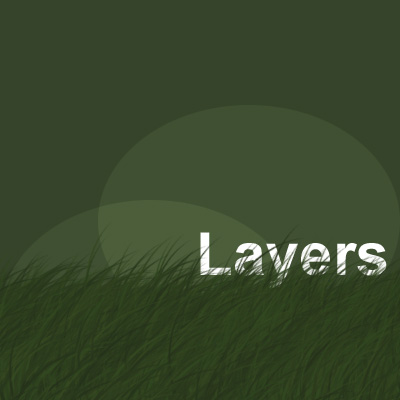
Consider the following Graphic created in Adobe Photoshop:

To the viewer, this is simply one flat graphic. However, in Photoshop, it is actually 4 separate layers (graphics if you will) stacked on top of one another. There is a Blue Background layer, two separate layers with a T9 Cloud, and a top layer with the Tutorial9 text.

As you can see, layers are more like transparencies stacked on top of one another, each with something different sketched onto them.
Lets put this knowledge to use now!
How to use Layers in Photoshop
You may have an easier time understanding how to use layers if we take on a simple task in Photoshop that allows you to play with them yourself. Go ahead and Create a New Document (File > New). Set it up to be 400 x 400px, with a resolution of 72px/inch.
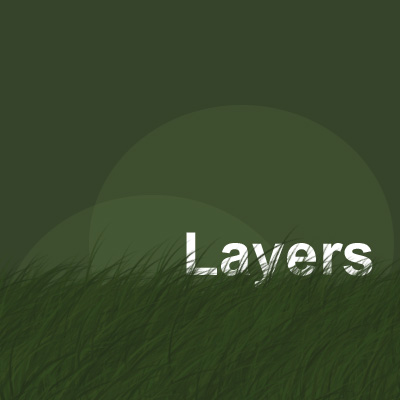
Were going to create the following graphic using layers:
Filling the Background
Typically, when Im working in Photoshop, I like to work from the background to the top (probably because thats how the graphic is seen by viewers), so to start things off we are going to fill our background layer with a nice dull green.
Select a Dull Green Foreground Color. To do this, click your foreground color, and use the color sliders to find a suitable color. Alternatively, you can enter the HEX value 36442a next to the # symbol on the lower right side.
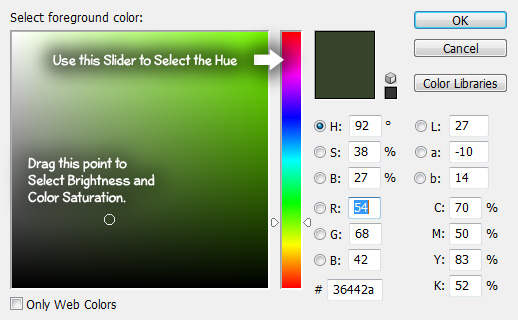

Click OK to confirm the color value youve picked. Now grab the Fill Tool from the Toolbox, and click anywhere in your working image area. Upon clicking the mouse button, your entire background layer should be filled with the foreground color.
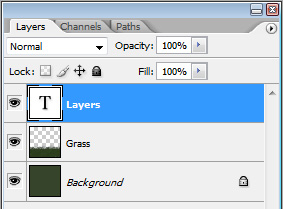
Create a New Layer
Lets take a quick peek at the Layers Palette, and examine some of its more basic functions:

To create a new layer, Click the New Layer icon shown above.
As you can see, a new layer Layer 1 has been created. You can rename this layer by clicking the name of it twice, and entering whatever name you desire. While this layer is selected (highlighted) you will be working on this layer alone in the photoshop document!
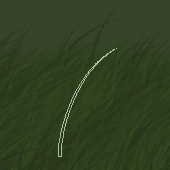
Drawing the Grass
Select the Brush Tool from the toolbox. Adobe Photoshop already has a preset brush called Dune Grass which we are going to use to create the grass in our graphic.
In the brush tools Option Bar, open the Brush Preset Picker (Small down arrow to the right of the currently selected Brush). Scroll a ways down the list, and select the Dune Grass Brush.
Were not going to go over brushes in great detail in the tutorial, but you do need to know that this brush is setup to alternate between foreground and background colors. Because of this, we need to select a background color with a similar green value (Such as #19250f).
Once you have a good foreground and background color selected, start painting with your brush in the working image area on your new layer. Hold down the Mouse Button to use the brush tool.
Lets add some text now!
The Type Tool
Select the Horizontal Type Tool from the toolbox. Set your Foreground Color to White. Click anywhere in your working image area to begin typing.
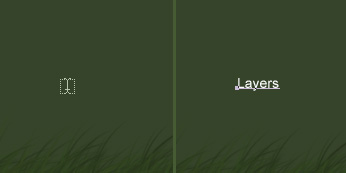
Once youve typed something, select all of the text with your cursor (hold down the mouse button, and drag over the text to select). Were going to adjust some of the type attributes in the Type Options Bar.
Set the Font to Arial, the font weight to Bold, the text size to 60 pt, and the anti-aliasing to Crisp.
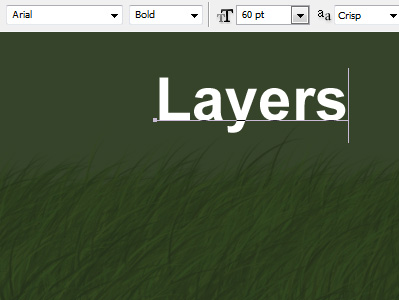
As you can see, the Type Tool has created a new Type Layer in your layers palette for the text. To apply the text, click this new layer (Or click Ctrl + Enter).
Great! Now lets position our new type tool so that it appears to be emerging from the grass.
Moving Layers
The first thing we need to do is position our Type Layer below the Grass Layer so that the Grass will appear in front of it. In your layers palette, click and drag your Type Layer below the Grass layer.
Now we can use the Move Tool to reposition our layer in the working image area. While the Type Layer is selected,get the Move Tool from the toolbox, and drag the text in the working image area to where the grass starts to end.

Pretty Simple, eh? Now that you have the general idea of layers down, lets create a few more and play with some of their options.
Opacity, Blending Modes & Filling Selections
Create a New Layer just above the background (below the type and grass layers), and drag out an elliptical selection using the Elliptical Marquee Tool (this tool may be hidden behind another marquee selection tool).
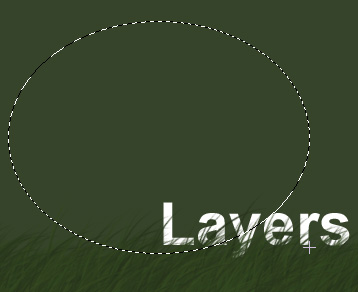
Using the Fill Tool, fill this selection (on your new layer) with White. Once filled, Deselect everything (Select > Deselect, or Ctrl + D).
You should have a large, white circle in your document now. Set this layers Blending Mode to Overlay in the layers palette:
Setting the blending mode is that easy! I wont go into details about blending modes in this tutorial, but please experiment with them to get an idea of what they do.
Now set the Opacity to something like 15-20%.
Simple! Now right click this new layer, and select Duplicate Layer. This will create an exact copy of this layer (retaining layer opacity and blending mode). Using the Move Tool reposition this layer so that you can clearly see the two different circle edges.
See how you can see through the top circle to see the circle behind it? This is because our circle layers are somewhat transparent, otherwise known as less opaque. By setting the opacity to something below 100%, we are able to see through objects.

Finally, lets take a look at one more useful feature in the layers palette. Click the New Group icon at the bottom of the layers palette (the one shaped like a folder).
Groups function in a similar manner to a folder. You can put multiple layers inside of a group, and then when you select the group (versus an individual layer), youre able to adjust the opacity, blending mode, and position of all those layers at the same time (as well as several other things).
Lets give it a try! Drag your two circle layers inside of the group.
Once both layers have been placed in the group (they should appear indented from the other layers), Select the Group in the layers palette. Using the Move Tool, drag inside of your working image area. Both your circle layers should move at the exact same time, yet they still retain their individual layer attributes!
Now that you have a better understanding of layers, learning some of Photoshops more interesting features should be a breeze!
Working with Layers in Photoshop | Tutorial9
In Photoshop, layers are used to work on individual parts of an image while not affecting other parts. You might say that layers are like transparency papers stacked
Photoshop Layers Tutorials
Learn all about layers in Photoshop with our complete collection of Photoshop Layers layers to working with Photoshop Background Eraser Tutorial;
Photoshops Filters | Tutorial9 - Tutorial9 - The Best ...
layer or selection in Photoshop. The Filter Effect Layers work just like ordinary filters in Photoshop, this is just what i need. tutorial 9 .com is
Working with Layers in Photoshop CS5 - Part 1 Beginners
Easy tutorial on creating and working with Layers in Photoshop CS5 http://www.danscourses.com/Photoshop/
Working with layers | Learn Photoshop Elements 11 | Adobe TV
the Editor workspace in Photoshop Elements. Jan explains what layers Working with layers . of Photoshop Elements with tutorials by
Working With Layers in Adobe Photoshop - Part One
Photoshop Tutorials Working One of Photoshop's most powerful features is the use of layers. Each layer in a Photoshop document
Photoshop - Working with layers | Art Lessons | Pinterest
Photoshop - Working with layers Added by Matt Huro. Follow. Added to Art Lessons. Art Lessons Matt Huro tutorial9.net. Photoshop toolbox explained
Working with Layers | Learn Photoshop Elements 9 | Adobe TV
panel and how to harness the true power of Photoshop Elements by working with layers. PHOTOSHOP. PREMIERE PRO use Photoshop Elements with
Learning | E20: Working with layers | Photoshop.com
ABOUT. With layers, you can work nondestructively and save all of your creative ideas in a single file. Learn about the various options in the Layers panel and how to
20+ Tutorials for Working with Photoshops Tools ...
Layers: Photoshop Layers Tutorial: Life Without Layers. Working with Layers in Photoshop. Actions: Tools & Tips: Photoshop Actions. Automating Actions to Save Time.
Travelling is my life
ConversionConversion EmoticonEmoticon