Written by Steve Patterson. In a previous Photoshop tutorial, we learned how to convert a photo into a sketch using a technique that works great with portraits, since it tends to leave out small, unwanted details like wrinkles and other skin blemishes while focusing more on the general features we want to see in the sketch, like a persons eyes, nose and lips. Sometimes though, when working with other types of images like landscape or nature photos, buildings and architecture, still lifes, or really any image that doesnt focus on people, youll want the sketch to include those tiny details the previous technique would ignore. In this tutorial, well learn a slightly different way to convert a photo to a sketch thats usually better suited for these other types of images since it often does an amazing job of bringing out fine details.
If youve already read through the previous Portrait To Sketch tutorial, youll find that most of the steps here are the same. Its really just one change in one of the steps that makes all the difference. So as an added bonus for those already familiar with the previous tutorial, at the end of this one, well learn how to create the entire sketch effect from beginning to end in 60 seconds or less! As before, Ill be using Photoshop CS5 throughout this tutorial but any recent version will work. Youll find the Photoshop Elements version of this tutorial here.
Heres the photo Ill be starting with, which comes to us from the Fotolia image library:
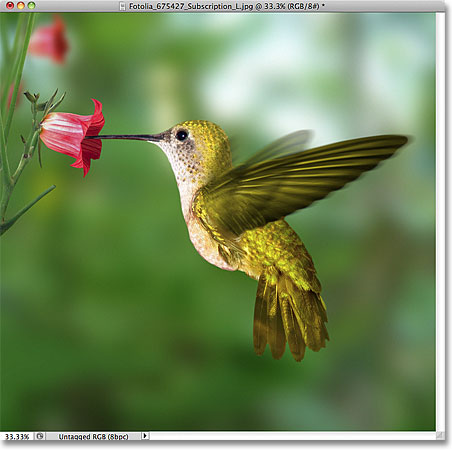
The original image.
Heres how it will look after being converted to a color sketch:
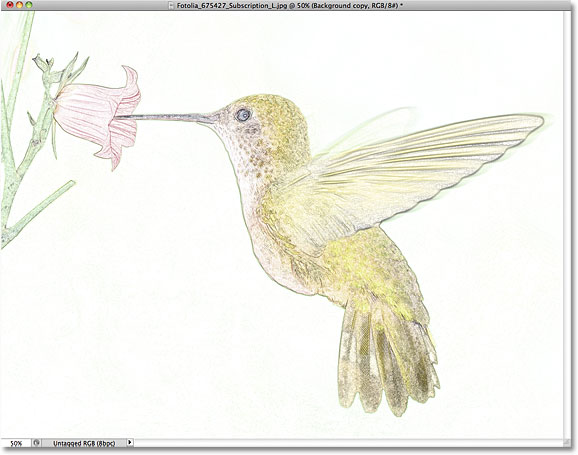
The final effect.
Lets get started!
Step 1: Duplicate The Background Layer
Lets begin as we usually do with photo effects by making a copy of our original image. This way, all of the changes we make will be made to the copy, leaving the original photo unharmed. If we look in the Layers panel, we see our image sitting all by itself on the Background layer, which is currently the only layer in the document:
The Layers panel showing the photo on the Background layer.
Go up to the Layer menu in the Menu Bar along the top of the screen, choose New, then choose Layer via Copy. Or, for a faster way to run the same command, press Ctrl+J (Win) / Command+J (Mac) on your keyboard:
Go to Layer > New > Layer via Copy.
Either way makes a copy of the layer. Photoshop automatically names the copy Layer 1 and places is above the Background layer in the Layers panel:
A copy of the image appears above the original.
Step 2: Desaturate The Layer
Go up to the Image menu at the top of the screen, choose Adjustments, then choose Desaturate:
Go to Image > Adjustments > Desaturate.
The Desaturate command quickly removes all color from the image, leaving it in black and white:
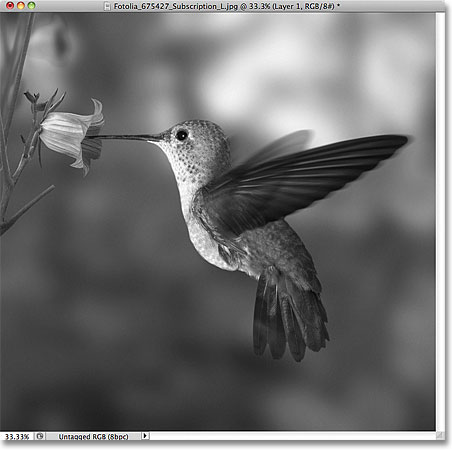
The image after running the Desaturate command.
Step 3: Duplicate The Layer
Just as we did in Step 1, make a copy of the layer by going up to the Layer menu, choosing New, then choosing Layer via Copy, or by pressing Ctrl+J (Win) / Command+J (Mac) on your keyboard. A copy of Layer 1 appears above the original in the Layers panel:
Photoshop names the new layer Layer 1 copy.
Step 4: Invert The Image
Go up to the Image menu, choose Adjustments, then choose Invert:
Go to Image > Adjustments > Invert.
This will invert the brightness values in our black and white image, making light areas dark and dark areas light:
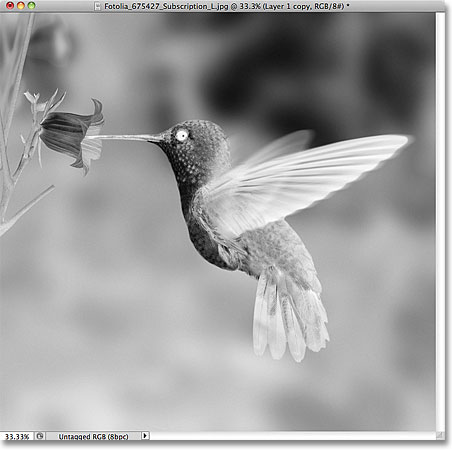
Inverting a black and white image creates a photo negative effect.
Step 5: Change The Layer Blend Mode To Color Dodge
Change the blend mode of the inverted layer from Normal (the default setting) to Color Dodge. Youll find the blend mode option in the top left of the Layers panel:
Change the layer blend mode from Normal to Color Dodge.
This will temporarily turn the document white:
The document becomes filled with white.
Step 6: Apply The Minimum Filter
Up to this point, the steps have been the same as in the previous tutorial where we turned a portrait into a sketch. In that tutorial, we used Photoshops Gaussian Blur filter to create the sketch effect by blurring the layer. This time, we want more detail in the sketch than what the Gaussian Blur filter would give us, so well use a different filter. Go up to the Filter menu at the top of the screen, choose Other, then choose Minimum:

Go to Filter > Other > Minimum.
This opens the Minimum filter dialog box. Leave the Radius value at the bottom of the dialog box set to 1 pixel, then click OK to close out of it:
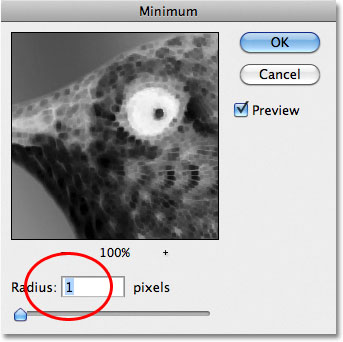
The default Radius value of 1 pixel usually works great.
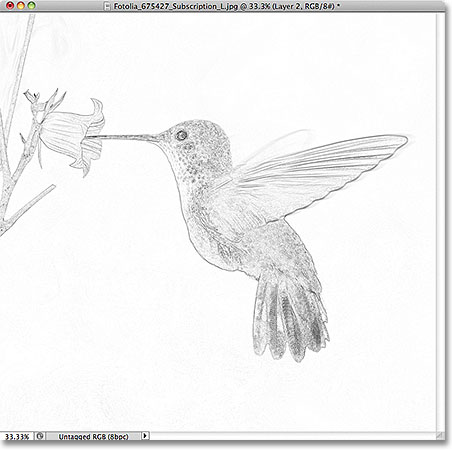
The photo is instantly converted into a sketch with lots of fine detail, much more than what we could have achieved with the Gaussian Blur filter:
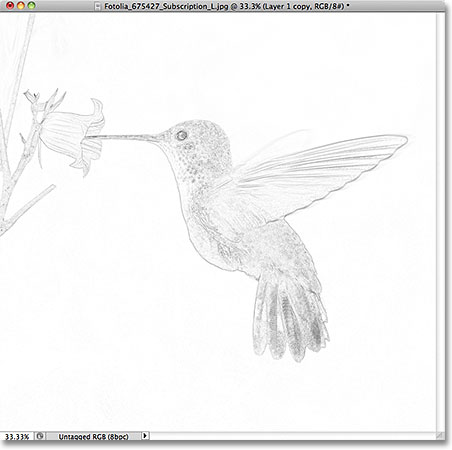
The initial sketch with lots of detail.
Next, well darken the sketch lines, colorize it, and learn how to complete the entire effect in 60 seconds or less!
Step 7: Merge The Layers Onto A New Layer
Hold down your Alt (Win) / Option (Mac) key and, with the key still held down, go up to the Layer menu and choose Merge Visible:
Hold down Alt (Win) / Option (Mac) and go to Layer > Merge Visible.
This will merge all of the existing layers onto a brand new layer, Layer 2, above them:
Holding down Alt / Option (Mac) while choosing Merge Visible keeps the original layers intact.
Step 8: Change The Blend Mode To Multiply And Adjust The Layer Opacity
Change the blend mode of Layer 2 from Normal to Multiply. This will darken the lines in the sketch. If you find the sketch is now too dark, lower the layers Opacity value, which youll find to the right of the blend mode option. Keep an eye on the image in the document window as you lower the opacity to fine-tune the results. Ill lower mine down to 65%:
Change the blend mode to Multiply, then lower the Opacity value.
Heres my result with the sketch lines now darker:
The sketch now appears darker against the white background.
Step 9: Duplicate The Background Layer
Lets add color to the sketch using the colors from the original image, which is sitting safely on the Background layer. First, click on the Background layer in the Layers panel to select it:
Click on the Background layer to select it.
With the Background layer selected, make a copy of it by going up to the Layer menu, choosing New, then choosing Layer via Copy, or by pressing Ctrl+J (Win) / Command+J (Mac) on your keyboard. Photoshop duplicates the layer, names the copy Background copy and places it directly above the original Background layer:
Photoshop always places a copy of a layer directly above the original.
Step 10: Move The Background Copy Above The Other Layers
Press Shift+Ctrl+] (Win) / Shift+Command+] (Mac) to instantly jump the Background copy layer to the top of the layer stack so it sits above the merged layer (Layer 2). The original photo will once again appear in the document window:
The Background copy layer jumps above the other layers.
Step 11: Change The Blend Mode To Color And Adjust The Layer Opacity
Finally, change the blend mode of the Background copy layer from Normal to Color, which will colorize the sketch. If the color seems too intense, lower the Opacity value until youre happy with the results. Ill lower my opacity down to 50%:

Change the blend mode to Color and lower the opacity if needed.
Here, after colorizing the sketch, is my final result. Ive cropped away some of the empty background with the Crop Tool:
The final colorized photo to sketch effect.
Photo To Sketch In 60 Seconds Or Less
As promised at the beginning of the tutorial, heres how to create this same photo to sketch effect in 60 seconds or less, using keyboard shortcuts for most of the work! Before you begin, make sure the Move Tool is selected at the top of the Tools panel, otherwise some of the keyboard shortcuts wont work.
Step 1: With the photo newly opened in Photoshop, press Ctrl+J (Win) / Command+J (Mac) to duplicate the Background layer.
Step 2: Press Shift+Ctrl+U (Win) / Shift+Command+U (Mac) to desaturate the layer.
Step 3: Press Ctrl+J (Win) / Command+J (Mac) to duplicate the desaturated layer.
Step 4: Press Ctrl+I (Win) / Command+I (Mac) to invert the layer.
Step 5: Press Shift+Alt+D (Win) / Shift+Option+D (Mac) to change the blend mode to Color Dodge.
Step 6: Go to Filter > Other > Minimum. Leave the Radius value set to 1 pixel and click OK to close out of the filters dialog box.
Step 7: Press Shift+Alt+Ctrl+E (Win) / Shift+Option+Command+E (Mac) to merge the layers onto a new layer above the others.
Step 8: Press Shift+Alt+M (Win) / Shift+Option+M (Mac) to change the blend mode of the merged layer to Multiply, which darkens the sketch effect.
Step 9: Lower the layer Opacity value if the sketch now appears too dark.
Step 10: Click on the Background layer in the Layers panel to select it, then press Ctrl+J (Win) / Command+J (Mac) to duplicate it.
Step 11: Press Shift+Ctrl+] (Win) / Shift+Command+] (Mac) to jump the Background copy layer to the top of the layer stack.
Step 12: Press Shift+Alt+C (Win) / Shift+Option+C (Mac) to change the blend mode to Color to colorize the sketch.
Step 13: Lower the Opacity value to reduce the intensity of the color if needed.
And there we have it! Thats how to create a more detailed pencil sketch effect from a photo with Photoshop!
Download our tutorials as print-ready PDFs! Learning Photoshop has never been easier!
You May Also Like...
Travelling is my life
ConversionConversion EmoticonEmoticon