Written by Steve Patterson. In this Photoshop tutorial, well learn how to create a text portrait effect. In other words, well create the illusion that the image seen in the photo is actually being created by multiple lines of type. Ive seen this effect used with many celebrity photos, from Andy Warhol and Marilyn Monroe to Michael Jackson, David Beckham, even Barack Obama. Of course, you dont need a photo of someone famous to create this effect. In fact, the more you know about the person in the photo, the more interesting the effect can become because you can add more personalized text. You may want to write about what the person in the photo means to you, or share a funny story, or describe something theyve accomplished. Or, you can just grab some random text from somewhere and paste it in. Its completely up to you. Ill be using Photoshop CS4 for this tutorial, but any version of Photoshop should work.
Heres the image Ill be starting with:
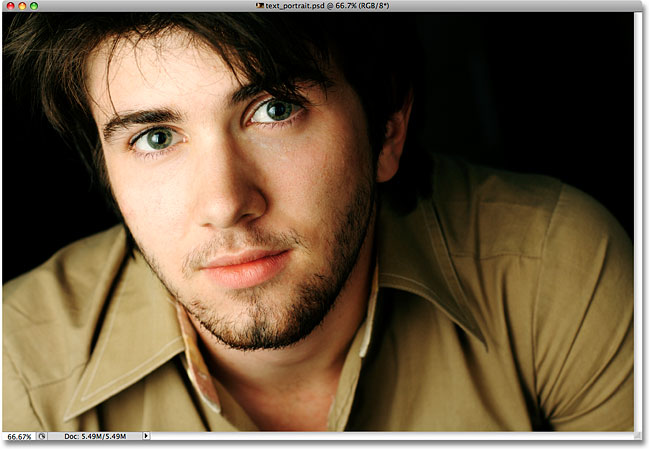
The original image
Heres how it will look after weve cropped it and then converted it to text:

The final text portrait effect.
Lets get started!
Step 1: Crop The Image Around The Persons Face
Before we begin, I should mention that youll probably want to work on a copy of your photo for this effect rather than on the original image, since the first thing well be doing is cropping some of it away. To save a copy of the image, go up to the File menu at the top of the screen and choose Save As. Give the document a different name, such as text-portrait-effect or whatever makes sense to you, and save it as a Photoshop .PSD file. This way, you can do whatever you like to the image and not worry about damaging the original.
Lets begin by cropping the image so we get a nice close-up view of the persons face. Photoshops official tool for cropping images is the Crop Tool, but for simple crops like this, youll often find that the Rectangular Marquee Tool is all you really need. Im going to grab the Rectangular Marquee Tool from the top of the Tools panel (panels are called "palettes" in earlier versions of Photoshop). I could also press the letter M on my keyboard to select it with the shortcut:

The Rectangular Marquee Tool works great for simple crops.
Then, with the Rectangular Marquee Tool selected, Ill click and drag out a selection around the mans face, beginning in the top left and dragging towards the bottom right. If you need to reposition your selection as youre dragging it, hold down your spacebar, drag the selection to a new location with your mouse, then release your spacebar and continue dragging out the selection. I want my selection to be a perfect square, so Ill hold down my Shift key as Im dragging, which will force the shape of the selection into a square. When youre done, you should have a selection that looks something like this:
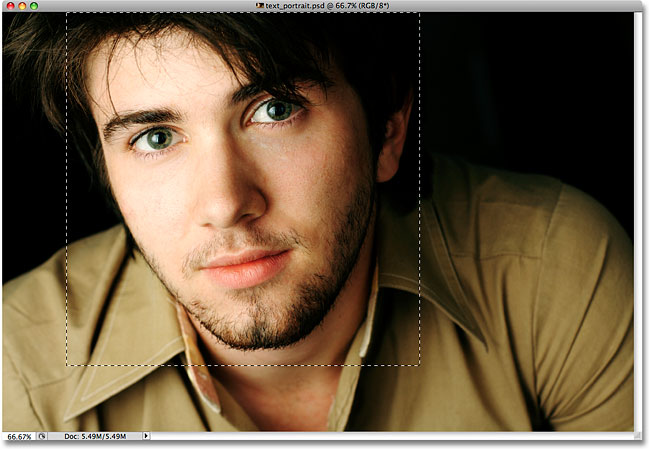
Everything outside of the selection will be cropped away in a moment.
With the selection in place, go up to the Image menu in the Menu Bar at the top of the screen and select the Crop command:
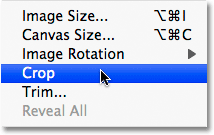
Go to Image > Crop.
As soon as you select the Crop command, Photoshop crops away everything outside of the selection outline, leaving us with our close-up portrait:
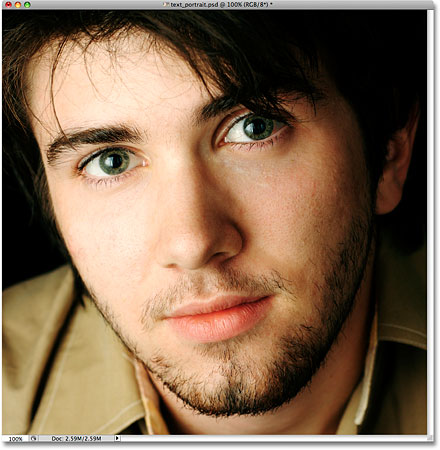
Only the area inside the selection remains.
Step 2: Add A New Blank Layer
If we look in our Layers panel (palette), we see that we currently have just one layer in our Photoshop document. This layer, named Background, is the layer that contains our image. We need to add a new blank layer above the Background layer, and we can do that by clicking on the New Layer icon at the bottom of the Layers panel:
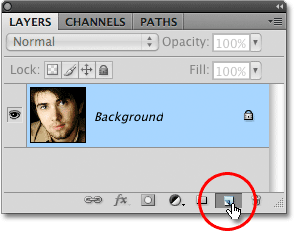
Click on the New Layer icon in the Layers panel (palette).
Nothing will seem to have happened in the document window, but the Layers panel is now showing a new layer sitting above the Background layer. Photoshop automatically names the new layer Layer 1. If we look in the layers preview thumbnail to the left of the layers name, we see a gray and white checkerboard pattern. This is how Photoshop represents transparency, and since the preview window is filled with nothing but this checkerboard pattern, we know the layer is currently blank (transparent):
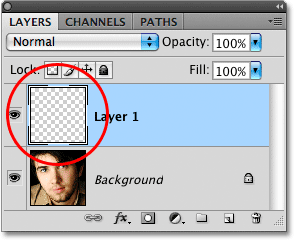
The preview thumbnail for each layer shows us whats currently on the layer.
Step 3: Fill The New Layer With Black
Next, we need to fill our new layer with black. Go up to the Edit menu at the top of the screen and select the Fill command:
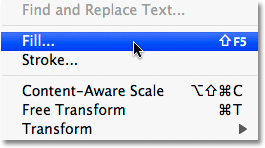
Select the Fill command from the Edit menu.
This brings up Photoshops Fill dialog box, giving us an easy way to fill a layer or a selection with either a solid color or a pattern. Since we no longer have a selection active on the layer, the entire layer will be filled with whatever color we choose. Select Black from the list to the right of the word Use in the Contents section at the top of the dialog box:
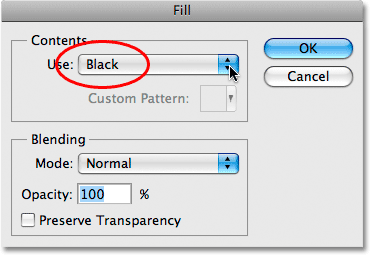
Choose Black for the fill color.
Click OK to exit out of the dialog box and Photoshop fills Layer 1 with black. Since Layer 1 is sitting above the Background layer, our image is now blocked from view in the document window by the fill color:

The photo temporarily disappears behind the solid black color.
Step 4: Select The Type Tool
Were ready to add our text. Well need Photoshops Type Tool for that, so select it from the Tools panel, or press the letter T on your keyboard to quickly select it with the shortcut:

Any time you want to add text to a Photoshop document, youll need the Type Tool.
Photoshop gives us the option to add either point type or area type to our documents. Point type is your basic single line of text, usually either a heading or a short caption. Adding point type is as easy as clicking with the Type Tool at the point in the document where you want the line of text to appear and then adding your text. As long as the text youre adding is short enough that youre not worried about it extending out beyond the edge of the document, point type is usually the way to go.
Area type, on the other hand, is used when you have large amounts of text, say one or more paragraphs, and you need to make sure that all of the text stays within the boundaries of the document or within a certain area of the document. Since we need to fill our entire document with text, well need to use area type.
To add area type, we first need to define the boundaries for the text, and we do that by dragging out a text frame, which looks very similar to the same sort of basic selection we dragged out earlier with the Rectangular Marquee Tool. Once we have the text frame in place, any text we add will be confined within the frame.
With the Type Tool selected, click in the very top left corner of the document, then drag down to the very bottom right corner of the document so that the text frame covers the entire document area when youre done. As you drag, youll see the outline of your text frame appearing. Just as when dragging out a selection with the Rectangular Marquee Tool, you can reposition the text frame as youre dragging it out if needed by holding down your spacebar, dragging the frame to a new location, then releasing your spacebar and continuing to drag. When youre done, release your mouse button and you should see your text frame surrounding the entire document, although it may be a little difficult to see in the small screenshot:
Any text we add will now be confined within the boundaries of the document thanks to the text frame.
Step 5: Select Your Font Options In The Options Bar
Now that we have our text frame in place, we can add our text. Before we do though, well need to choose which font we want to use. Any time the Type Tool is selected, the Options Bar at the top of the screen will show various options for working with text in Photoshop, including options for choosing a font, font style, font size, text color, and so on. The exact fonts you have to choose from will depend on whichever ones you currently have installed on your computer. Youll probably need to experiment a few times with this since the font you choose, especially the font size, will have a large impact on the overall look of the effect. To preserve as much detail in the portrait as possible, youll want to use a small font size. Of course, the smaller the font, the more text youll need to add to fill up the entire document area.
Im going to stick with something simple, like Arial Black, and Ill choose 12 pt for my font size to keep it small enough to maintain lots of detail in the portrait:
Select your font, style and size from the Options Bar.
Well need our text color to be white, so if yours is currently set to some other color, click on the color swatch in the Options Bar, which will bring up Photoshops Color Picker, and choose white. Click OK when youre done to exit out of the Color Picker. The color swatch in the Options Bar should now be filled with white:

Click on the color swatch in the Options Bar and select white from the Color Picker if your text color is not already set to white.
Step 6: Add Your Text To The Document
All we need to do now is to add the text. As I mentioned at the beginning of the tutorial, you can personalize the text portrait effect by writing something specific about the person in the photo, or you can simply copy and paste enough text from somewhere to fill up the document. Since Im using a stock photo for this tutorial and I dont actually know the person in the image (although Im sure hes a nice guy with lots of good stories to share), Ill simply add some standard lorem ipsum page filler text. When youre done, youre entire document should be filled with white text:
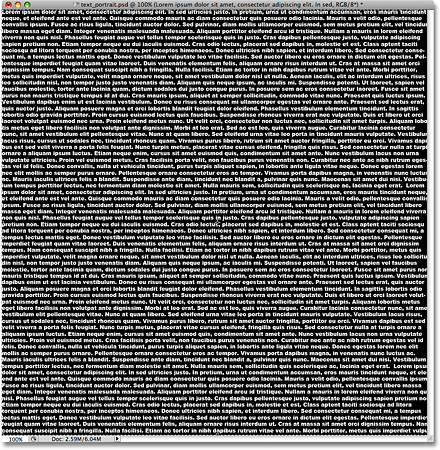
Add enough text to fill the entire document from top to bottom.
To accept the text and exit out of text editing mode, click on the small checkmark in the Options Bar:

Click on the checkmark in the Options Bar to accept the text.
Step 7: Add A Layer Mask To The Type Layer
To turn our Photoshop document full of text into our text portrait effect, well need to add a layer mask to the text layer. If we look in the Layers panel, we see that we now have three layers, with our text layer sitting above the other two layers. We know that its a text layer because the layers preview thumbnail shows a capital letter T in the center of it. To add a layer mask to the layer, click on the Layer Mask icon at the bottom of the Layers panel:
Make sure the text layer is selected (highlighted in blue) in the Layers panel, then click on the Layer Mask icon.
Nothing will happen yet in the document window, but a layer mask thumbnail will appear to the right of the layers preview thumbnail:
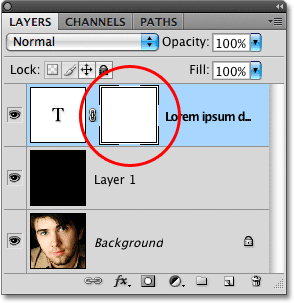
Layer masks are filled with white by default, which means everything on the layer is fully visible in the document.
Step 8: Copy The Original Photo On The Background Layer
Were now going to create our effect by copying and pasting the portrait photo directly into the layer mask we just added. Click on the Background layer in the Layers panel to select it. Youll see it become highlighted in blue, telling us that its now the currently selected layer:
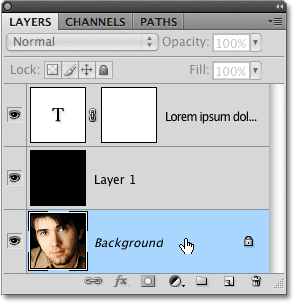
Layer masks are filled with white by default, which means everything on the layer is fully visible in the document.
Press Ctrl+A (Win) / Command+A (Mac) to quickly select the entire layer. Youll see a selection outline appear around the edges of the document, indicating that the entire layer is now selected. Even though we can still see our white text against the solid black fill color in the document window, were actually selecting the contents of the Background layer because thats the layer we currently have selected in the Layers panel. Then, press Ctrl+C (Win) / Command+C (Mac) to copy the contents of the layer (the portrait photo) temporarily into your computers memory.
Step 9: Paste The Photo Directly Into The Layer Mask
Hold down your Alt (Win) / Option (Mac) key and click on the layer mask thumbnail on the text layer in the Layers panel:
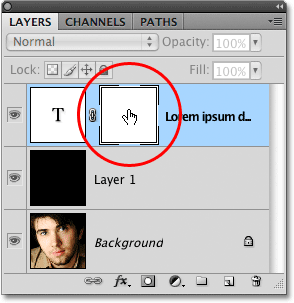
Click on the layer mask thumbnail while holding down Alt (Win) / Option (Mac).
By holding down Alt / Option as we click on the layer mask thumbnail, not only do we select the layer mask, we make it visible inside the document window, allowing us to paste our image directly into it. Since the mask is currently filled with white, your document window will appear filled with white. Press Ctrl+V (Win) / Command+V (Mac) to paste the portrait photo directly into the layer mask. Since layer masks deal only with black, white and shades of gray, the image will appear as a black and white image in the document window:
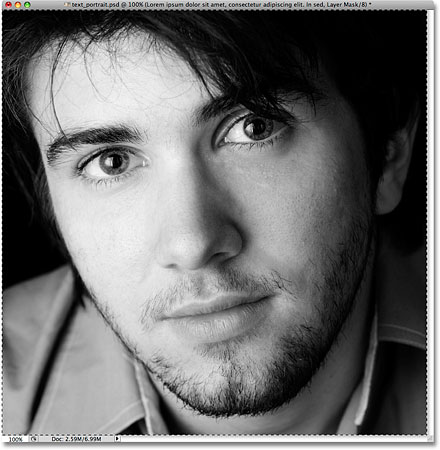
The image has now been pasted directly into the layer mask on the text layer.
To exit out of the layer mask and switch our view back to normal in the document window, simply hold down Alt (Win) / Option (Mac) once again and click on the layer mask thumbnail, just as we did a moment ago. Notice that the portrait photo is now visible inside the layer mask thumbnail:
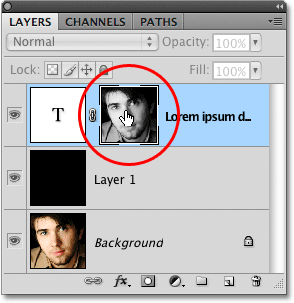
Hold down Alt (Win) / Option (Mac) and click again on the layer mask thumbnail to exit out of the layer mask.
Press Ctrl+D (Win) / Command+D (Mac) to remove the selection outline from around the edges of the document window. Were now back to our normal view mode inside the document, and the text is now being masked by the photo that we pasted directly into the layer mask, creating our text portrait effect:
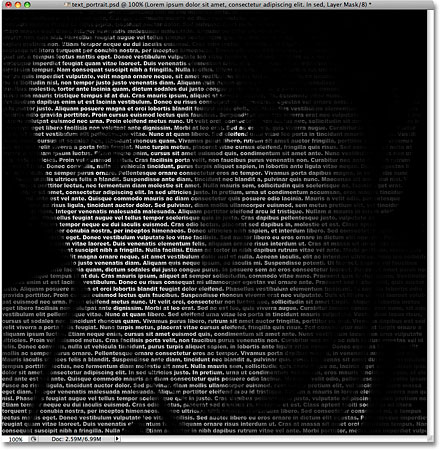
The text is now being masked by the photo.
Step 10: Duplicate The Type Layer
If youre happy with the results at this point, you can skip these last couple of steps, but if you find that the effect looks a little too dark, make sure the text layer is selected in the Layers panel, then press Ctrl+J (Win) / Command+J (Mac) to quickly duplicate the layer. A copy of the text layer will appear above the original:
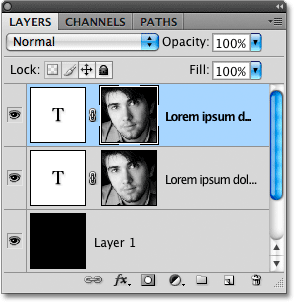
You can also copy layers by going up to the Layer menu, choosing New, then choosing Layer via Copy, but the keyboard shortcut is much faster.
The image will now appear brighter:
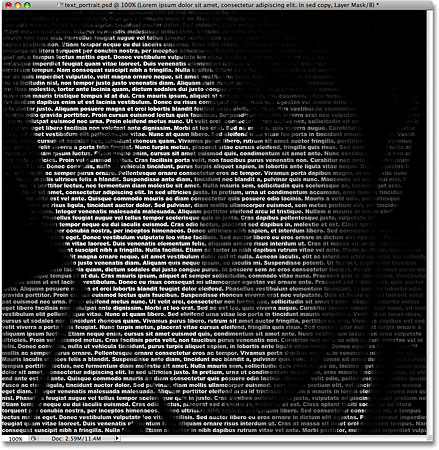
The effect appears brighter after duplicating the text layer.
Step 11: Adjust The Layer Opacity To Fine Tune The Brightness
If you find that the effect is still too dark, simply duplicate the text layer a second time. Or, if you find that its now a bit too bright, you can fine tune the results by lowering the layers opacity. Youll find the Opacity option at the top of the Layers panel. The lower you set the opacity of the top layer, the more you allow the layers below it to show through, which in this case will have the effect of darkening the image. Im going to lower the opacity of my copied text layer down to around 65% just to darken the effect slightly:
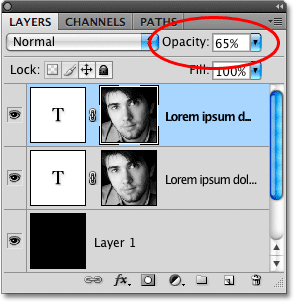
Reduce the top layers opacity to fine tune the brightness of the effect.
And with that, were done! Here, after adjusting the brightness with the Opacity option, is my final text portrait Photoshop effect:

The final text portrait effect.
And there we have it! Thats how to create a portrait with text with Photoshop!
Download our tutorials as print-ready PDFs! Learning Photoshop has never been easier!
ConversionConversion EmoticonEmoticon