Written by Steve Patterson. In this Photoshop tutorial, well learn how to take any photo and easily turn it into a watercolor painting in just a few short steps. This version of the tutorial has been re-written and updated to be fully compatible with Photoshop CS6 which means youll need CS6 to follow along. If youre using Photoshop CS5 or earlier, be sure to check out the original version of our watercolor painting tutorial.
To create the painting effect, well be using a handful of layers, filters and blending modes, and new in this version of the tutorial, well be using Smart Objects and Smart Filters to keep the entire effect fully editable, allowing us to go back when were done and try different filter settings to compare the results!
This effect works best on images where rich colors and strong contrast are more important than fine details. Heres the photo Ill be starting with (still life photo from Shutterstock):
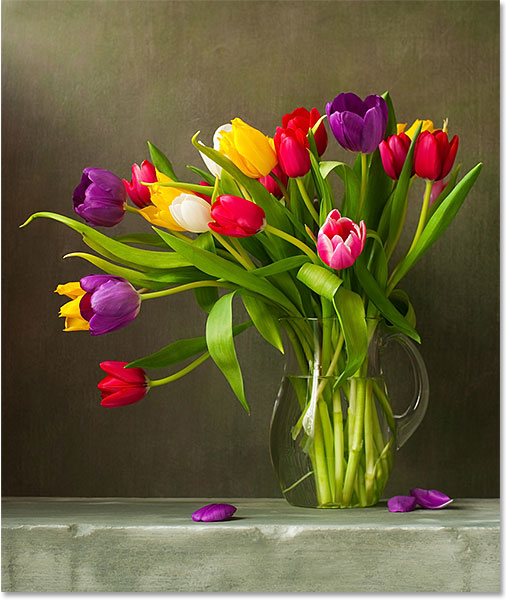
The original photo.
And heres what the final watercolor painting effect will look like:
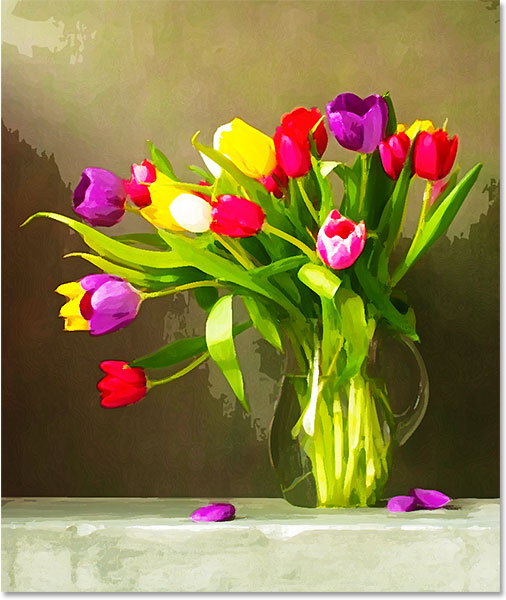
The final result.
Lets get started!
Step 1: Duplicate The Background Layer
Lets begin by looking in our Layers panel where we see that with our photo newly open in Photoshop, were starting with just a single layer the Background layer which holds our image:
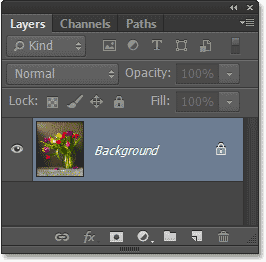
The Layers panel showing the photo on the Background layer.
We need to duplicate the layer, and we can do that by going up to the Layer menu in the Menu Bar along the top of the screen, choosing New, and then choosing Layer Via Copy. Or, we can simply press Ctrl+J (Win) / Command+J (Mac) on the keyboard to access the same command with the shortcut:
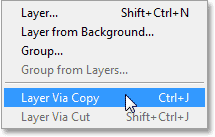
Going to Layer > New > Layer Via Copy.
And now if we look again in the Layers panel, we see a copy of the layer, which Photoshop has automatically named Layer 1, sitting above the original Background layer:
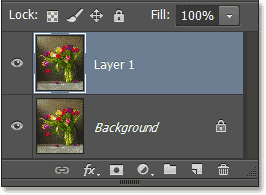
The copy of the layer appears above the original.
Step 2: Convert The Layer Into A Smart Object
Lets convert our new layer into a Smart Object so that when we apply a filter to it, as well do in a moment, the filter will be applied as a Smart Filter which means it will remain fully editable. With Layer 1 selected in the Layers panel (it should be highlighted in blue), go back up to the Layer menu at the top of the screen, choose Smart Objects, then choose Convert to Smart Object:
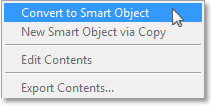
Going to Layer > Smart Objects > Convert to Smart Object.
You wont see anything happen with the image in the document window, but a small Smart Object icon appears in the lower right corner of the preview thumbnail for Layer 1, telling us its now a Smart Object:
A Smart Object icon appears in the preview window.
Step 3: Make Two Copies Of The Smart Object
We need to make a couple of copies of our Smart Object, so lets just use the quick and handy keyboard shortcut we heard about back in Step 1. Press Ctrl+J (Win) / Command+J (Mac) to make the first copy, then press the same keys (Ctrl+J (Win) / Command+J (Mac)) a second time to make the second copy. Both copies of the Smart Object will appear above the original in the Layers panel:
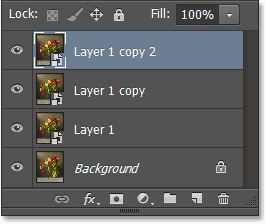
The Layers panel showing the two copies of the Smart Object above the original.
Step 4: Rename The Layers
The default names that Photoshop has been giving our layers, like Layer 1 copy and Layer 1 copy 2, may be good enough for Photoshop but theyre certainly not very useful to us humans, so lets quickly rename the layers to something more descriptive. To rename a layer, double-click directly on its name, type in the new name, then press Enter (Win) / Return (Mac) to accept it. Well name the layers based on the filter well be applying to each one. Change the name of Layer 1 to Cutout, then rename Layer 1 copy above it Dry Brush, and finally, change Layer 1 copy 2 at the top to Median:
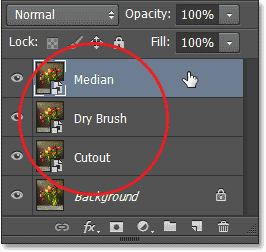
Renaming our layers.
Step 5: Hide The Top Two Layers From View
Hide the two layers at the top (Median and Dry Brush) from view in the document window by clicking on their layer visibility icons (the eyeball icon on the far left of each layer in the Layers panel). When the visibility icon is blank (meaning theres no eyeball inside the little square), the layer is temporarily hidden:
Hiding the top two layers by clicking on their visibility icons.
Step 6: Select The Cutout Layer
Click on the Cutout layer in the Layers panel to select it:
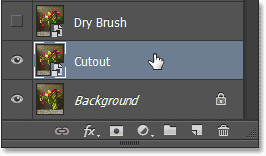
Selecting the Cutout layer.
Step 7: Apply The Cutout Filter
Were ready to apply the first of three filters well be using to create the watercolor painting effect. As you may have guessed, the first filter is named Cutout, and were going to use it to simplify our image, removing much of the finer detail. In Photoshop CS6, this filter is found in the Filter Gallery, so go up to the Filter menu at the top of the screen and choose Filter Gallery:
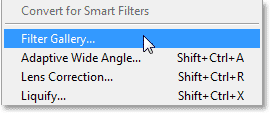
Going to Filter > Filter Gallery.
This opens Photoshops large Filter Gallery which is divided into three main columns a large preview column on the left, the filter selection column in the middle, and the actual controls and options for the selected filter on the right. The filters in the middle column are organized into different categories. Select the Artistic category at the very top, then select the Cutout filter by clicking on its thumbnail:
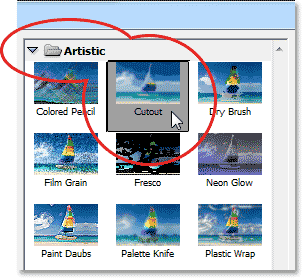
Choosing the Cutout filter from the Artistic category in the middle column.
Once youve selected the Cutout filter, the options for it will appear over on the right. Set both the Number of Levels and Edge Simplicity options to 4, then set the Edge Fidelity option to 2:
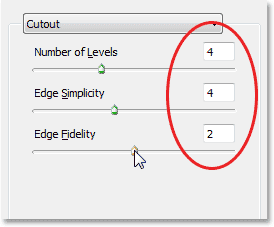
The Cutout filter options.
Click OK when youre done to exit out of the Filter Gallery and apply the filter to the Cutout layer.
Step 8: Change The Cutout Layers Blend Mode To Luminosity
Next, we need to change the layers blend mode. Youll find the Blend Mode option in the top left corner of the Layers panel (its the box thats set to Normal by default). Click on the word Normal to open a list of other blend modes and choose Luminosity from the bottom of the list:
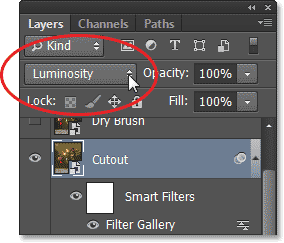
Changing the blend mode of Layer 1 to Luminosity.
Heres what the effect looks like so far after applying the Cutout filter and changing the blend mode to Luminosity:
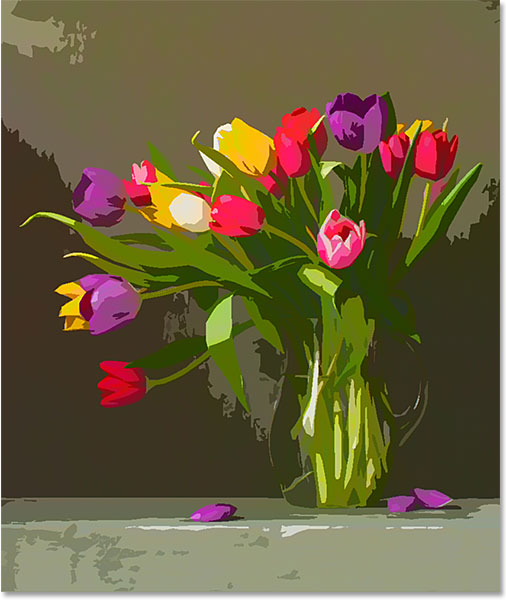
The first part of the effect is complete.
Step 9: Select And Turn On The Dry Brush Layer
Were finished with our Cutout layer, so lets move on to the next one directly above it. Click on the Dry Brush layer in the Layers panel to select it, then click on its layer visibility icon to make the layer visible again in the document window:
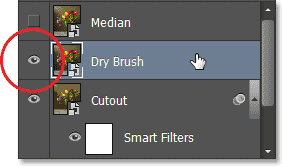
Selecting and turning on the Dry Brush layer.
Step 10: Apply The Dry Brush Filter
Were going to apply Photoshops Dry Brush filter to this layer which will add some texture to the image. In Photoshop CS6, the Dry Brush filter is also found in the Filter Gallery, so go back up to the Filter menu at the top of the screen and once again choose Filter Gallery. This time though, since the Filter Gallery was the last item we selected from the Filter menu, youll find it conveniently located right at the top of the list:
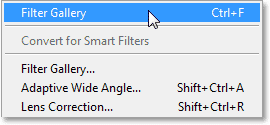
Photoshop displays the previously selected filter at the top of the Filter menu for easy access.
This re-opens the Filter Gallery set to the previously chosen filter, which in our case was Cutout. The Dry Brush filter is also located in the Artistic category in the middle column, and in fact is found directly to the right of the Cutout filter. Click on its thumbnail to select it. The options for the Dry Brush filter will then appear on the right. Set both the Brush Size and Brush Detail options to 10, then set the Texture option to 3. Click OK when youre done to apply the filter and close out of the Filter Gallery:
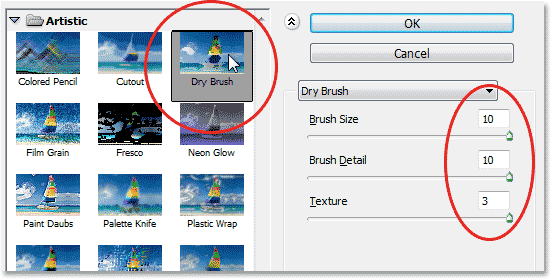
Selecting the Dry Brush filter and setting its options.
Step 11: Change The Blend Mode Of The Dry Brush Layer To Screen
With the Dry Brush layer still selected, go up to the Blend Mode option in the top left corner of the Layers panel and change its blend mode from Normal to Screen:
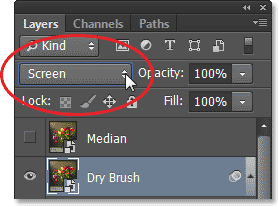
Changing the blend mode of the Dry Brush layer to Screen.
Heres my image with the second part of the effect now complete:
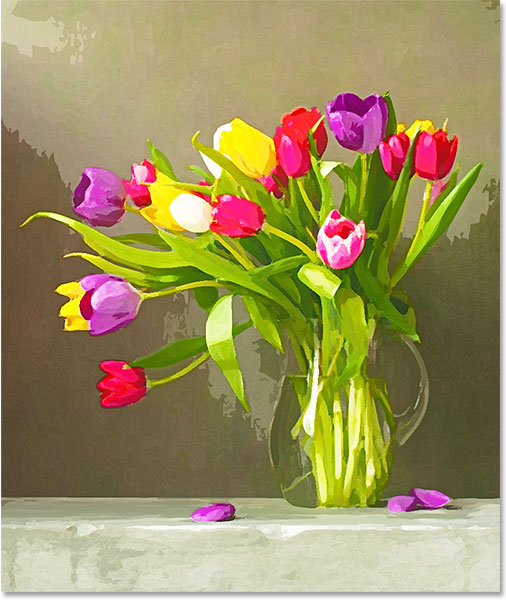
The image after applying the Dry Brush filter and changing the blend mode to Screen.
Step 12: Select And Turn On The Median Layer
Two filters down, one more to go. Click on the Median layer in the Layers panel to select it, then click on its visibility icon to make the layer visible again in the document window:
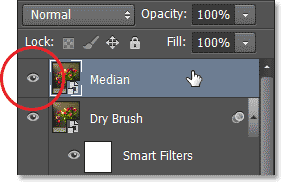
Selecting and turning on the Median layer.
Step 13: Apply The Median Filter
The third filter well use is Median which will remove even more image detail while keeping the edges of objects well defined. This ones not part of the Filter Gallery. Instead, we access it by going up to the Filter menu, choosing Noise, and then choosing Median:
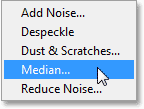
Going to Filter > Noise > Median.
This opens the Median filter dialog box. Set the Radius value down at the bottom of the dialog box to 12 pixels, then click OK to apply the filter to the layer:
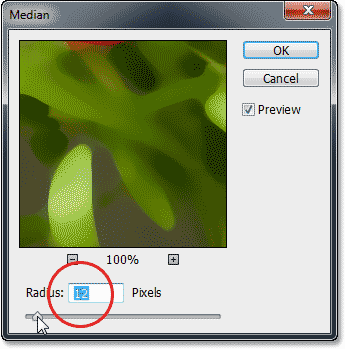
The Median filter dialog box.
Step 14: Change The Blend Mode Of The Median Layer To Soft Light
Finally, with the Median layer still selected, change its blend mode from Normal to Soft Light:
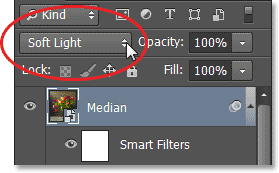
Changing the blend mode to Soft Light.
And with that, were done! Heres the original image once again for comparison:

The original photo once again.
And here, after applying the Median filter and changing the layers blend mode to Soft Light, is the final watercolor painting effect:

The final watercolor painting result.
The Benefit Of Smart Filters
I mentioned at the beginning of the tutorial that wed be using Smart Filters to keep the effect fully editable, and thats exactly what weve done. Even though weve completed the effect, we can still go back now and change any of the filter settings to view and compare the results. By first converting our layers into Smart Objects, the filters we applied to them became Smart Filters, and if we look in the Layers panel, we can see each filter listed directly below the layer it was applied to.
To change the settings for a Smart Filter, simply double-click on its name to re-open its dialog box. For example, if you want to see what effect a higher Radius value might have with the Median filter, double-click on the Median filters name to re-open the dialog box, change the Radius value, then click OK to close out of the dialog box and view the results. To change any of the Dry Brush settings, double-click on the Filter Gallery below the Dry Brush layer to re-open the Filter Gallery directly to the Dry Brush options. The same goes for the Cutout filter. Just double-click on the Filter Gallery below the Cutout layer and Photoshop will re-open the Filter Gallery directly to the Cutout options. Make any changes you need, click OK to close out of the gallery, then view the results in the document window:
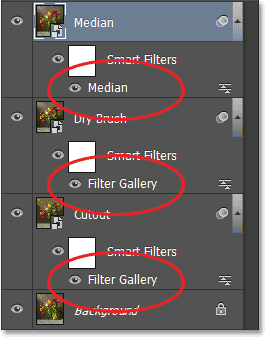
Double-click on any of the Smart Filters to re-open its dialog box and make changes if needed.
And there we have it! Thats how to turn any photo into a watercolor painting with Photoshop CS6!
Download our tutorials as print-ready PDFs! Learning Photoshop has never been easier!
You May Also Like...
Watercolor Painting Effect In Photoshop CS6
learn how to easily turn any photo into a watercolor painting with Photoshop CS6! Step by step, Watercolor Painting Effect In Photoshop CS6 .
Photoshop Watercolor Painting Effect Tutorial
Photoshop CS6 users should check out the fully updated Photoshop CS6 version of our Watercolor Painting Effect into a watercolor painting with Photoshop!
Watercolor Painting Effect In Photoshop CS6
Watercolor Painting Effect In Photoshop CS6. Were ready to apply the first of three filters well be using to create the watercolor painting effect.
Watercolor Painting Effect In Photoshop CS6
Watercolor Painting Effect In Photoshop CS6. to Your Photos In Photoshop Download a watercolor effect Photoshop action Create An Instant Photo To Oil
4. Watercolor Painting In Photoshop - How to achieve watercolor effects. Video 4
Click here for Playlist: http://www.youtube.com/playlist?list= Watercolor Painting using Photoshop CS6 This video gives a detailed explanation of how to
Photoshop CS6 Tutorials: Create Oil Painting Photo Effects
Create Oil Painting Effect Using Photoshop CS6. Final Output: Step: 1.
Watercolor Painting Effect In Photoshop CS6
In this Photoshop tutorial, well learn how to take any photo and easily turn it into a watercolor painting in just a few short steps. This version of
Transform a Photograph with a Paint Splash Effect in ...
In this tutorial you will learn how to create a watercolor paint effect on a photo using several techniques in Adobe Photoshop CS6. To create the watercolor
Create Cool Watercolor Effects in Photoshop - Tuts+ Design ...
The coolest thing in their design work is their use of watercolor So in this tutorial I will show a quick way to simulate that effect using only Photoshop and
Creating a Watercolor Painting with Adobe Photoshop Touch ...
your favorite images and turn it into a watercolor painting with Adobe Photoshop Techniques with CS6 Design Effect with Adobe Photoshop
ConversionConversion EmoticonEmoticon